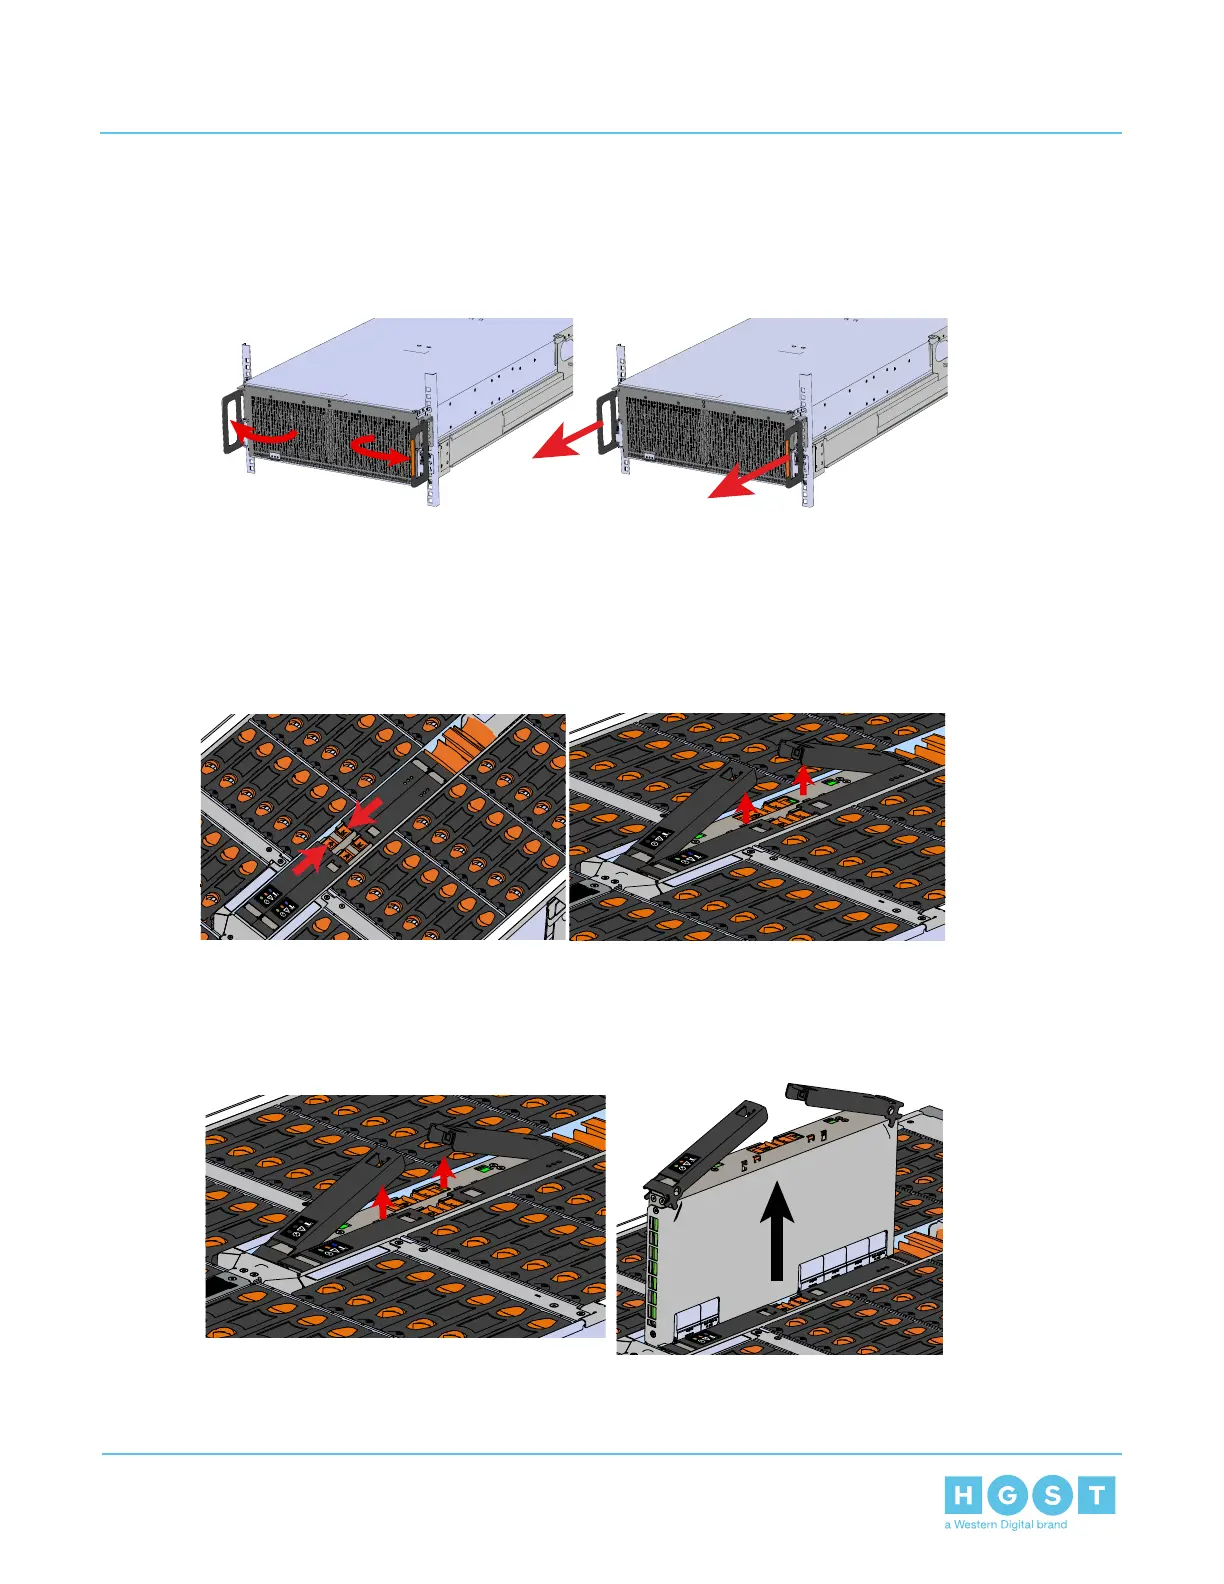
1. Grasp both handles at the front of the enclosure and pull with even pressure to extend the chassis out of
the rack until it is stopped by the safety latches. The safety latches will prevent the enclosure from coming
out of the rack completely and the cover will remain in the rack attached to the rear alignment brackets.
Figure 36: Chassis Handle Operation
2. Locate the faulty IOM by the amber LED that will be lit on top if there is a fault or by activating the identify
LED on the IOM being replaced.
3. Uninstall the IOM(s).
a) Locate the latch release on the IOM and press it in the direction shown in the following image.
Figure 37: Unlatching the IOM
b) Grasp both handles, one handle in each hand, and lift evenly with both hands to ensure the IOM comes
out straight. This will prevent any damage to the pins on the internal connectors.
Figure 38: Removing IOM
4. Remove the new IOM from its packaging.
5. Install the IOM.
58
4 Part Replacement
User Guide 4.2 IOM Replacement

 Loading...