22
_____________________________________________________________________________________________
3.3 Basic Measurement
______________________________________________________________________________________________
Level Setting Screen
Level Setting Screen
Level Setting Screen
NOTE
Initial Screen
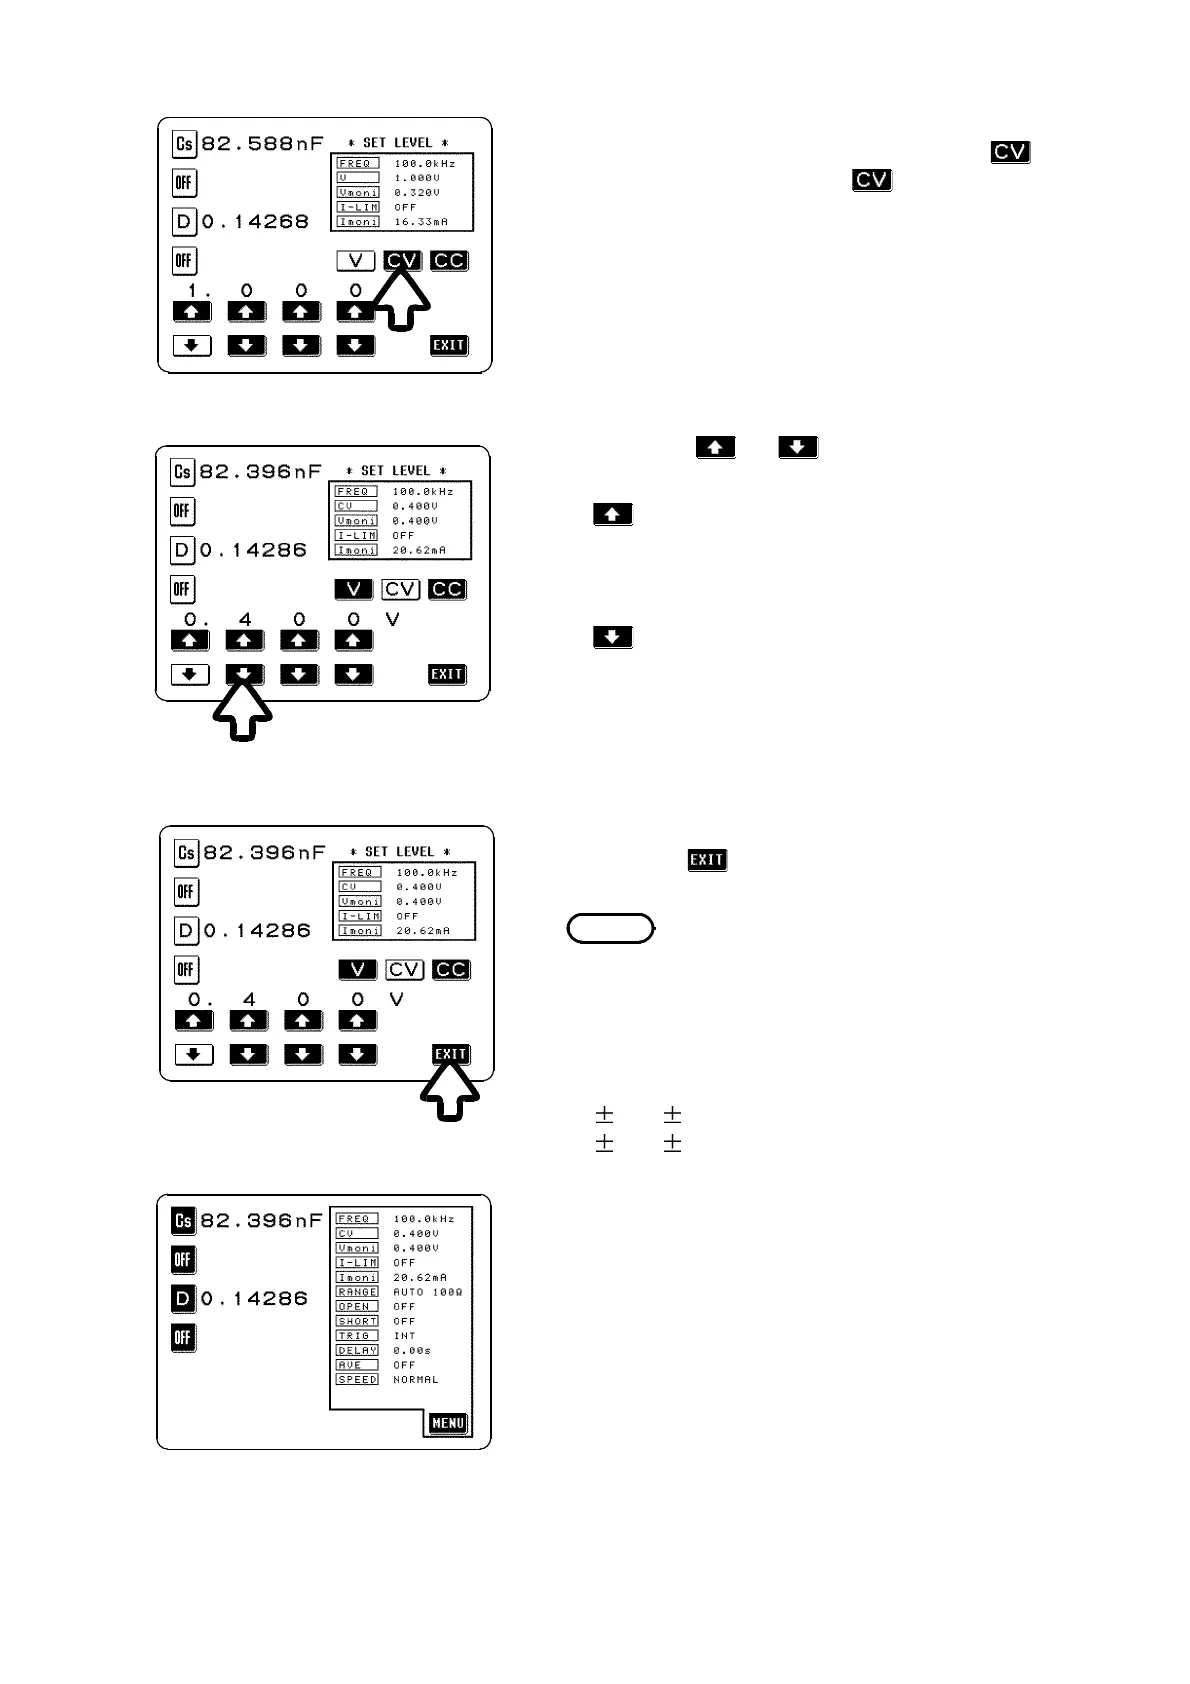
3. Because you for example want to set the value
for the constant voltage (CV), press the
key. Then check that the key changes to
black figures on a white ground (i.e., in non-
reversed video), which confirms that constant
voltage has been properly selected.
4. Using the
and
keys, set the displayed
constant voltage value to 0.400.
The corresponding digit is increased. (If
you hold this key down continuously, the
corresponding digit increments
continuously.)
The corresponding digit is decreased. (If
you hold this key down continuously, the
corresponding digit decrements
continuously.)
5. When the setting has been established as above,
press the key.
With this constant voltage (CV) setting, the
testing will be performed with the voltage
between the terminals of the sample being tested
being kept constant at 0.400 V.
The accuracy of this constant voltage:
10% 10 mV (42 Hz to 1.000 MHz)
20% 10 mV (1.001 MHz to 5.000 MHz)
For details, refer to Section 4.4, "Setting the Test
Signal Level"