Copyright © 2019, 2021, Hitachi, Ltd.
DKC910IHitachi Proprietary
[INST(IN)03-01-40]
Rev.2
INST(IN)03-01-40
1. Installing rails for Controller Chassis
The rail install procedure is different depending on the hole shape (square or circular hole) on the rack.
Check the holes on the rack before the installation work.
Table 3-1 shows the components for the rails for Controller Chassis.
Table 3-1 Components for Rail (DW-F800-RRCB/DKC-F910I-RRCBE) (Per Unit)
Item No. Product name Parts No. Quantity Comment Remarks
1 Rail 2855180-A
2857743-A
1 set Rail (R) and Rail (L) −
2 Screw etc − 1 − −
3 Rack nut 5510146-1 4 (*1) For xing Storage System and
rail
(*2)
4 Cage nut 5528564-1 4 (*1) For xing Storage System and
rail
(*2)
5 KS-PIN 5557433-1 8 (*1) Pin for circular hole (*2)
6 Binding screw (M5 × 10) SB510N 8 (*1) For xing rail and Storage System (*2)
7 LL washer (M5) 5513553-513 4 (*1) For xing rail (for square hole) (*2)
8 Loop cable tie 5552567-1 2 For xing the cable −
*1 : 2 spares are included.
*2: These parts are included in Item No. 2 Screw etc.
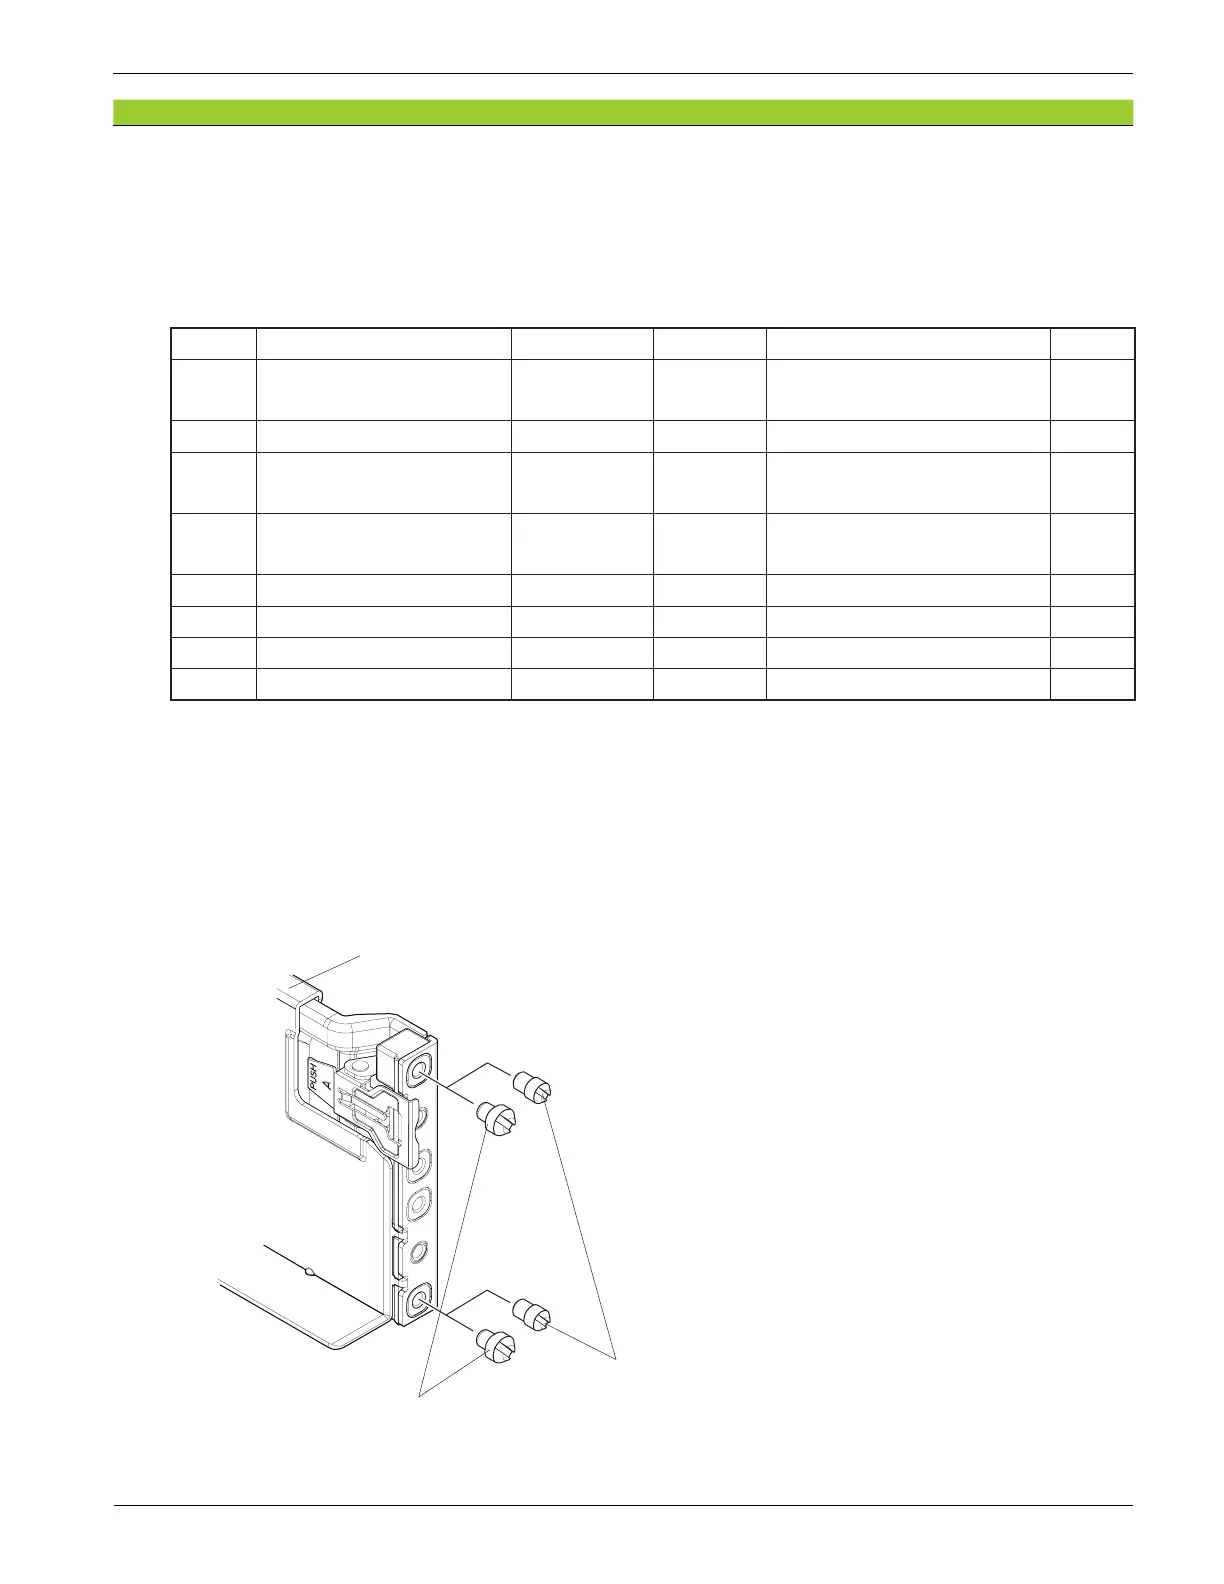
When installing the rails to a rack with circle holes, replace the right and left pins (total of eight places)
on the front and rear sides with the supplied circular hole pins (KS-PINs).
Figure 3-4 Replacing Square Hole Pins
Rail
For circle hole
(KS-PIN)
For square hole