3 INDOOR UNIT INSTALLATION
! DANGER
• Checktoensurethattheaccessoriesarepackedwiththeindoor
unit.
• Donotinstalltheindoorunitsoutdoors.Ifinstalledoutdoors,an
electrichazardorelectricleakagewilloccur.
• Considertheairdistributionfromeachindoorunittothespace
of the room, and select a suitable location so that uniform
air temperature in the room can be obtained. The unit must
not be installed below 2.3 metres from the oor level, with a
recommendedinstallationheightbetween2.3and3metresfrom
theoorlevel.Iftheunitisinstalledhigherthan3meters,itis
alsorecommendedthatafanbeutilisedto obtainuniformair
temperatureintheroom.
• Avoid obstacles which may hamper the air intake or the air
dischargeow.
• Payattentiontothefollowingpointswhentheindoorunitsare
installedinahospitalorotherplaceswherethereareelectronic
wavesfrommedicalequipment,etc.
• Do not install the indoor units where electromagnetic wave is
directly radiated to the electrical box, remote control cable or
remotecontrolswitch.
• Prepareasteelboxandinstalltheremotecontrolswitchinit.
Prepareasteelconduittubeandwiretheremotecontrolcablein
it.Thenconnectthegroundwirewiththeboxandtube.
• Installanoiselterwhenthepowersupplyemitsharmfulnoises.
• Thisunitisexclusivenonelectricalheatertypeindoorunit.Itis
prohibitedtoinstallaelectricalheaterintheeld.
• Donotputanyforeignmaterialintotheindoorunitandcheckto
ensurethatnoneexistintheindoorunitbeforetheinstallation
andtestrunning.Otherwiseareorfailure,etc.,mayoccur.
! CAUTION
• Do not install the indoor units in a ammable environment to avoid a
re or an explosion.
• Check to ensure that the ceiling slab is strong enough. If not strong
enough, the indoor unit may fall down on you.
• Do not install the indoor units in a machinery shop or kitchen where
vapor from oil or mist ows to the indoor units. The oil will deposit on
the heat exchanger, thereby reducing the indoor unit performance,
and may deform. In the worst case, the oil damages the plastic parts
of the indoor unit.
• To avoid any corrosive action to the heat exchangers, do not install
the indoor units in an acid or alkaline environment.
• When lifting or moving the indoor unit, use appropriate slings to avoid
damage and be careful not to damage the insulation material on units
surface.
3.1 UNIT INSTALLATION
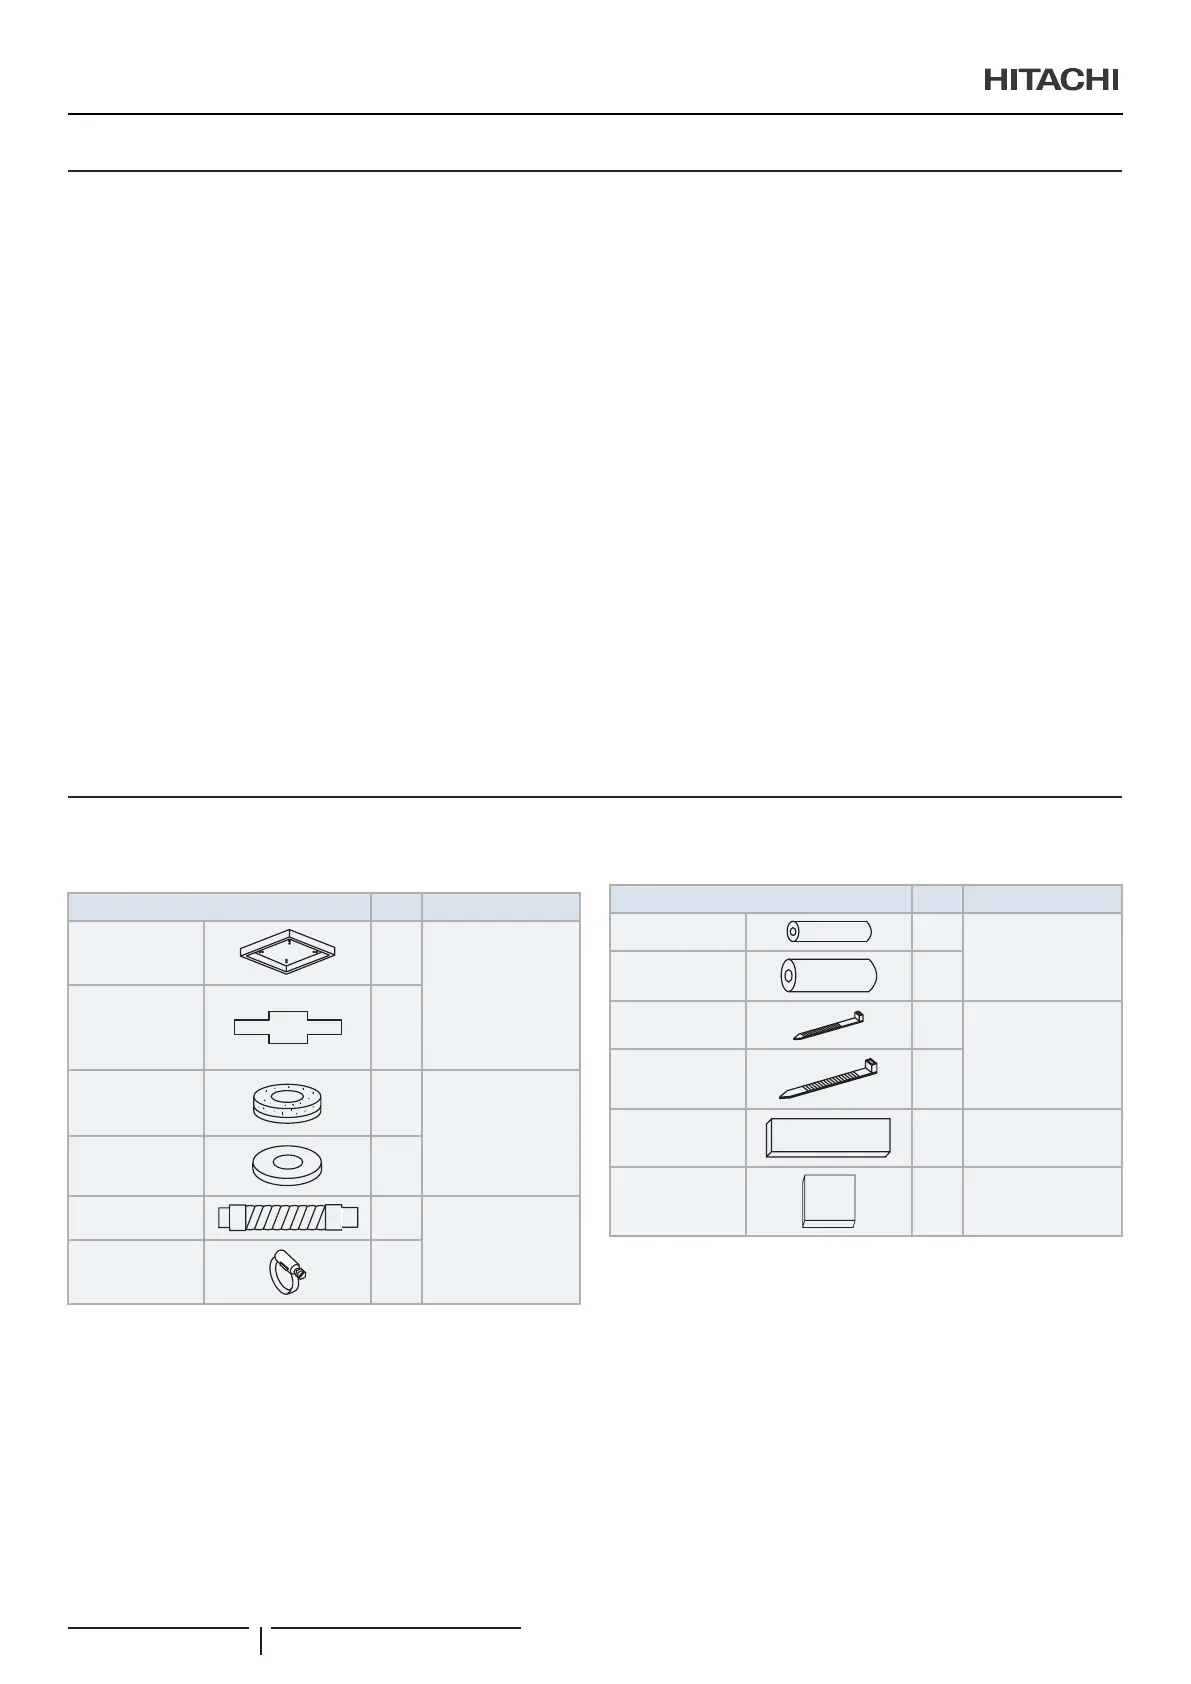
3.1.1 Factory-Supplied Accessories
Accessory Qty. Purpose
Pattern Board
(Carton Board)
1
For adjusting space
of false ceiling
opening and
position of the unit
Checking Scale
(cut and take out
it from the carton
board)
1
Washer with
Insulation
Material (M10)
4
For unit installation
Washer (M10) 4
Drain Hose 1
For Drain Hose
Connection
Hose Clamp 1
Accessory Qty. Purpose
Pipe insulation 1
For refrigerant
piping connection
Pipe insulation 1
Cord clamp 2
For xing remote
control switch
wiring, louver
sensor and
insulation of piping
Cord clamp 6
Insulation
(5Tx50x200)
1
For covering wiring
connection
Insulation
(5Tx270x270)
1
For covering drain
connection
INDOOR UNIT INSTALLATION
PMML0547 rev.0 - 11/2020
4

 Loading...


