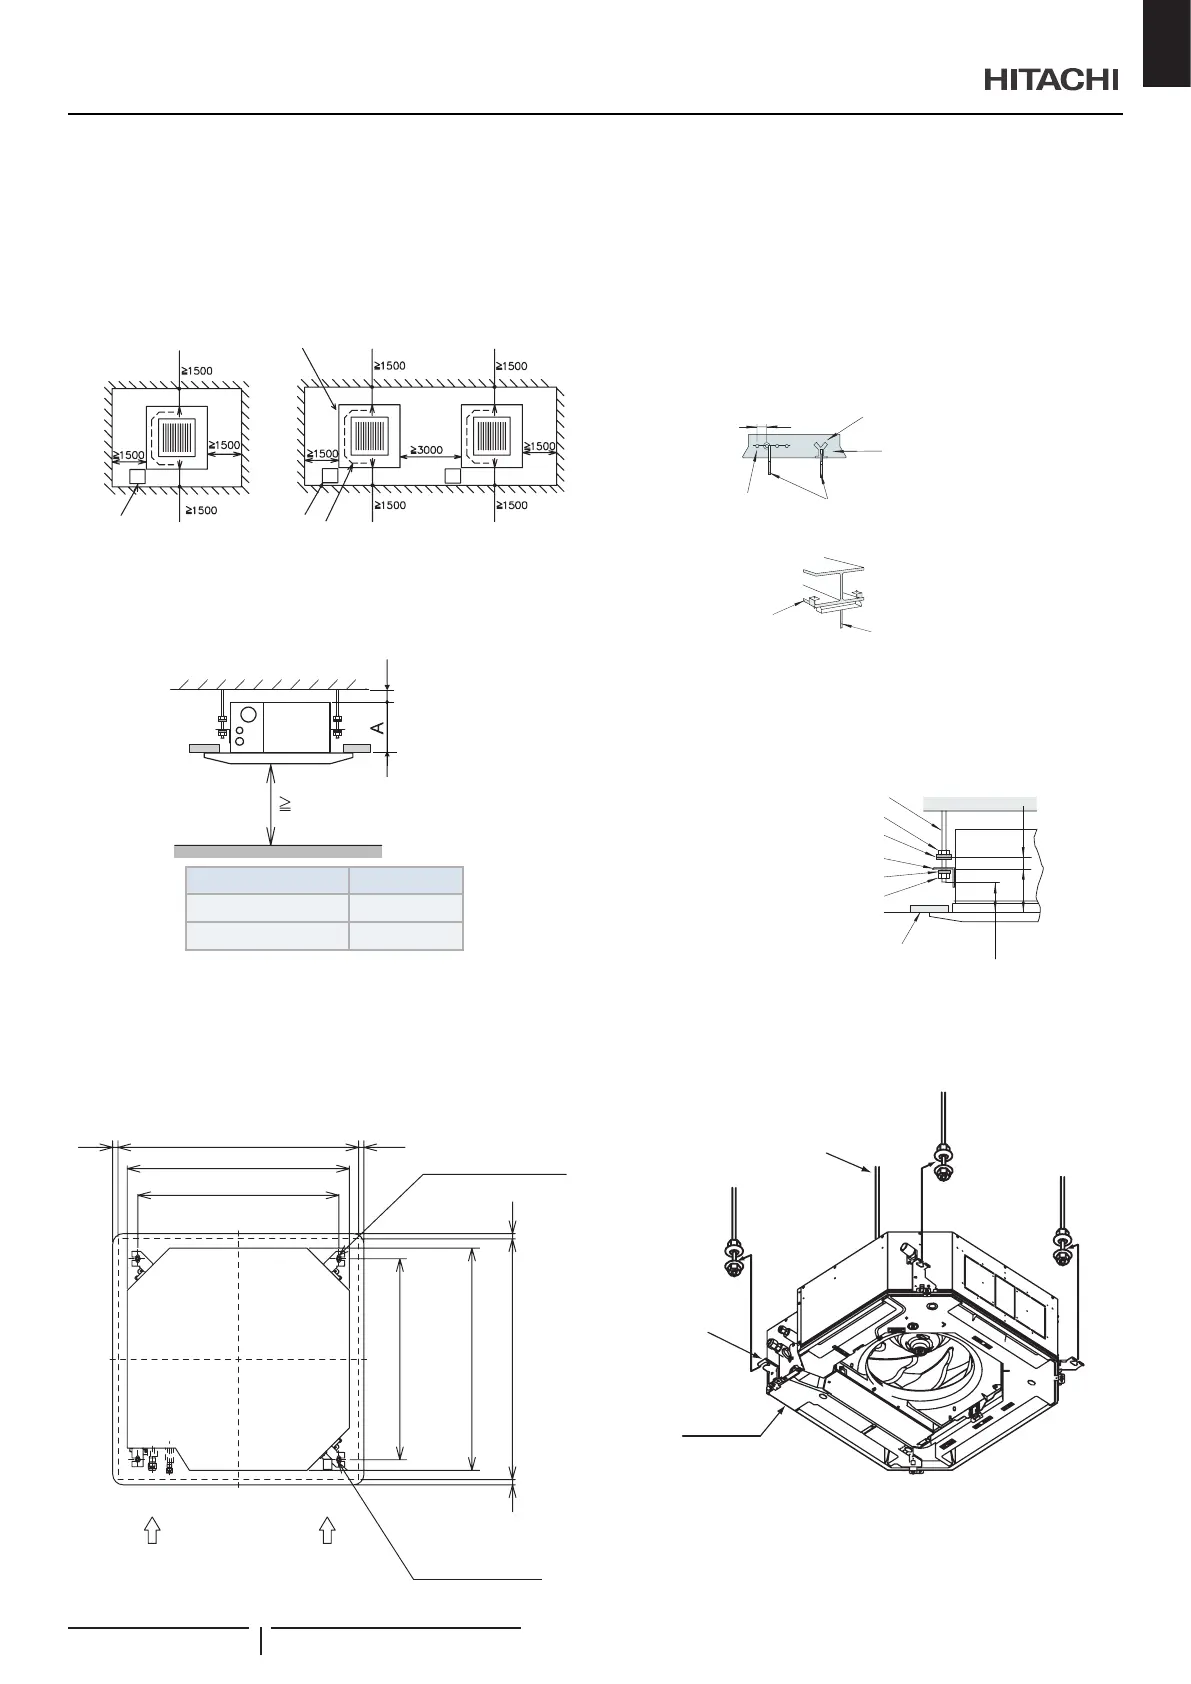
3.1.2 Initial Check
• Install the indoor unit with a proper clearance around it
paying careful attention of installation direction for the piping,
wiring and maintenance working space, as shown below.
• Provide a service access door near the unit piping
connection area on the ceiling.
Service
Access Door
Service Access
Door
Piping
Connection
Drain Piping
Connection
• Check space between ceiling and false ceiling is enough as
indicated below.
• Check the ceiling surface is at for the air panel installation
work.
2500
Clearance:
10-20mm
Unit height
In False
Ceiling
Unit HP A(mm)
RCI-1.0 to 2.5HP 238
RCI-3.0 to 6.0HP 288
Check down slope Pitch of Drain Piping is following the
specications indicated in chapter "5 DRAIN PIPING".
Opening Of False Ceiling
• Cut out the area for the indoor unit in the false ceiling and
install suspension bolts, as shown below.
20 20
840
760
2020
760
4-12 x32
Dimension of
opening 860 to 910
(Unit size)
(Dimension of
suspension bolts)
Holes
(for suspension bolt)
(Dimension of
suspension bolts)
840 (Unit size)
Dimension of
opening 860 to 910
Piping connection
side
Drain piping
connection side
4-Positions of
suspension bolts
(M10 or W3/8)
(Field-supplied)
• Check to ensure that the ceiling is horizontally level,
otherwise water can not ow.
• Strengthen the opening parts of the false ceiling.
3.1.3 Installation
Mounting of Suspension Bolts
Mount suspension bolts using M10 (W3/8) as size, as shown.
For concrete slab:
150 to 160mm
Insert (100 to 150Kg)
Concrete
Steel
Anchor Bolt (W3/8 or M10)
For steel beam:
Suspension Bolt
(W3/8 or M10)
I-Beam
Mounting of Indoor Unit
• Mount the nuts and the washers to the suspension bolts.
Put the washer so that the surface with insulation faces
downwards as shown below:
Suspension bolts
(eld-supplied)
(mm)
Nut (eld-supplied)
Washer with insulation (accessory)
Suspension bracket
(attached indoor unit)
Washer (accessory)
Nut (eld-supplied)
Surface of ceiling
Aprox. 50
100
Aprox. 50
• Consider piping connection side before lifting indoor unit.
• Lift the indoor unit by hoist, and do not put any force on the
drain pan.
• Secure the indoor unit using the nuts and washers.
Suspension bolt
Suspension
bracket
Drain pan
? NOTE
• If a false ceiling has already been installed, complete all piping and
wiring work inside the ceiling before hooking-up the indoor unit.
• Secure the indoor unit using the nuts, and at washers.
INDOOR UNIT INSTALLATION
PMML0547 rev.0 - 11/2020
5
EN

 Loading...


