Adjusting of space between indoor units and
false ceiling opening
- Adjust the indoor unit to the correct position while
checking with the pattern for installation.
Checking Scale for Dimension
of Opening
Pattern Board for
Installation
Packing (Corrugated Board)
For ceiling already completed with panels
Indoor Unit
Attach this side of the scale to the inner
side of the opening of the ceiling
Attach this side of the scale
to the lower side of the unit
Indoor Unit
Attach this side
of the scale to
the ceiling Panel
Checking Scale
Check the height of
the ceiling at each
corner of the unit
Check the
dimension of
opening at each
side of the unit
Attach this side
of the scale to
the outer side of
the unit
Ceiling panel
Checking Scale
Ceiling not completed with panels yet
Pattern paper
for installation
Dimension for opening
Unit
Dimension for opening
Suspension bolt
Surface of Ceiling
Pattern Board for Installation
Screw (M6)
- Tighten the nuts of the suspension brackets after the
adjustment is completed. Apply LOCK-TIGHT paint to the
bolts and nuts in order to prevent them from loosening. If
not done, abnormal noises or sounds may occur and the
indoor unit may come loose.
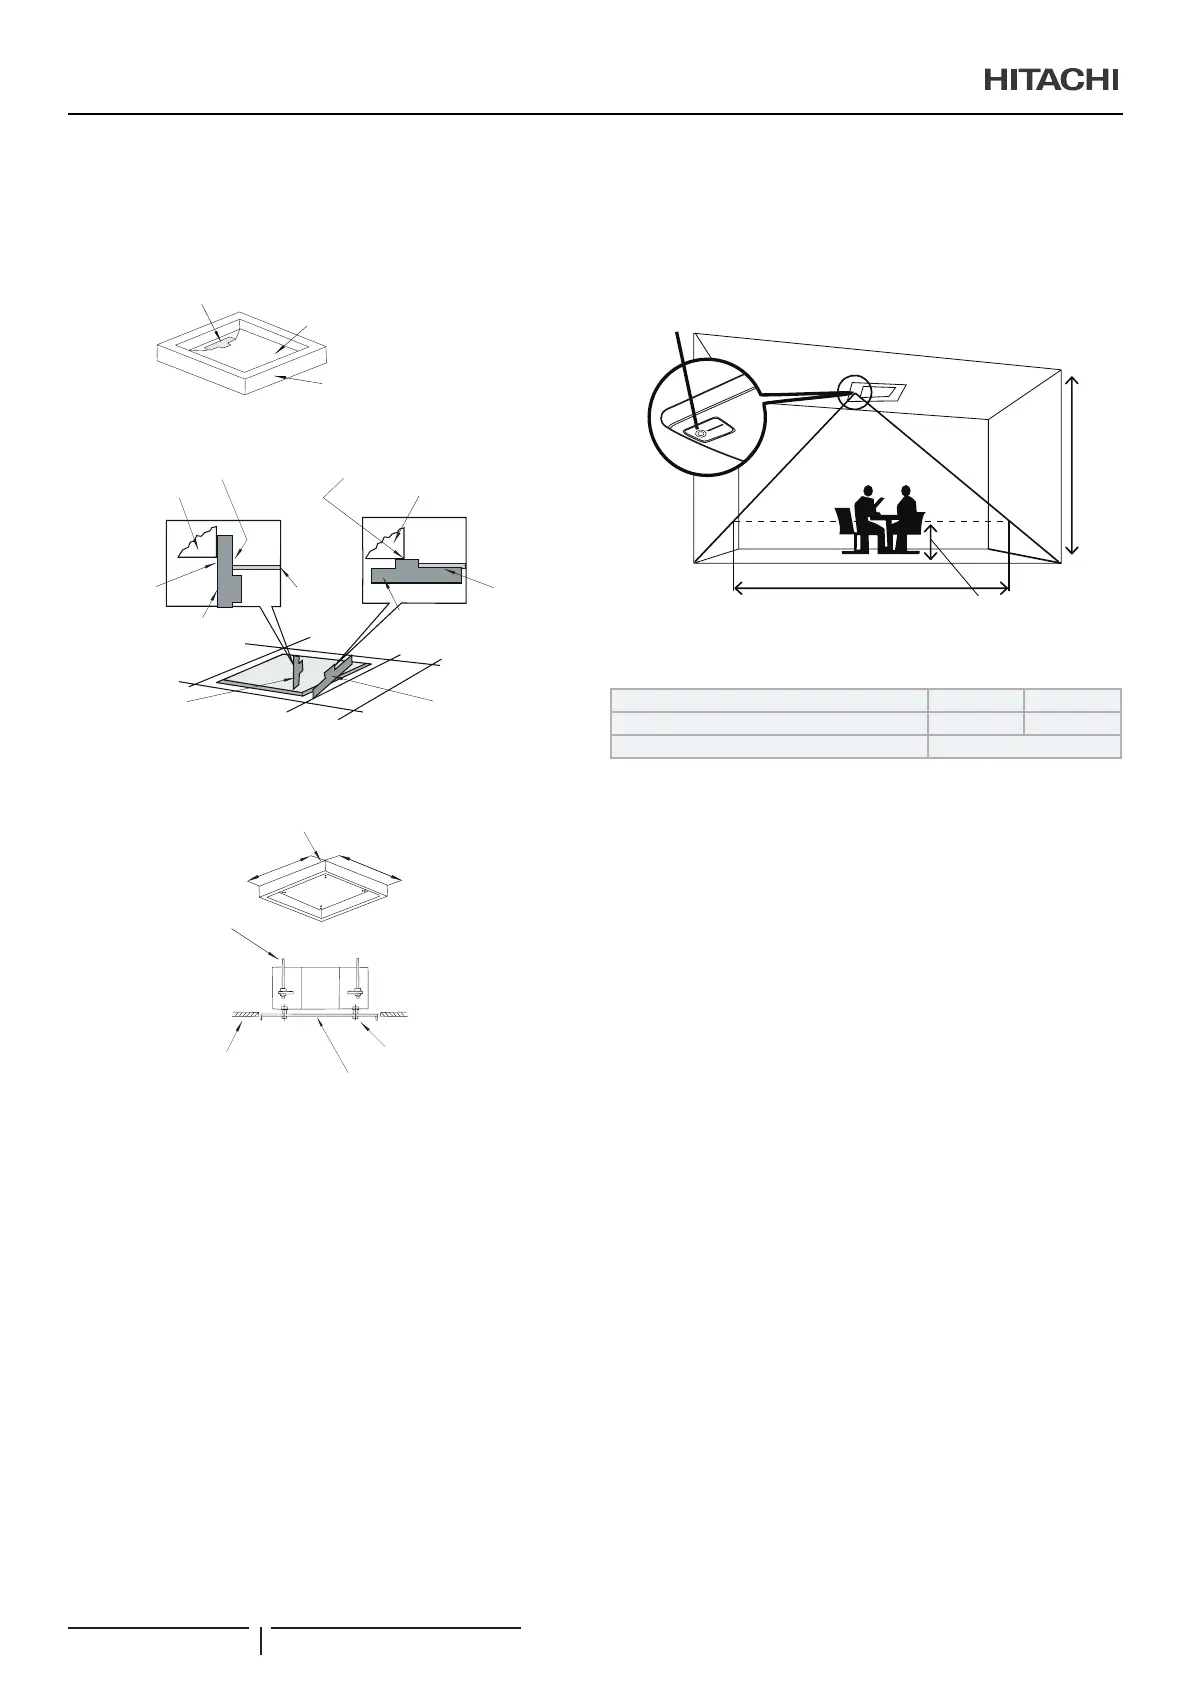
Sensing area for the motion sensor kit PS-MSK2
(optional) only as an accessory for air panel
P-N23NA2
The sensing area for the motion sensor is shown in the gure
below when applying the motion sensor with the air panel.
Ø
a
Motion sensor
From oor surface
0.8m
Installation Height of Indoor Unit h (m) 2.7 3.2
Sensing Area for Motion Sensor Øa (m) Approx. 7.0 Approx. 8.8
Motion Detection Human Motion
? NOTE
The motion sensor may detect as absence in the case that the indoor unit
with the motion sensor is installed to a high ceiling (higher than 4m) even
if someone is in a room.
INDOOR UNIT INSTALLATION
PMML0547 rev.0 - 11/2020
6

 Loading...


