5-13
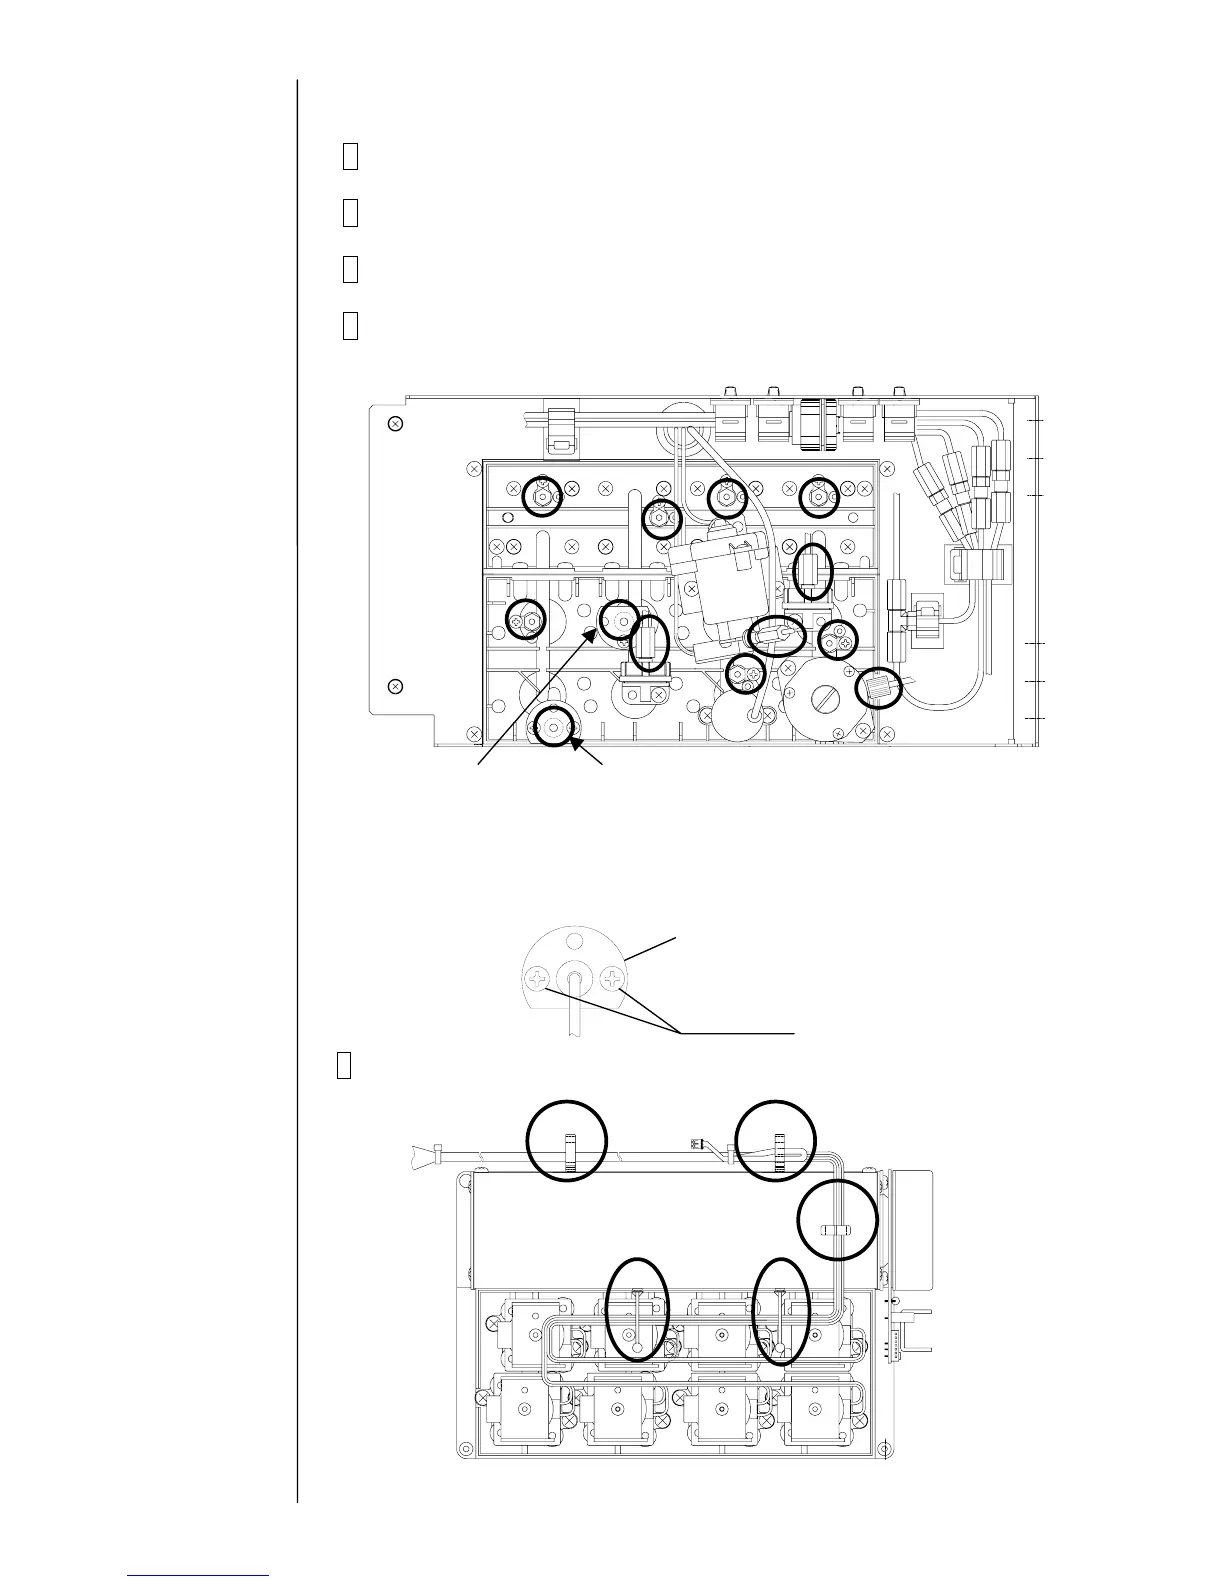
Fixing screw
P tank joint clamp
5.8 Circulation Unit Replacement Procedure
1 Perform “Ink drainage” and then “Pressure relief”.
2 Turn off the power supply.
3 Perform “5.1.3 Approach to the parts on the rear side of the equipment”.
4 Remove the wire connecting part screws (13 positions) of the liquid level
sensor in the main ink tank and the exhaust tube.
"Caution"
(1)Take care about an ink drip.
(2) Remove the piping tubes “P” and “Q” from P tank joint clamp section.
For other tubes, loosen tube lock and remove only tube.
5 Remove the clamps (5 positions) that fix the wires unit.
Q P

 Loading...


