Contents
1. Introduction·················································································································1-1
1.1 Safety precautions ······························································································· 1-1
1.2 PXR-P usage precautions ··················································································· 1-8
1.3 Structure of each part in the main body ······························································· 1-9
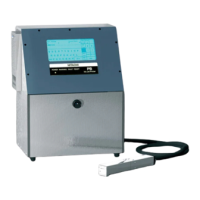
1.3.1 External views (PXR-D, PXR-H)····································································· 1-9
1.3.2 Main body internal (PXR-D, PXR-H)······························································· 1-10
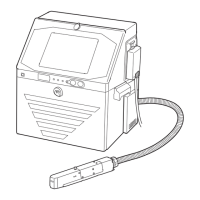
1.3.3 External views (PXR-P) ·················································································· 1-11
1.3.4 Main body internal (PXR-P) ············································································ 1-12
1.3.5 Print head ····································································································· 1-13
1.4 Installation ··········································································································· 1-14
1.4.1 Wiring of power supply ·················································································· 1-14
1.4.2 Installation procedure (PXR-D, PXR-H)·························································· 1-17
1.4.3 Installation procedure (PXR-P) ······································································· 1-18
1.4.3-1 Installation procedure ············································································ 1-18
1.4.3-2 Air Connection and air pressure adjustment
(at the time of installation) ································· 1-19
1.4.3-3 Disposition of makeup ink inside main ink tank
(at the time of installation) ·································· 1-21
1.4.3-4 Ink replenishment (at the time of installation) ········································ 1-21
2. Maintenance work······································································································· 2-1
2.1 Setting of maintenance mode by service personnel·············································· 2-1
2.2 System environment setup···················································································· 2-4
2.3 Adjustment/operational checkout ·········································································· 2-7
2.3.1 Excitation adjustment······················································································ 2-7
2.3.2 Charging voltage confirmation ······································································ 2-9
2.3.3 Phase margin test ························································································· 2-10
2.3.4 Auto phase gain adjustment ·········································································· 2-12
2.3.5 Level sensor confirmation ············································································· 2-14
2.3.5-1 Model PXR-D and model PXR-P level sensor confirmation ························ 2-14
2.3.5-2 Model PXR-H level sensor confirmation ······················································ 2-15
2.3.6 Heating unit confirmation ·············································································· 2-17
2.4 Test of solenoid valve/pump ················································································ 2-18
2.5 Download ············································································································ 2-19
2.6 Calibration of viscometer ····················································································· 2-21
2.6.1 Calibration of viscometer ·············································································· 2-21