1-3
Galaxy Dimension Installer Manual
SECTION 1: QUICK SETUP
To quickly set up a Galaxy Dimension control panel for programming follow these simple steps:
1. Connect a 1k Ω (1%) resistor across each of the zones on the panel and any RIO’s (if connected).
2. Ensure that the tamper return loop — the terminals marked as AUX TAMP/GND on the PCB — is a
complete loop.
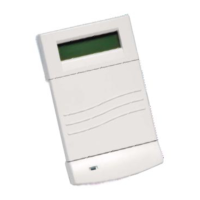
3. Connect a keypad to the AB LINE terminals on the control panel.
Table 1-2. Terminal Connections
4. Connect a 680 Ω End Of Line (EOL) resistor across the A and B terminals of the keypad.
5. Ensure that the keypad is fitted to the wall (see Keypad Installation Procedure, Section 4).
6. Connect the battery before replacing the control panel lid.
7. Connect the mains wiring to the control panel. Do not switch the mains ON.
8. Replace the control panel lid and secure the fastening screws.
9. Switch on the mains voltage (230 Va.c. / 50 Hz).
10. The following sequence of events occur:
• the keypad buzzer and control panel horn (if fitted) activate for 10 - 20 seconds,
• flashing is displayed on the keypad,
• the sounders stop and the keypad displays become blank,
• the green power LED lights and the following displays on the keypad
• the default banner is then displayed on the keypad.
where: XXX is the panel type
Y.YY is the panel software revision
11. The system is now ready to be programmed. Refer to Section 6 System Operation for program-
ming details.
12. Default User code is 12345
Default Engineer code is 112233
Quick Setup
ConfiguringConfiguring
ConfiguringConfiguring
Configuring
Please WaitPlease Wait
Please WaitPlease Wait
Please Wait
GALAXY <XXX> <VY.YY>GALAXY <XXX> <VY.YY>
GALAXY <XXX> <VY.YY>GALAXY <XXX> <VY.YY>
GALAXY <XXX> <VY.YY>
01:0101:01
01:0101:01
01:01
SUN 01 JAN SUN 01 JAN
SUN 01 JAN SUN 01 JAN
SUN 01 JAN
Control Panel
(Line 1)
Keypad
B1 B
A1 A
--
+12V +

 Loading...