Galaxy Dimension Installer Manual
2-5
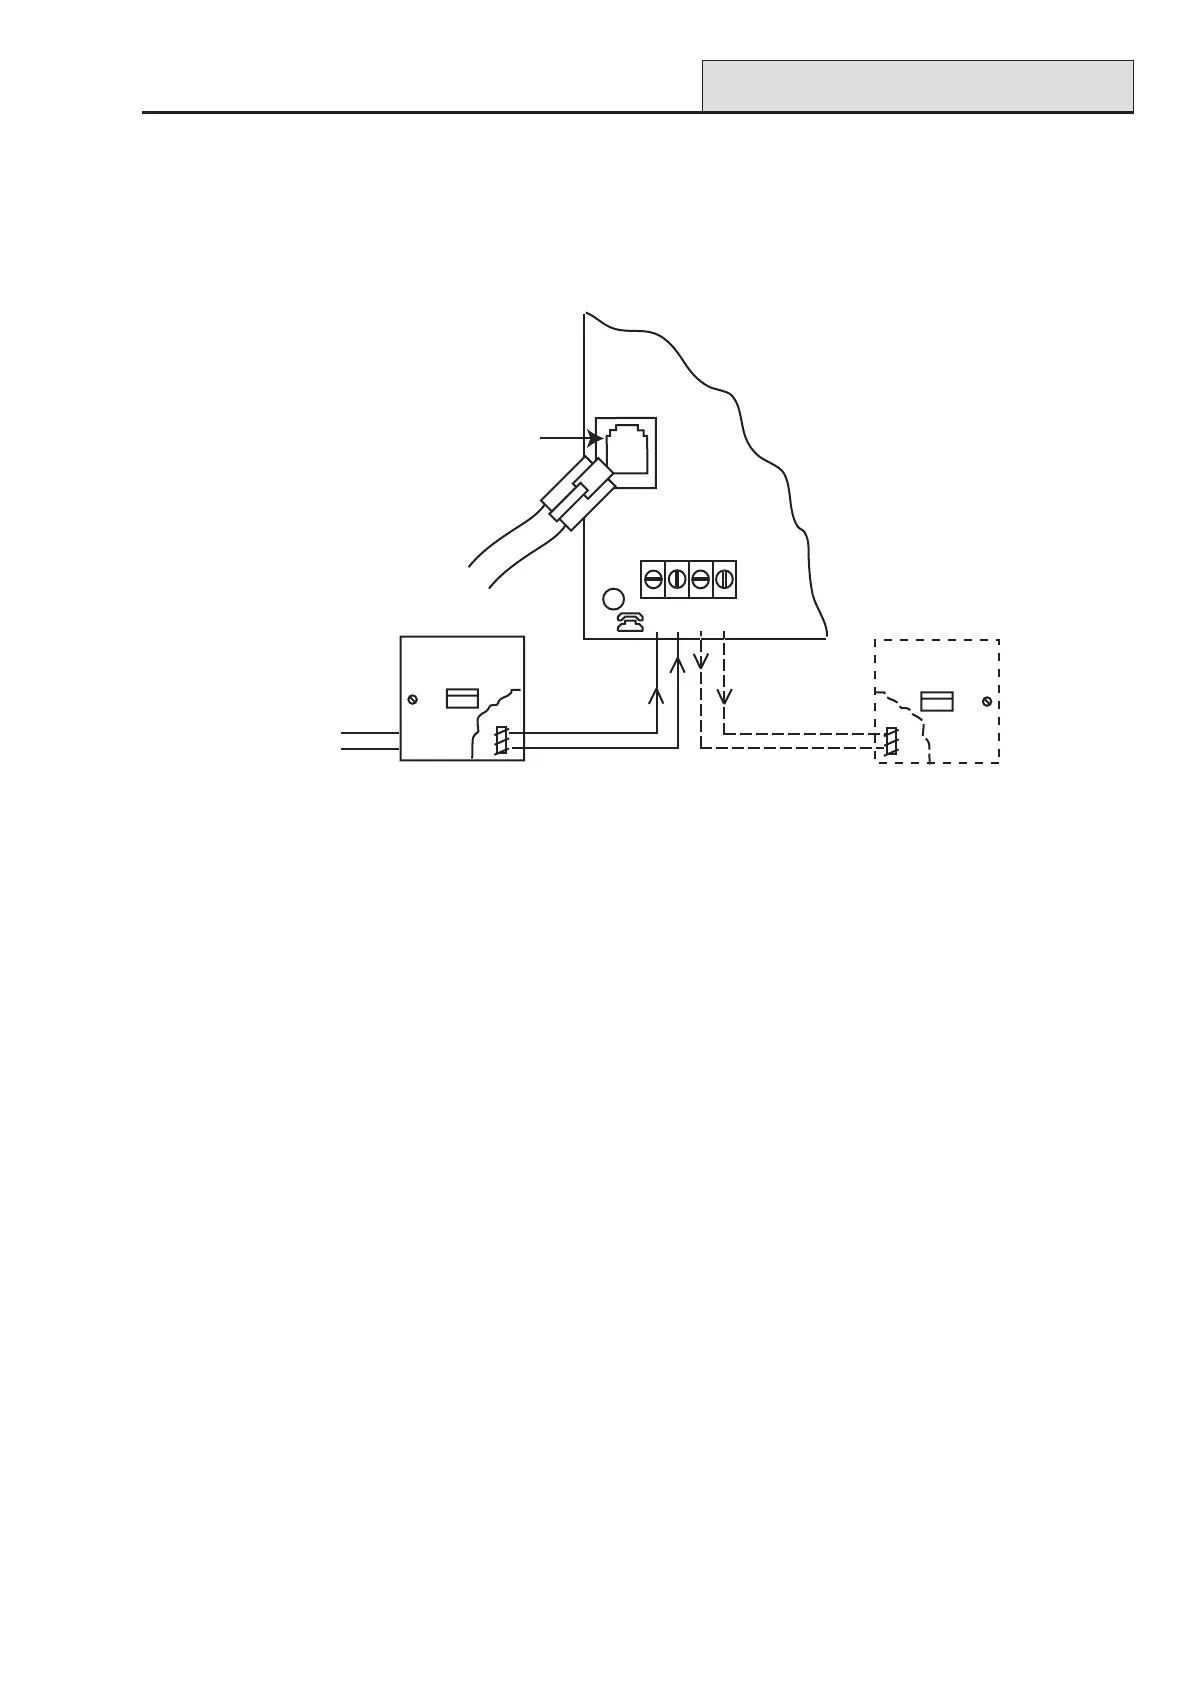
Connecting the Galaxy Dimension to the PSTN
The Telecommunications Network Voltage (TNV) port (terminals A and B on PCB) must be permanently
connected (hard-wired) to the PSTN via a master socket, refer to Figure 2-5.
System Wiring
Figure 2-5. Connecting the Galaxy Dimension to the PSTN
NOTES: 1. Terminals 1 and 2 on the Master Socket must be hard-wired to LINE A and B
terminals on the Galaxy Dimension PCB. The connection is polarity independent.
2. It is strongly recommended that the Galaxy Dimension panel is the only device on the line.
3. If another device is to be connected to the line, connect the PHONE terminals on the PCB
to terminals 1 and 2 on a Secondary socket.
There are two methods of connecting the on-board Telecom Module to the PSTN:
Method 1
Using cable suitable for connection to 2.8 mm diameter screw terminals, strip back approximately 20 mm of
the outer sheath and then remove approximately 4 mm of the insulation from the wires to be connected to the
Galaxy Dimension PCB.
Connect terminals 1 and 2 on the Master socket across the LINE A and B terminals on the Galaxy Dimension
PCB, see Figure 2-5.
Method 2
Use a standard cable with RJ11 plug on one end and plug into the telecom socket on the Galaxy Dimension
PCB. Connect the other end of the cable to the Master socket as described in Method 1.
NOTE: Digital Subscriber Line (DSL) should not be used. If it is used, connect a suitable filter to the phone
line.
PHONE
LINE
A
B
AB
Incoming
PSTN
Line
Master socket
Secondary socket
Telecom
Socket
RJ11
Plug
line 1
line 2
line 1
line 2

 Loading...