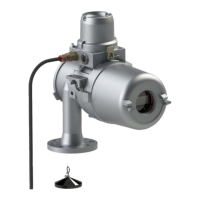
Honeywell Sensing and Control 43
SC 2000, SC2001, SC3004
Rev. G, 008-0608-00
KNOWN POINT x/y Menu Items
This enters the engineering units for the known-displacement
calibration points. These points must match the actually dis-
placements that you will apply to the transducer during calibra-
tion. The number of calibrations points depends on the CALIBRA-
TION TYPE.
When using the 2-Point Known Displacement Calibration type,
the following menu items are available:
• “KNOWN POINT 1/2”: point 1 of 2, usually 0% of the transduc-
er’s full-scale capacity.
• “KNOWN POINT 2/2”: point 2 of 2, usually 100% of the trans-
ducer’s full-scale capacity.
When using the 3-Point Known Displacement Calibration type,
the following menu items are available:
• “KNOWN POINT 1/3”: point 1 of 3, usually 0% of the transduc-
er’s full-scale capacity.
• “KNOWN POINT 2/3”: point 2 of 3, usually 50% of the transduc-
er’s full-scale capacity.
• “KNOWN POINT 3/3”: point 3 of 3, usually 100% of the trans-
ducer’s full-scale capacity.
When using the 5-Point Known Displacement Calibration type,
the following menu items are available:
• “KNOWN POINT 1/5”: point 1 of 5, usually 0% of the transduc-
er’s full-scale capacity.
• “KNOWN POINT 2/5”: point 2 of 5, usually 25% of the transduc-
er’s full-scale capacity.
• “KNOWN POINT 3/5”: point 3 of 5, usually 50% of the transduc-
er’s full-scale capacity.
• “KNOWN POINT 4/5”: point 4 of 5, usually 75% of the transduc-
er’s full-scale capacity.
• “KNOWN POINT 5/5”: point 5 of 5, usually 100% of the trans-
ducer’s full-scale capacity.
NOTICE
To insure both correct operation of the transducer and ap-
plication of the displacement, the instrument expects the
voltage applied at each known-displacement point to be
increasing. For example, the displacement applied at Known-
Displacement Point 2/2 must cause the transducer to produce
a more positive voltage than at Known-Displacement Point
1/2. You may need to swap the (+)Signal and (-)Signal wires
on the 12-pin channel connector to accomplish this.
11.5.6 CALIBRATE Menu Item
This menu item performs a calibration according to what was en-
tered in the CALIBRATION TYPE and CALIBRATION DATA menu items.
NOTICE
Before performing a calibration, the transducer must be
connected to the instrument, the must be
selected (see “ Menu Item” on page 42) and
the must be entered (see “
Sub-Menu” on page 42).
NOTICE
For maximum accuracy, allow at least twenty minutes of
warm-up with the excitation voltage applied to the transducer
before calibration.
If the CALIBRATION TYPE is 2-Point Known Displacement Cali-
bration...
• ThedisplaywillreadDOING 2POINT CAL, and prompt you to
APPLY 00000 UNIT (where 00000 and UNIT are previously
entered as KNOWN POINT 1/2 and DISPLAY. UNITS). When you
have applied this displacement to the transducer, press
[ENTER].
• ThedisplaywillreadWORKING, then APPLY 01000 UNIT (where
01000 and UNIT are previously entered as KNOWN POINT 2/2
and DISPLAY. UNITS). When you have applied this displace-
ment to the transducer, press [ENTER].
• Uponcompletion,thedisplaywillindicateDONE and the
instrument will return to the RUN mode.
If the CALIBRATION TYPE is 3-Point Known Displacement Cali-
bration...
• Thedisplaywillread DOING 3POINT CAL, and prompt you to
APPLY 00000 UNIT (where 00000 and UNIT are previously
entered as KNOWN POINT 1/3 and DISPLAY. UNITS). When
you have applied this displacement to the transducer, press
[ENTER].
• ThedisplaywillreadWORKING, then APPLY 00500 UNIT (where
00500 and UNIT are previously entered as KNOWN POINT 2/3
and DISPLAY. UNITS). When you have applied this displace-
ment to the transducer, press [ENTER].
• ThedisplaywillreadWORKING, then APPLY 01000 UNIT (where
01000 and UNIT are previously entered as KNOWN POINT 2/3
and DISPLAY. UNITS). When you have applied this displace-
ment to the transducer, press [ENTER].
• Uponcompletion,thedisplaywillindicateDONE and the
instrument will return to the RUN mode.

 Loading...