Intermediate PCA
Before proceeding, remove the following components:
●
Right cover. See
Right cover on page 21.
●
Upper cover. See
Upper-cover assembly on page 41.
●
Right panel. See
Right panel on page 52.
Remove the intermediate PCA
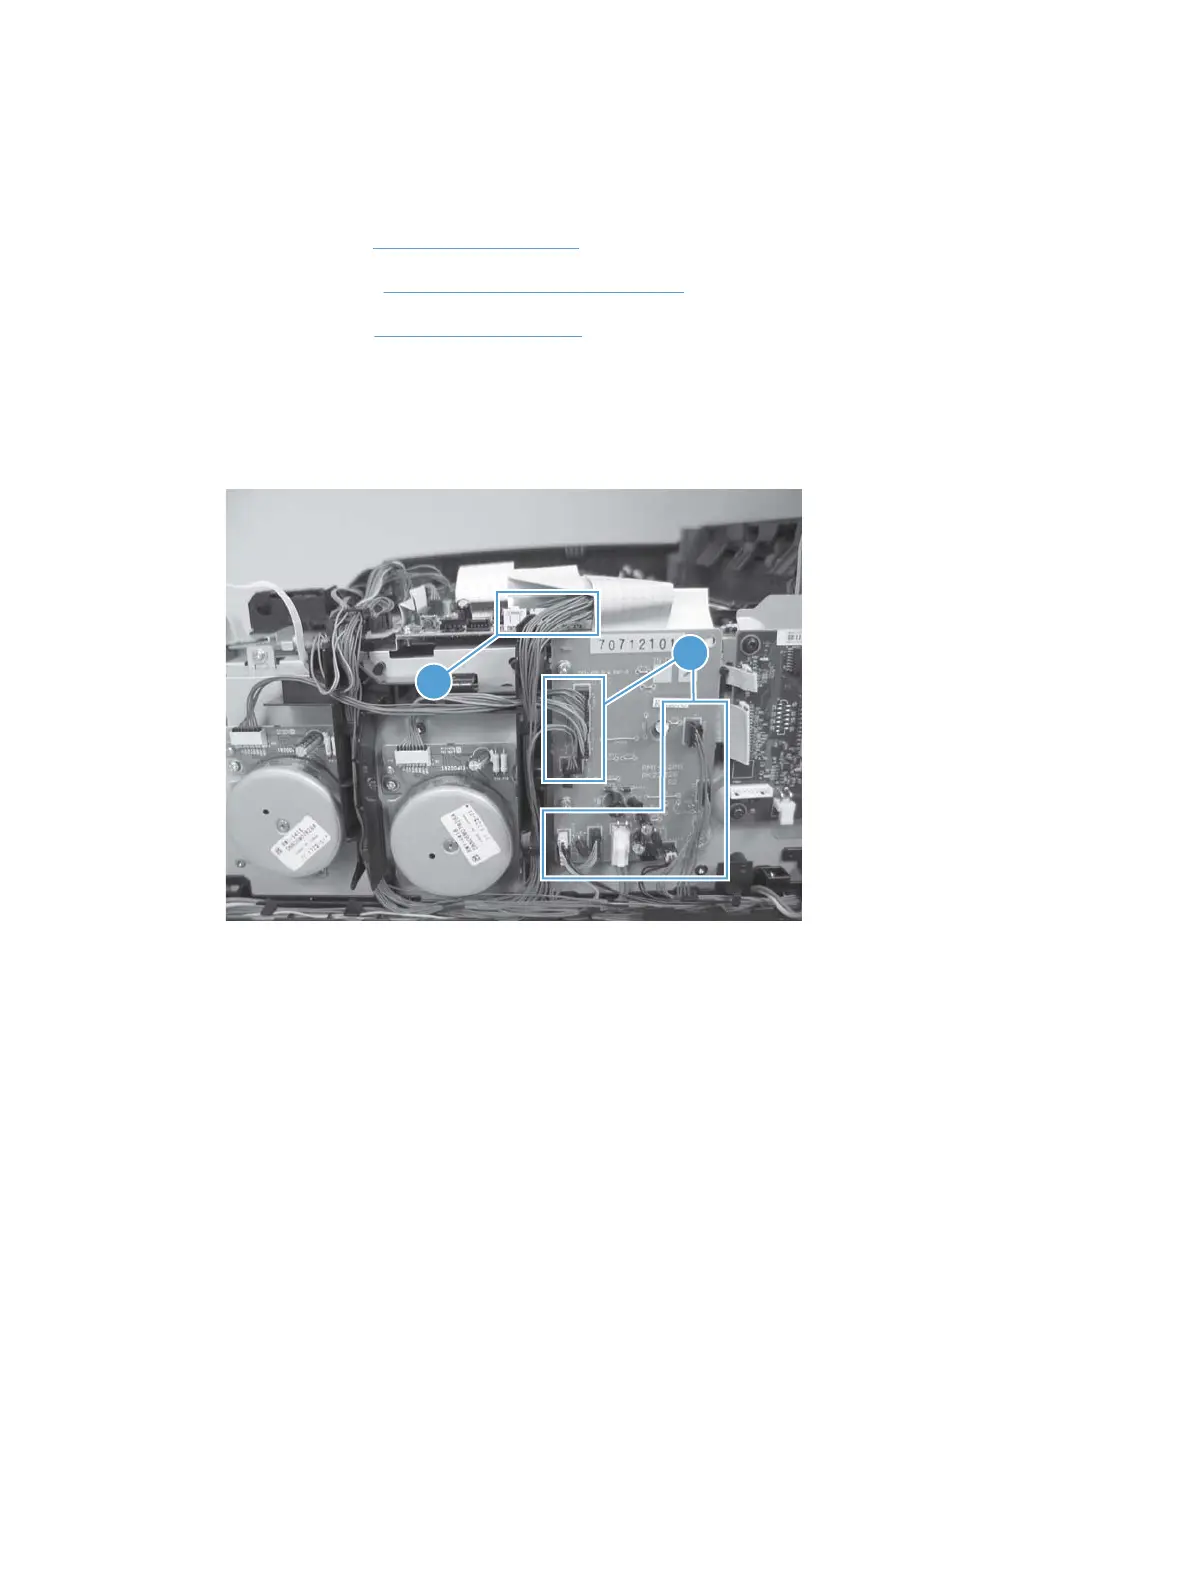
1. Disconnect all the connectors (callout 1) on the PCA and one FFC (callout 2).
Figure 1-105 Remove the Intermediate PCA (1 of 2)
2
1
72 Chapter 1 Removal and replacement ENWW
For mor information on LaserJet Pro 300, Pro 400 go to www.printersupplies.com
 Loading...