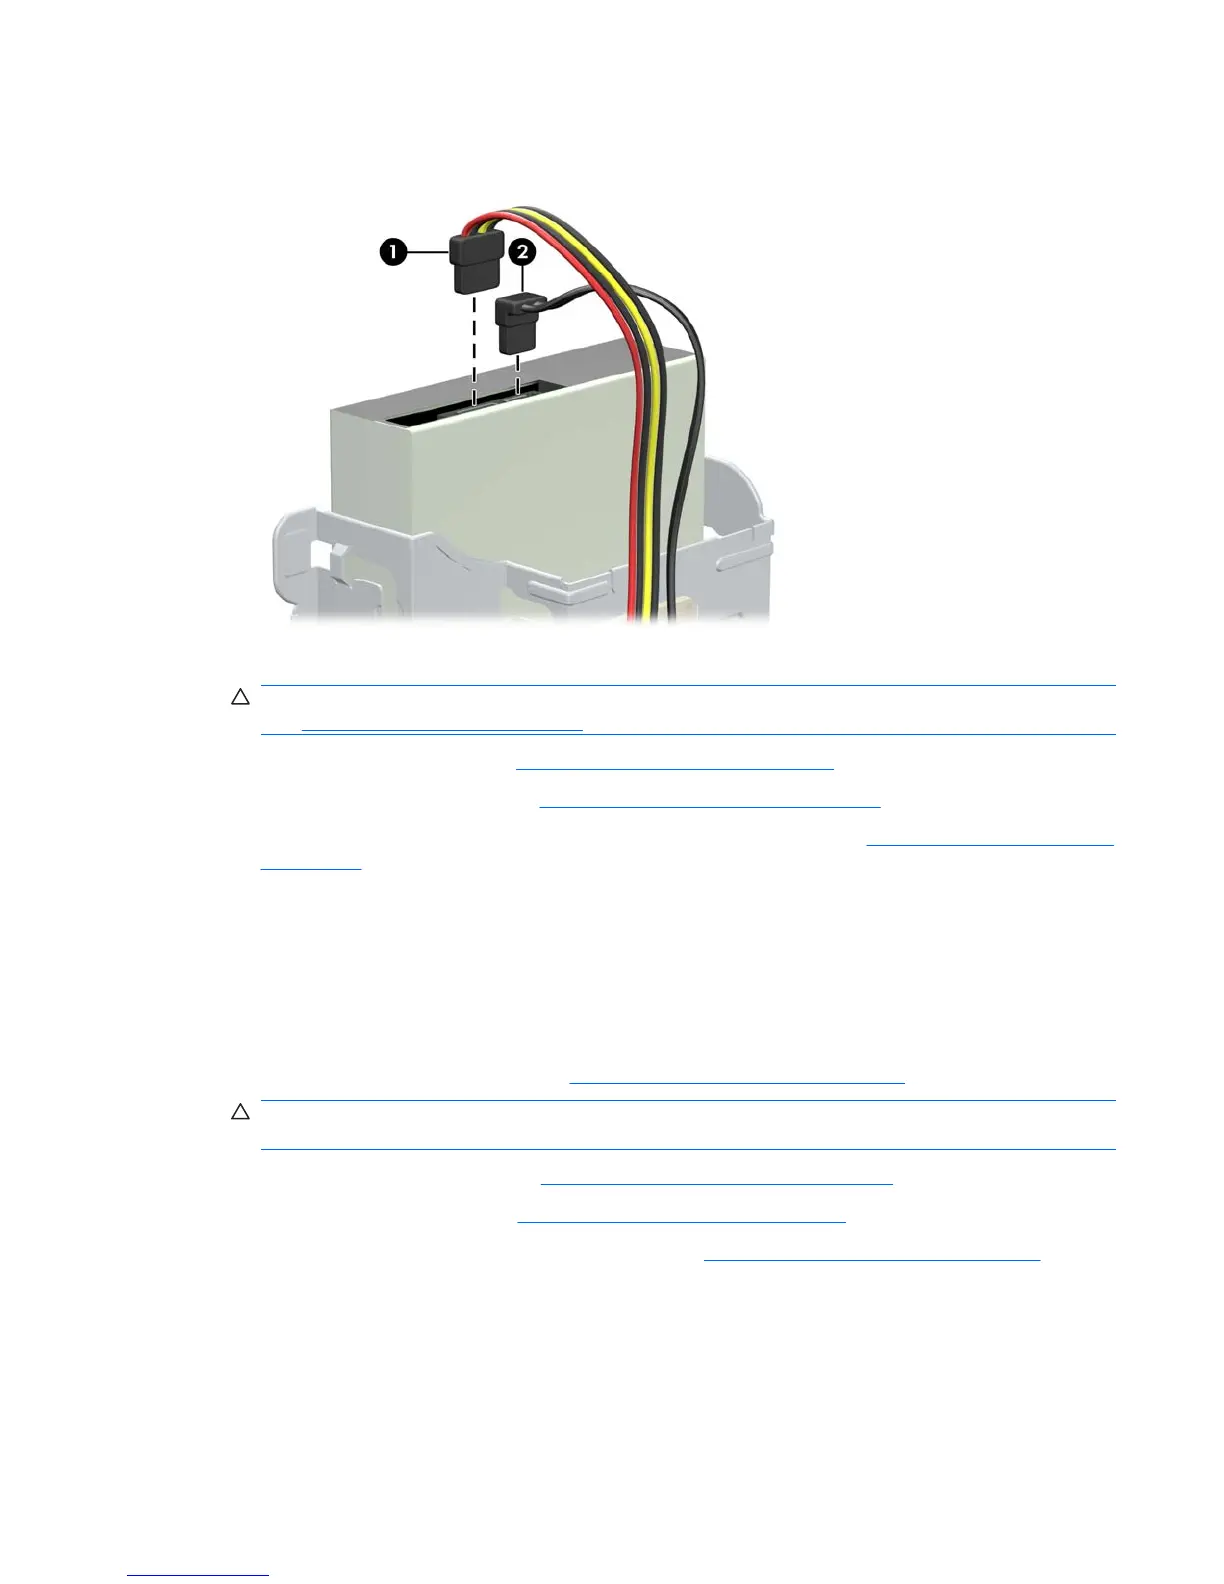
10. Connect the power cable (1) and data cable (2) to the rear of the optical drive.
Figure 5-18 Connecting the power and data cables
11. Carefully rotate the drive cage back down to its normal position.
CAUTION: Be careful not to pinch any cables or wires when rotating the drive cage down.
See
Cable management on page 93.
12. Replace the front bezel (see Installing the front bezel on page 72).
13. Replace the access panel (see
Installing the access panel on page 71).
14. Restore all connections and equipment that you removed during the
Predisassembly procedures
on page 68.
Removing a hard disk or media card from the drive cage
The 3.3 cm (3.5 in) drive is located underneath the 13.3 cm (5.25 in) optical drive. A media card can
also be installed at this location. If an optical drive is present, you must remove it before removing the
hard drive.
To remove a hard drive or media card from the drive cage:
1. Follow the procedures listed in the
Predisassembly for drives on page 77 section.
CAUTION: Failure to follow the predisassembly procedures can result in equipment damage or
data loss.
2. Remove the access panel (see Removing the access panel on page 71).
3. Remove the front bezel (see
Removing the front bezel on page 72).
4. Remove the optical disk drive if it is present. (See
Removing an optical drive on page 80.)
ENWW Removing and installing components 85
 Loading...