88 Powermax30 XP Service Manual 808150 Revision 0
6 – Power Supply Component Replacement
Replacing the power supply cover
Remove the power supply cover
1. Set the power switch to OFF (O), disconnect the power cord from the power source, and disconnect the gas supply.
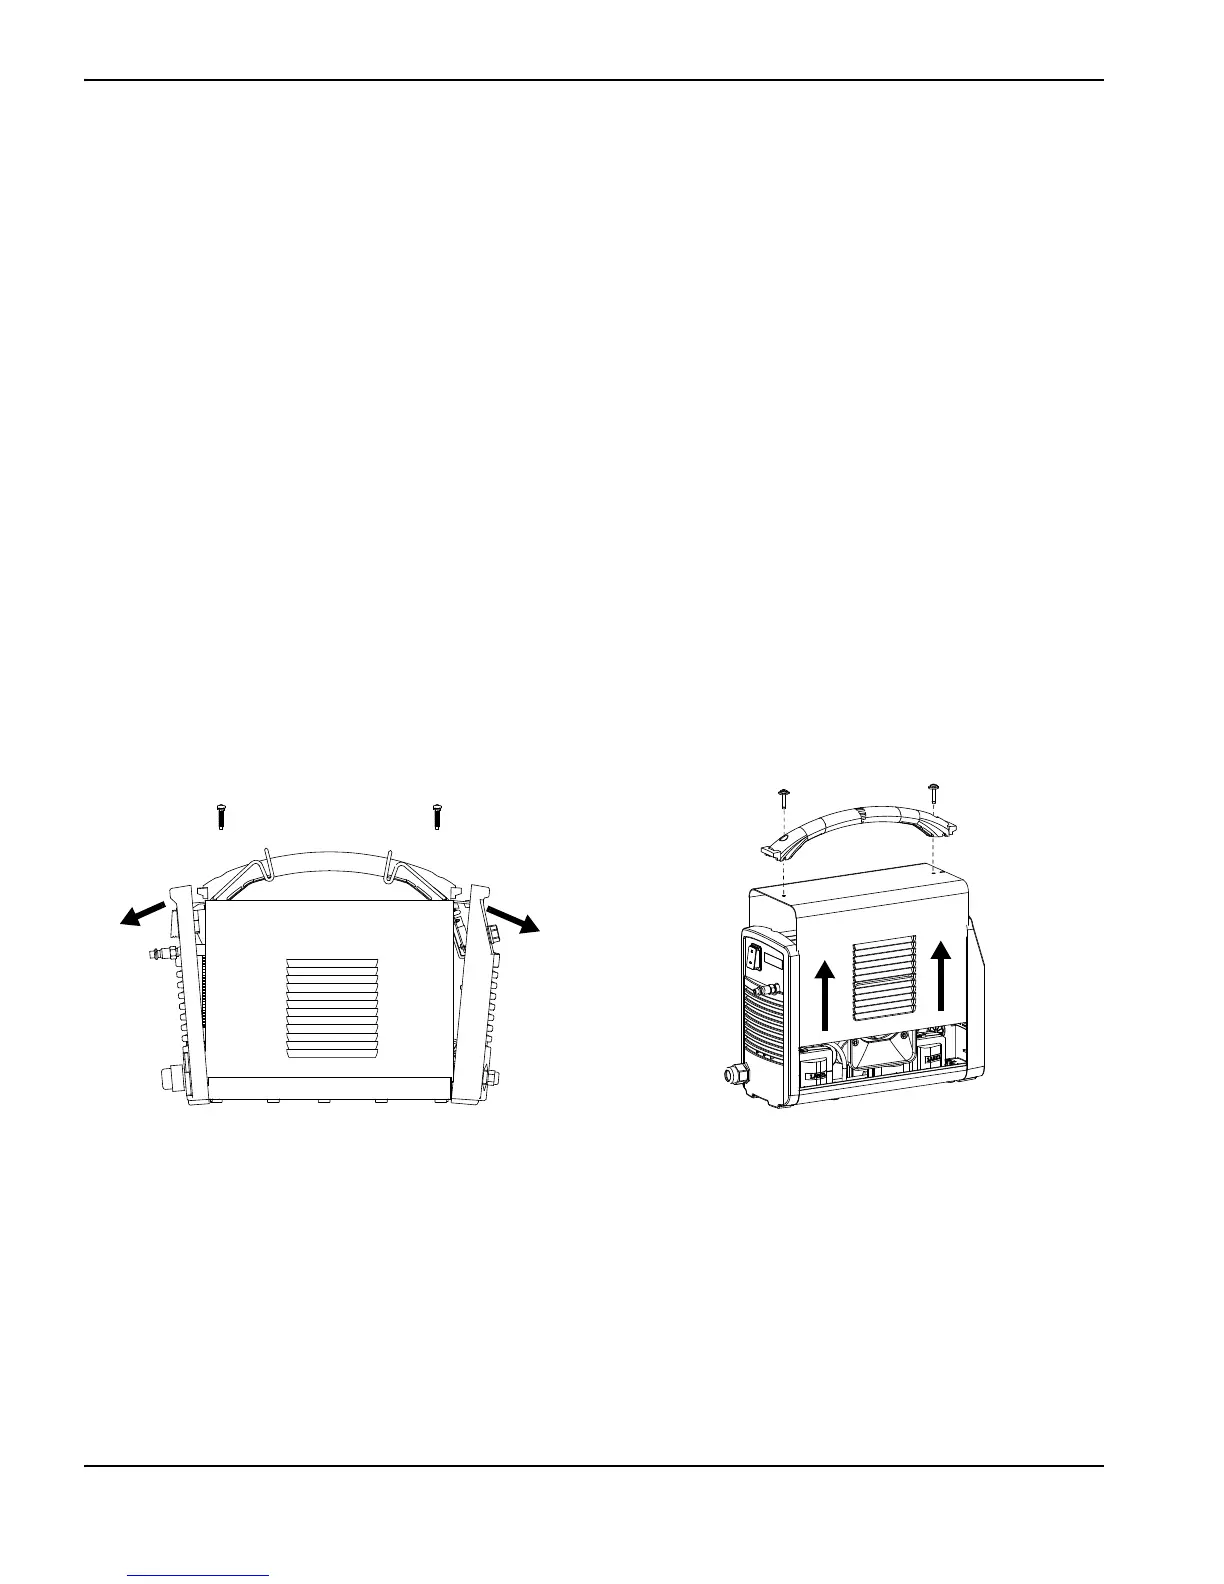
2. Remove the two screws from the handle on the top of the power supply. Gently pull on the panel nearest the screw
you are removing to keep pressure on the screw. When the screw is almost out, tilt the screwdriver slightly to help
pull the screw out of the recessed hole.
3. Slightly tip the front and rear panels away from the power supply so that you can get the edges of the handle out from
underneath them. Remove the handle, and set it and the two screws aside.
4. Continue to tilt the panels outward to release the fan side of the cover from its track. Then lift the cover off the power
supply.
Figure 24
Kit number Description
428221 Kit: Power supply cover with labels, CSA
428222 Kit: Power supply cover with labels, CSA, Built in America
428224 Kit: Power supply cover with labels, CE
428225 Kit: Power supply cover with labels, CCC