Powermax30 XP Service Manual 808150 Revision 0 95
6 – Power Supply Component Replacement
Detaching and reattaching the rear panel
Several repairs are easier to make if you detach the rear panel from the power supply. For instructions on replacing an old
rear panel with a new one, see Replacing the rear panel on page 156.
Detach the rear panel
1. Set the power switch to OFF (O), disconnect the power cord from the power source, and disconnect the gas supply.
2. Loosen the power cord’s strain relief nut.
3. Lay the power supply on its side.
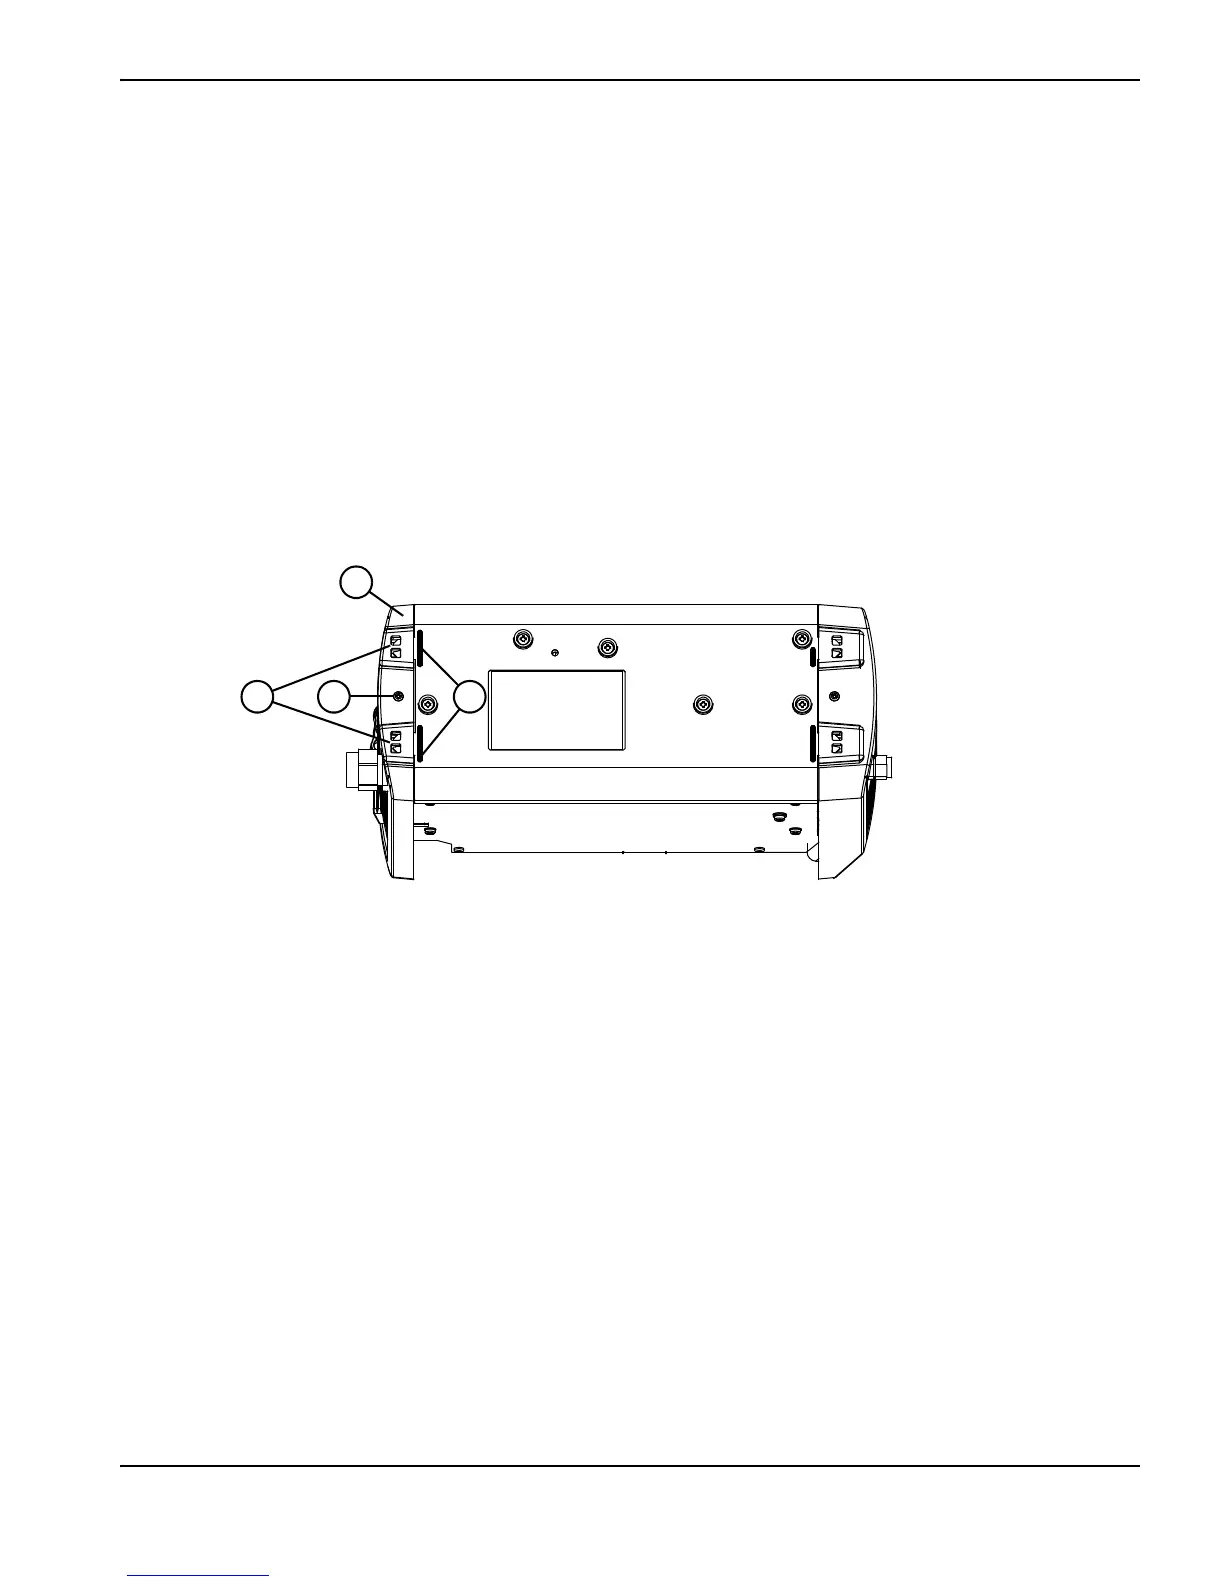
4. Remove the retaining screw from the bottom of the rear panel.
Figure 32
5. Insert needle nose pliers into the opening for one of the snaps and use the pliers to squeeze it together.
6. Place a blade screwdriver against the raised rib next to the snap and gently turn the screwdriver to push the panel
away from the base.
1
Rear panel
2
Snap
3
Retaining screw
4
Raised rib