Powermax30 XP Service Manual 808150 Revision 0 133
6 – Power Supply Component Replacement
Replacing the torch lead and strain relief
Remove the torch lead and strain relief
If you are replacing just the torch lead cable, not the whole torch assembly, refer to Replacing the torch lead on page 182
for details on how to remove the old lead from the torch.
1. Complete the following procedures:
a. Set the power switch to OFF (O), disconnect the power cord from the power source, and disconnect the gas
supply.
b. See Remove the power supply cover on page 88.
c. See Detach the front panel on page 92.
2. Push-to-disconnect the plastic 90° fitting from the torch lead’s brass gas supply fitting inside the front panel of the
power supply. (See Figure 56 on page 119.)
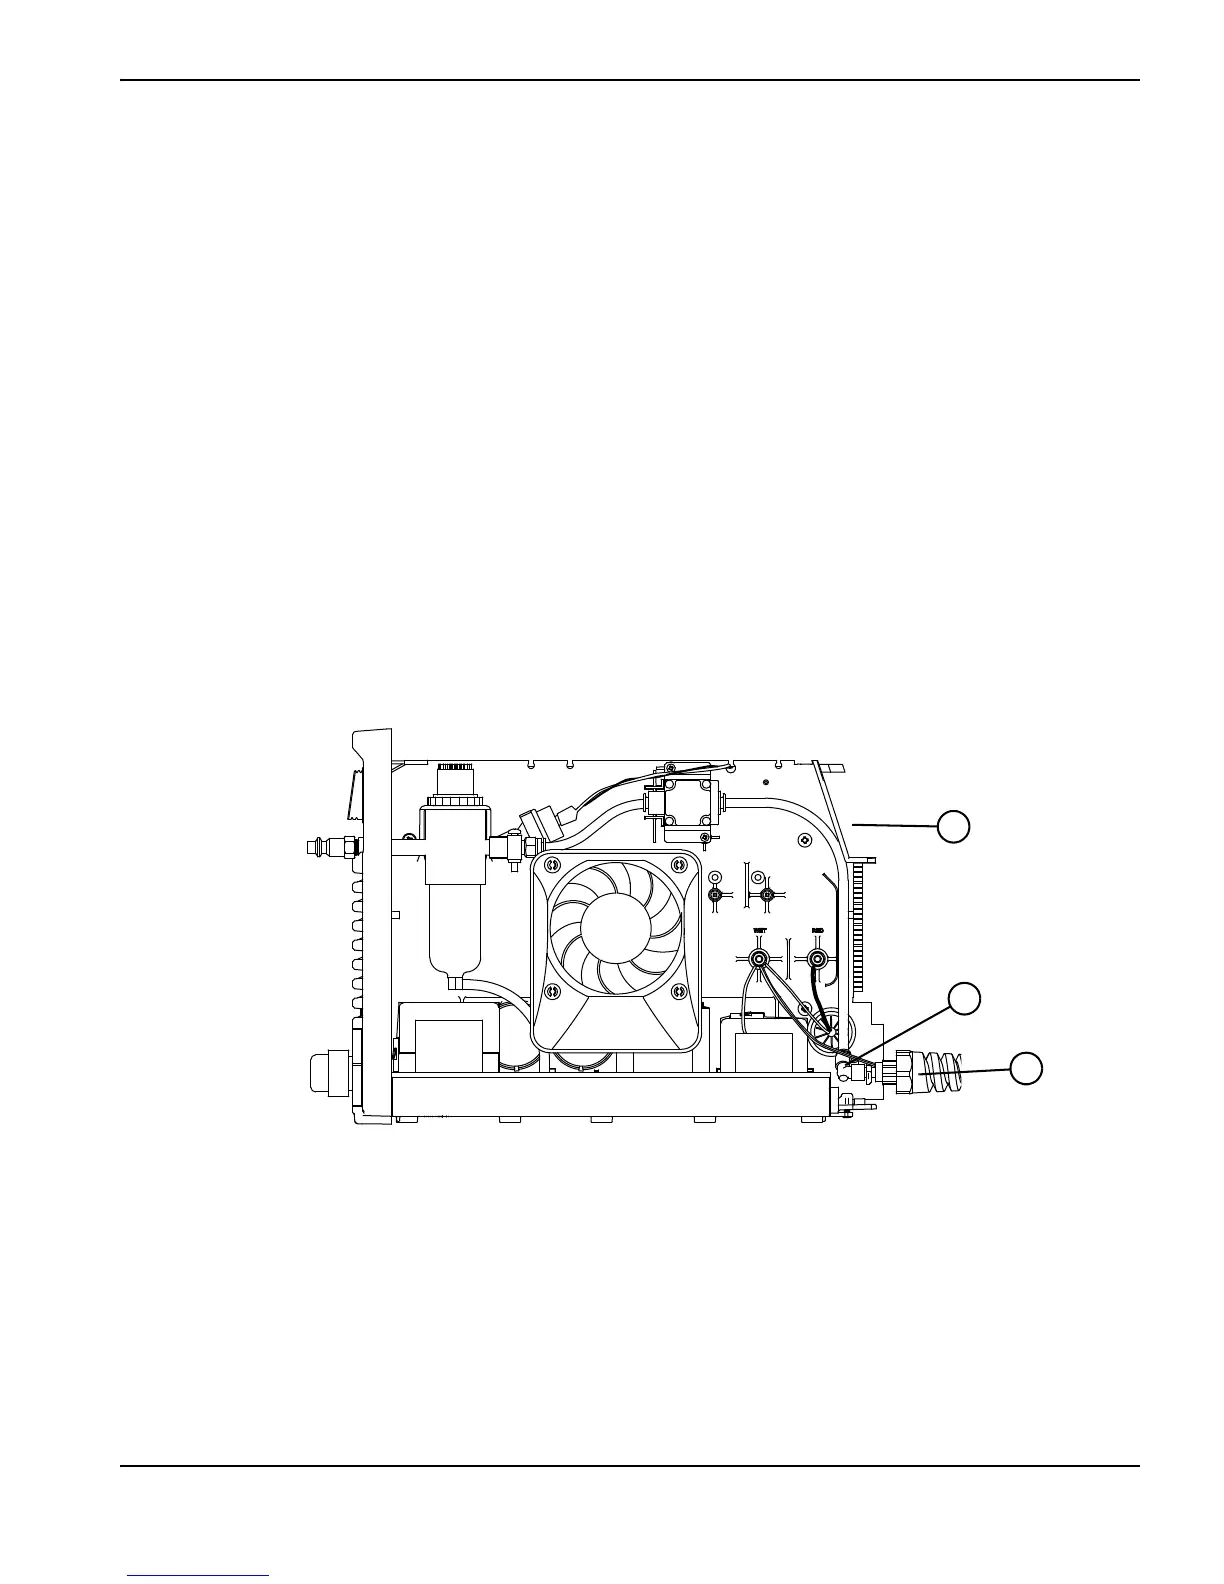
Figure 67
Kit number Description
428176 Kit: Duramax LT torch lead, 4.6 m (15 feet), with strain relief
1
Torch lead
2
Plastic 90° fitting connected to brass gas supply
fitting
3
Front panel (hidden)