5-24
Updating the CLARiTY Operating Software
Rev AA
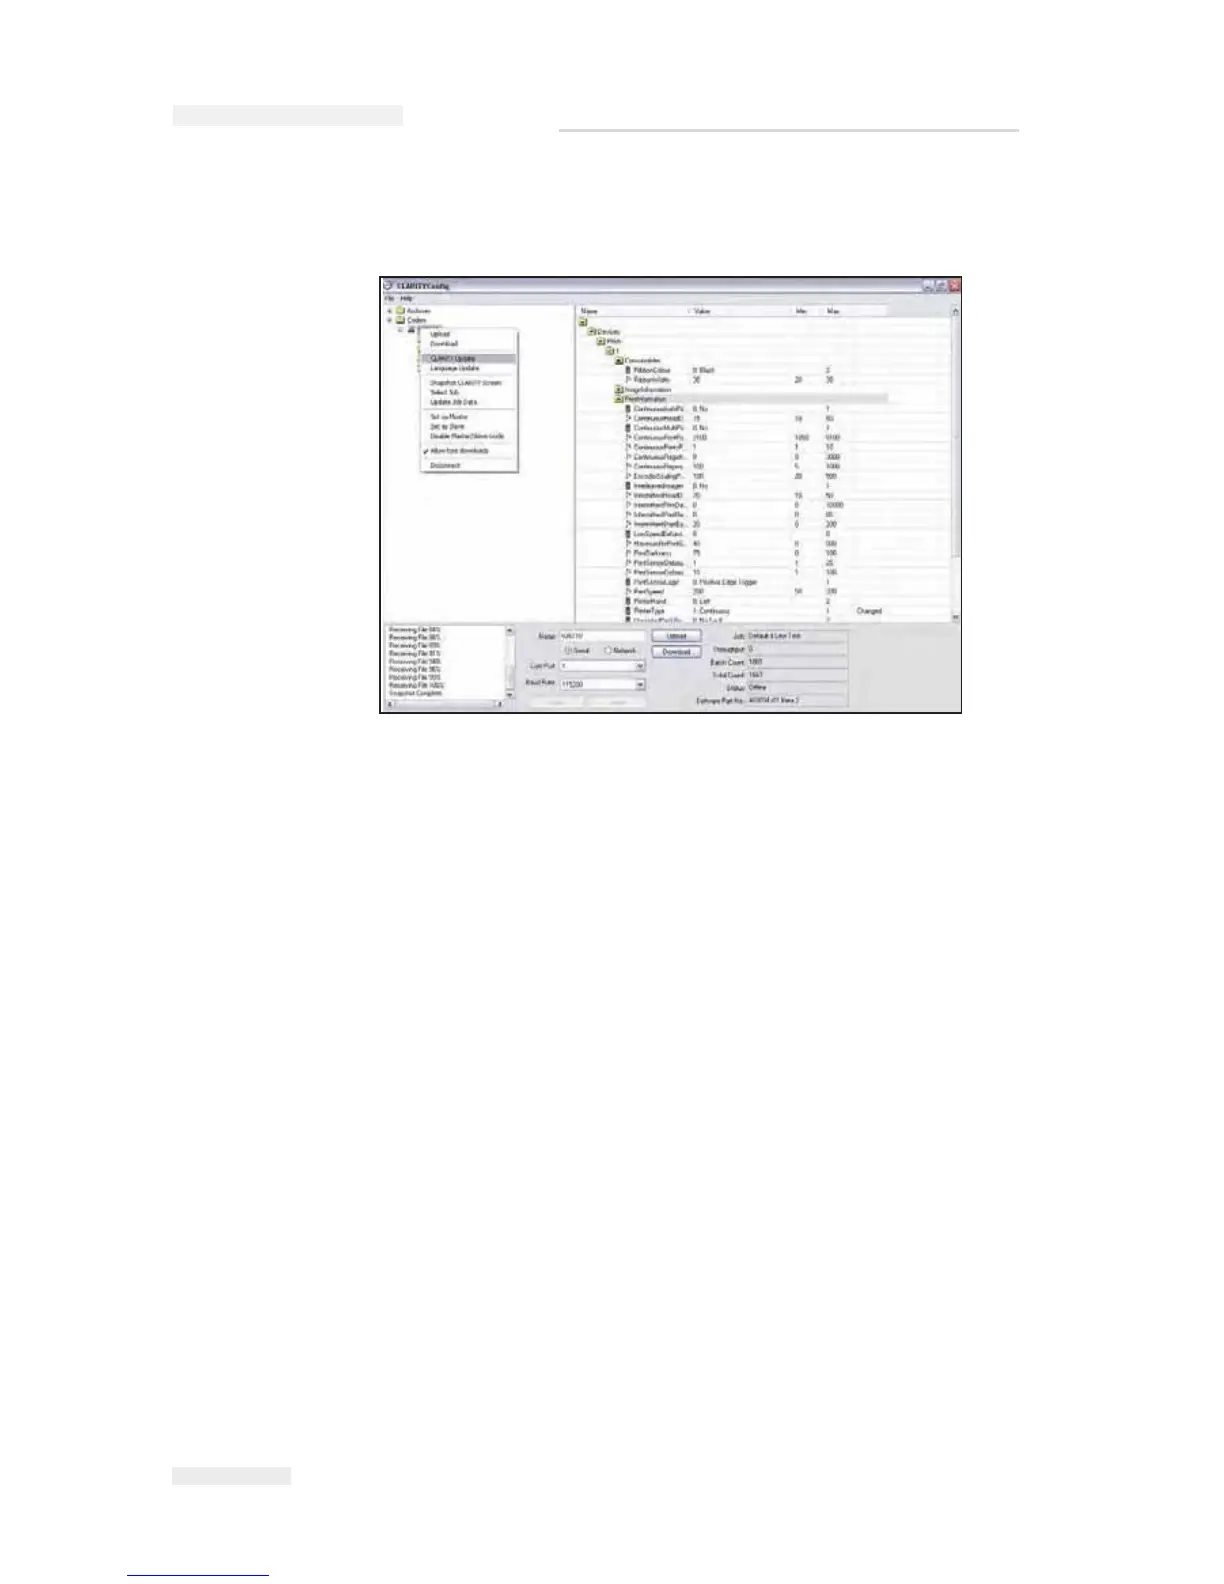
1 Connect the printer to the PC and when the coder icon is green, right
click on the icon.
2 Click on CLARiTY Update and navigate to the CAB file stored on the
PC disc.
3 Click on the file name and the update process commences.
4 The update file is initially downloaded and the progress of the
download can be followed in the Progress pane of the CLARiTY
Configuration Manager screen.
5 Once the download is completed the CLARiTY Update of the printer
starts and the CLARiTY screen indicates the progress of the update.
Note: It is very Important to ensure that the power to the printer is not
removed during the update process, or the flash card in the printer may get
corrupted.
When the update is finished, CLARiTY automatically re-boots and the
CLARiTY Home Screen is finally displayed.
6 Check the Software Part number in the Diagnostics screen to ensure
that the update has been successful.
CLARiTY Update via a USB Memory Stick
Updating of printer software is possible from a USB memory stick as
opposed to a PC/Lap top and CLARiTY Configuration Manager.
To update the CLARiTY using an USB, proceed as follows:
Figure 5-29: CLARiTY Update Window
I
CE Pegasus Service Manual