Rev AA Maintaining the Printer 5-13
2 Locate and remove the 2 screws (Figure 5-14).
3 Remove the rear cover as detailed above in the section “Replacing the
Compact Flash Card” on page 5-11.
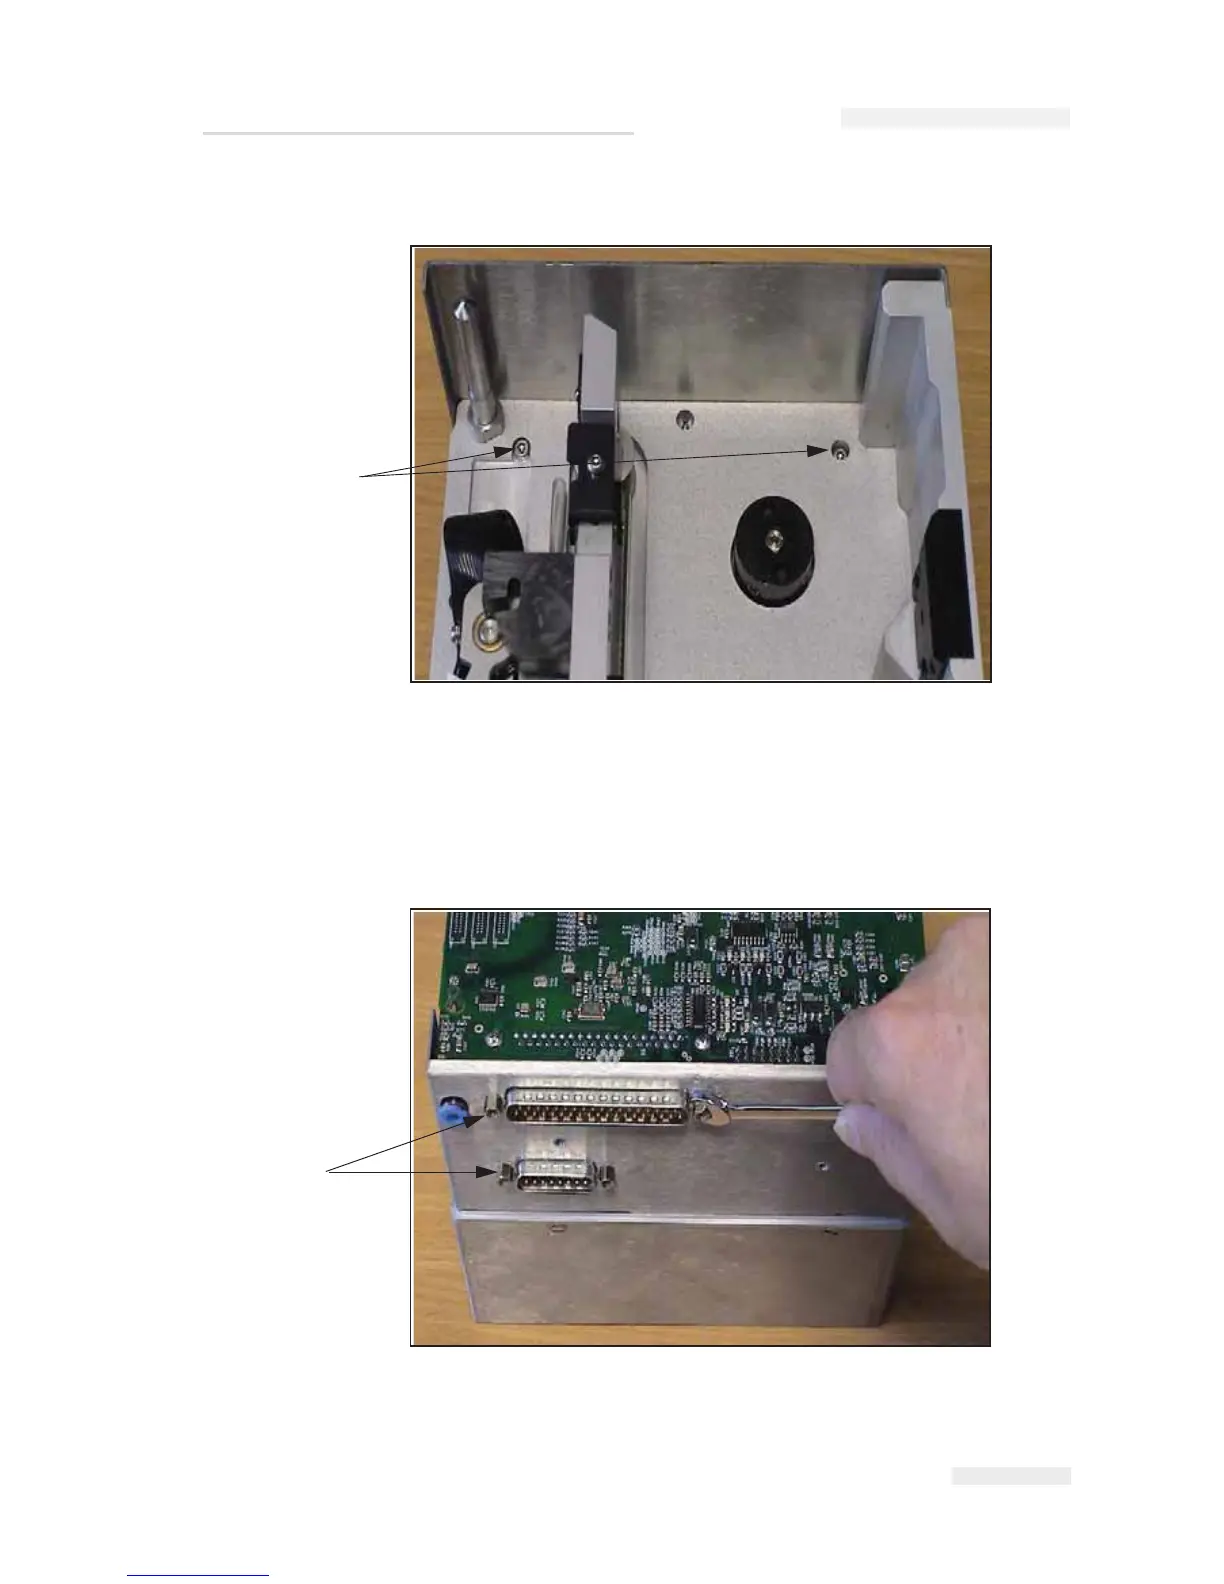
4 Next remove the nuts securing the D-Type connectors to the side plate
still secured to the unit (Figure 5-15).
Screws
Figure 5-14: Cassette Screws Removal
Figure 5-15: D-Type Securing Nuts
Nuts
I
CE Pegasus Service Manual