Chapter 3 Welder Operation Description 41
Ehave Series Full Digital IGBT CO
2
/MAG/MMA Multifunctional Inverter Welder User Manual
Welding arc is
generated.
Turn on the
power switch of
the welding
torch.
Turn off the
power switch of
the welding
torch.
Switch to the ending arc.
Turn on the
power switch
of the welding
torch again.
Turn off the
power switch of
the welding
torch again.
Welding stops.
Welding arc
generation is
locked.
Ending arc is
generated
again.
Turn on the power
switch of the
welding torch
within 2 seconds.
Turn off the
power switch of
the welding
torch again.
Welding stops.
Ending arc is
generated
again.
Turn on the power
switch of the
welding torch again.
Welding stops.
Turn off the
power switch of
the welding
torch again.
Repeated within 2 seconds
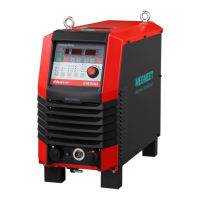
Figure 3-14 Schematic diagram of welding with repeated ending arc
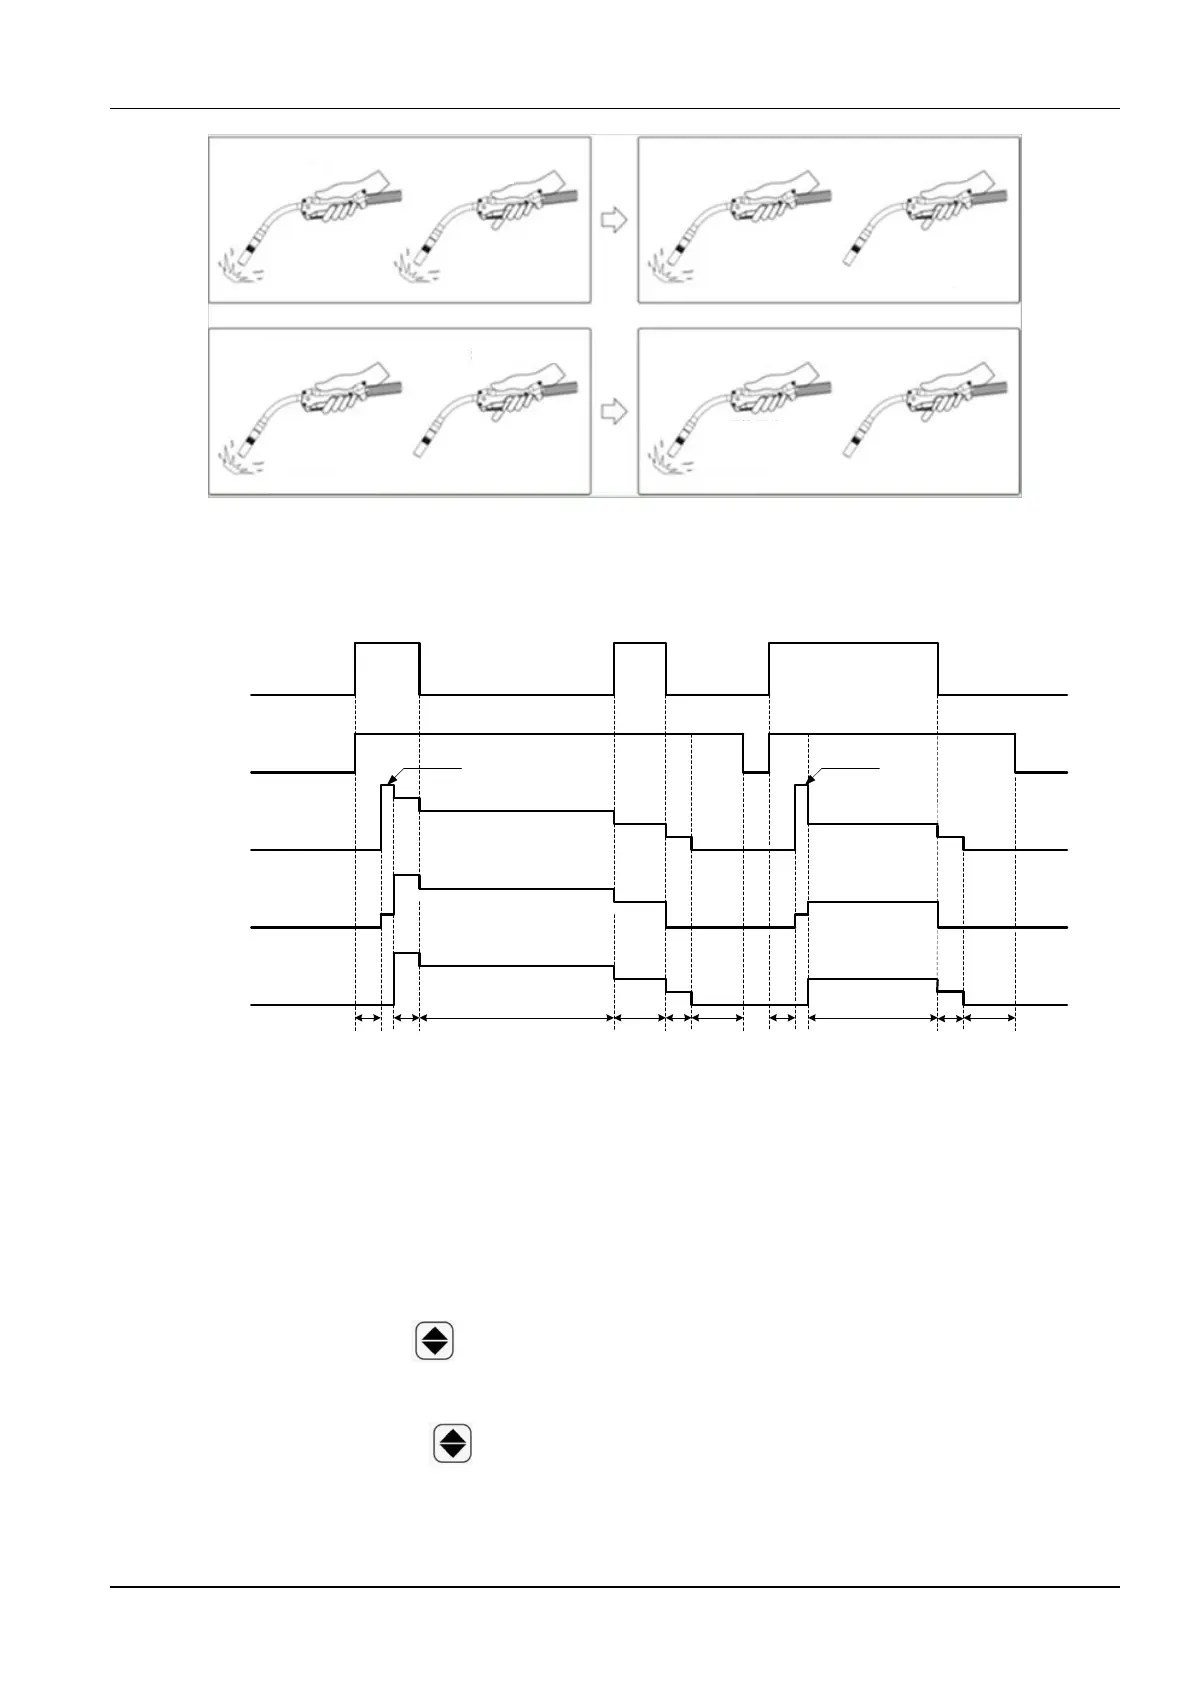
Figure 3-15 shows the welding logic.
Welding
torch
switch
Gas
sending
Welding
voltage
Wire
inching
speed
Welding
current
Send gas
before
welding
Open circuit voltage
Starting
arc
Weld
Wire sticking
prevention
OFF
ON
OFF
Delayed gas
sending
ON
OFF
Ending
arc
ON
OFF
Delayed gas
sending
Wire sticking
prevention
Ending
arc
Open circuit voltage
Send gas
before welding
Figure 3-15 Logic for welding with repeated ending arc
3.4.6 Synergic/Manual
Synergic
The welding voltage varies with the welding current. The procedure is as follows:
1. Press the Manual button on the control panel and rotate the voltage adjusting knob on
the wire feeder to set the standard voltage to 30 V.
2. Press the Synergic button on the control panel and perform welding in synergic
mode.