103
To install memory:
1. Remove the front top cover as described in Chapter 6.
2. Lift the peripherals in their brackets out of the base and lay them on the back top cover.
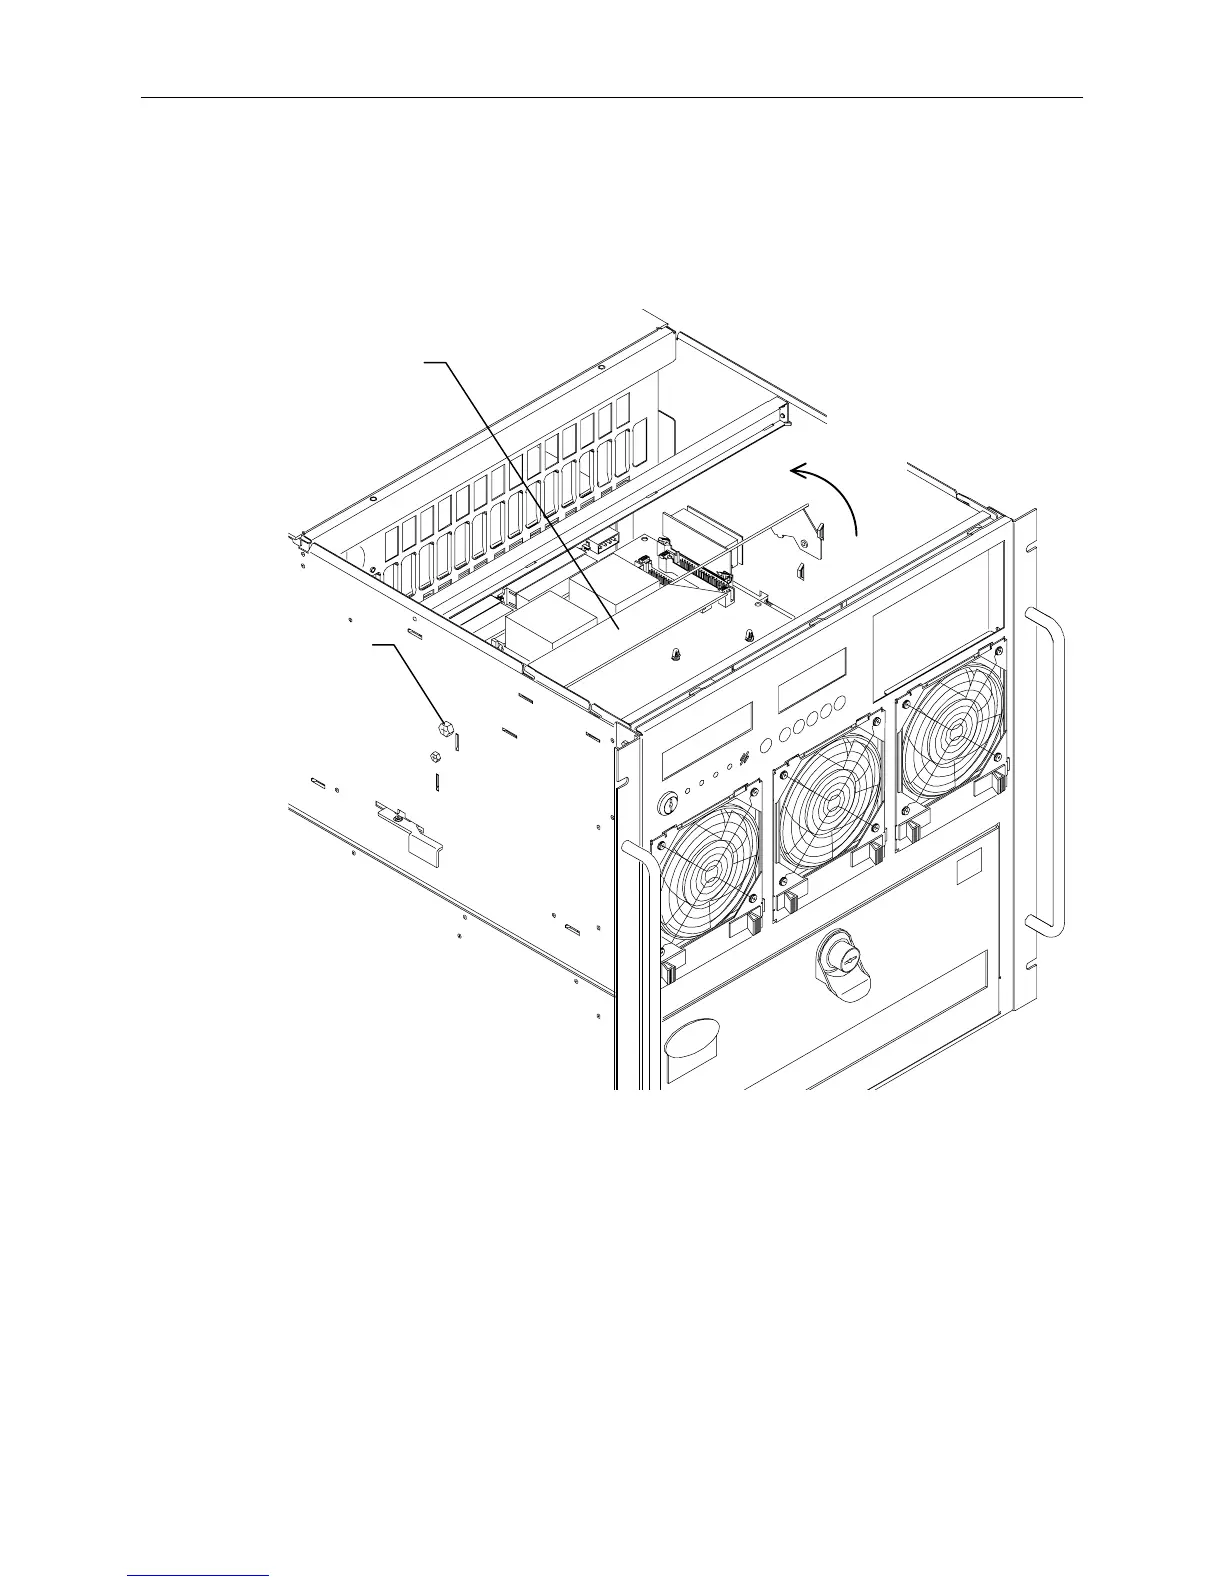
3. Undo the thumb screw on the left side of the system. Rotate the airflow baffle backwards to access
the SIMMs. Refer to the following figure.
Airflow Baffle
Rotate
Back
Thumb
Screw
4. Examine the sockets and become familiar with the layout as shown on page 102.
5. Remove all installed SIMMs.
6. Starting from the outer socket of the last bank to be populated, install a SIMM at an angle (leaning
towards the center of the board) and push them up. Ensure the metal socket tabs engage the
SIMM. Repeat for every SIMM, installing the next SIMM into the socket closer to the center of
the board.
For example, if your InterServe system has minimum memory, and you are adding three Intergraph
memory kits (12 SIMMs total), install the first two SIMMs in sockets J29 and J44 of Bank 1, then
work towards the center of the board.
7. Rotate the air baffle into its proper position and replace the thumb screw.
8. Replace the peripherals.