39
RAID Disk Drives
The StudioZ RAX comes standard with eight RAID disk drives: four to be installed into the internal
disk drive section of the base unit, and four in the external InterRAID-8 cabinet. Two disk drive boxes
(one labeled “Internal” and one “External”) contain the disk drives and a drive labeling sheet. The
standard disk drives are pre-labeled with capacity (GB), adapter number (ADP), channel (CH), and slot
ID (ID).
If additional disk drives are shipped, they are included in separate boxes. These drives are unformatted
and have a blank label that must be completed after installing them. Before installing drives with a
blank label, install the drives in the “Internal” and “External” boxes first.
To install the standard RAID disk drives:
1. Open the disk drive door to the internal RAID section.
NOTE Use the key supplied in the base unit parts box to open the disk drive door. Insert the key and turn it
clockwise to unlock, counterclockwise to lock.
1. Remove the disk drives from the “Internal Drives” box. These drives contain a label similar to the
following:
0
ID
1
CHN
0
ADP
x GB
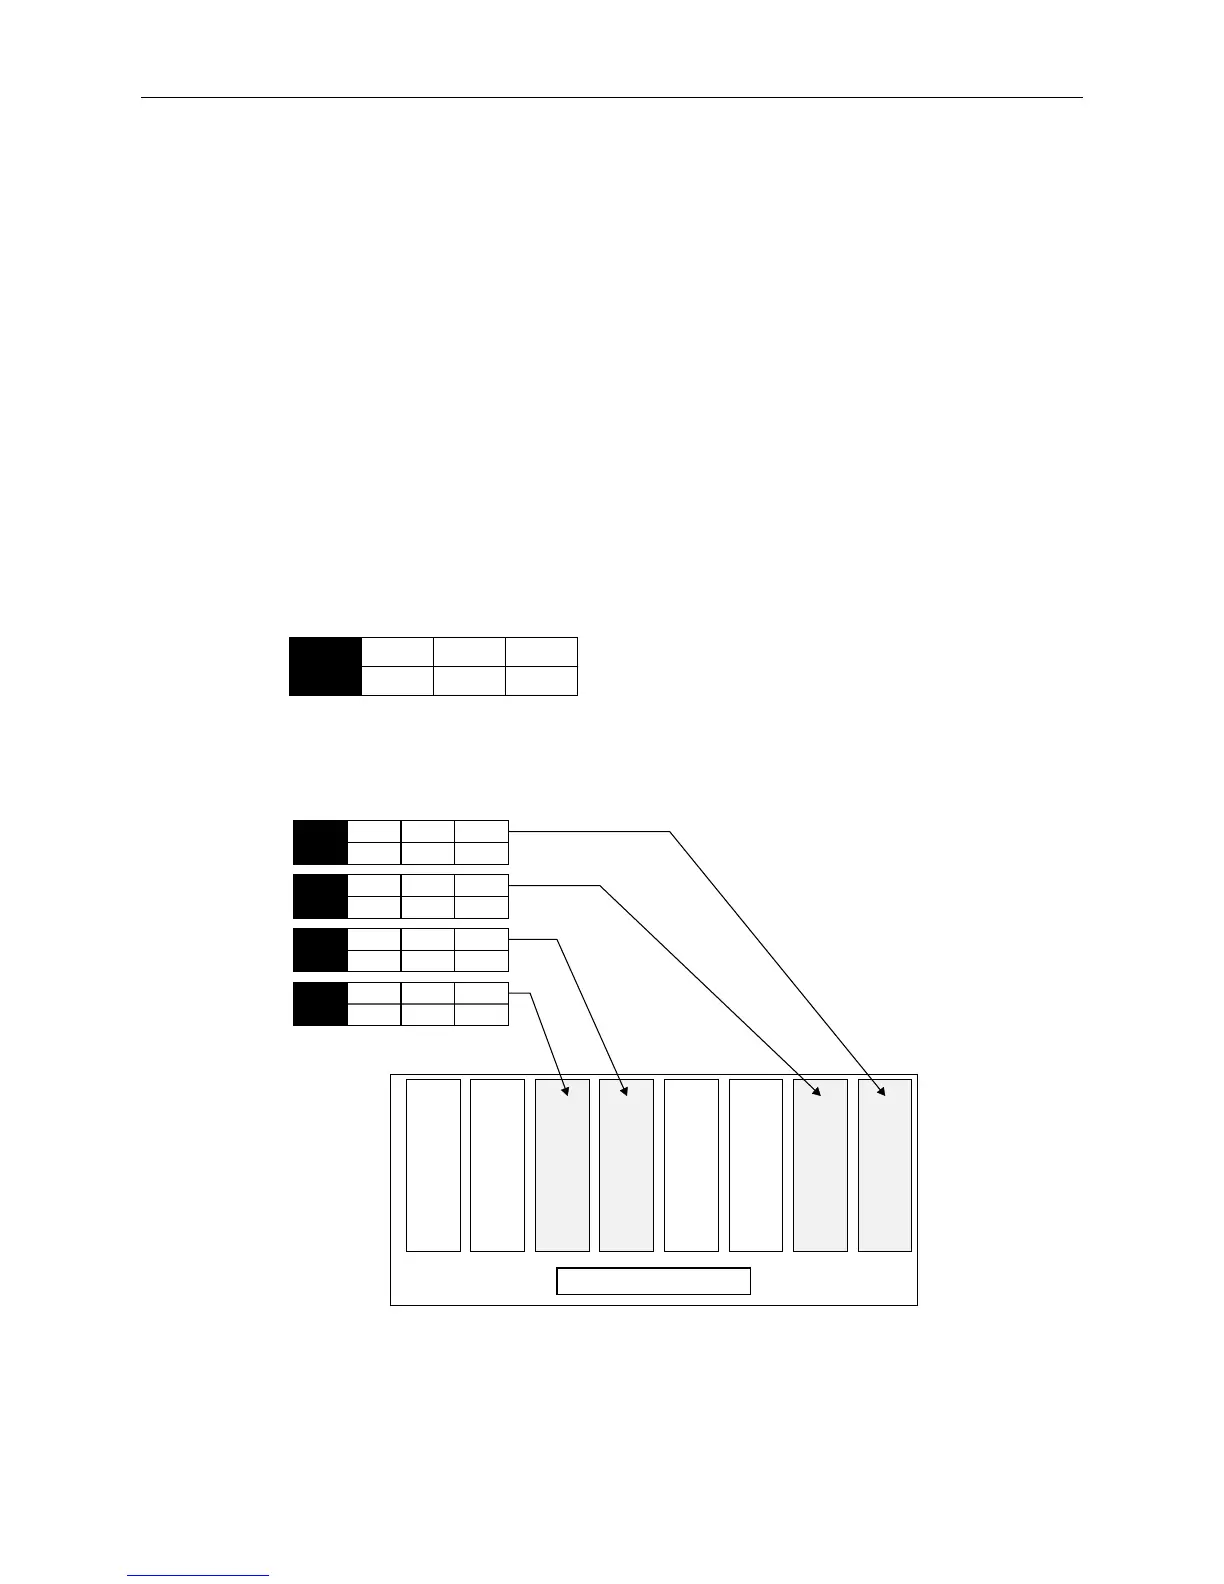
2. Open the access door of the internal disk drive section in the StudioZ RAX base unit. Slots are
numbered 1 to 8 from the right slot to the left.
3. Install the drives into slots 1, 2, 5, and 6, as shown in the following figure.
Slot 2 Slot 1Slot 3Slot 4Slot 5Slot 6Slot 7Slot 8
Internal Disk Cabinet
0
ID
1
CHN
0
ADP
x GB
1
ID
1
CHN
0
ADP
x GB
0
ID
2
CHN
0
ADP
x GB
1
ID
2
CHN
0
ADP
x GB
− For each RAID disk drive, extend the latching clips on the drive and align the rails on the side
of the drive with the guides inside the slot. The metal casing of the drive faces left. If you
install the disk drive reversed, the drives will not connect to the system.