Chapter 3 — Replacing Parts
60 EasyCoder PD41/PD42 Printer Service Manual
Before replacing the LTS, troubleshoot it by checking that:
• The sensor is in its horizontal position.
• Nothing blocks the LED and the sensor, for example dust or stuck
labels.
• The back side of the media is able to reflect the light.
• The cables of the sensor are undamaged and properly connected to P38
(“LTS”) on the main board.
To replace the Label Taken Sensor
1 Disconnect the power cord and remove the left-hand panel (For help,
see “To remove the left-hand panel” on page 27).
2 Remove the front panel (For help, see “To replace the front panel” on
page 22).
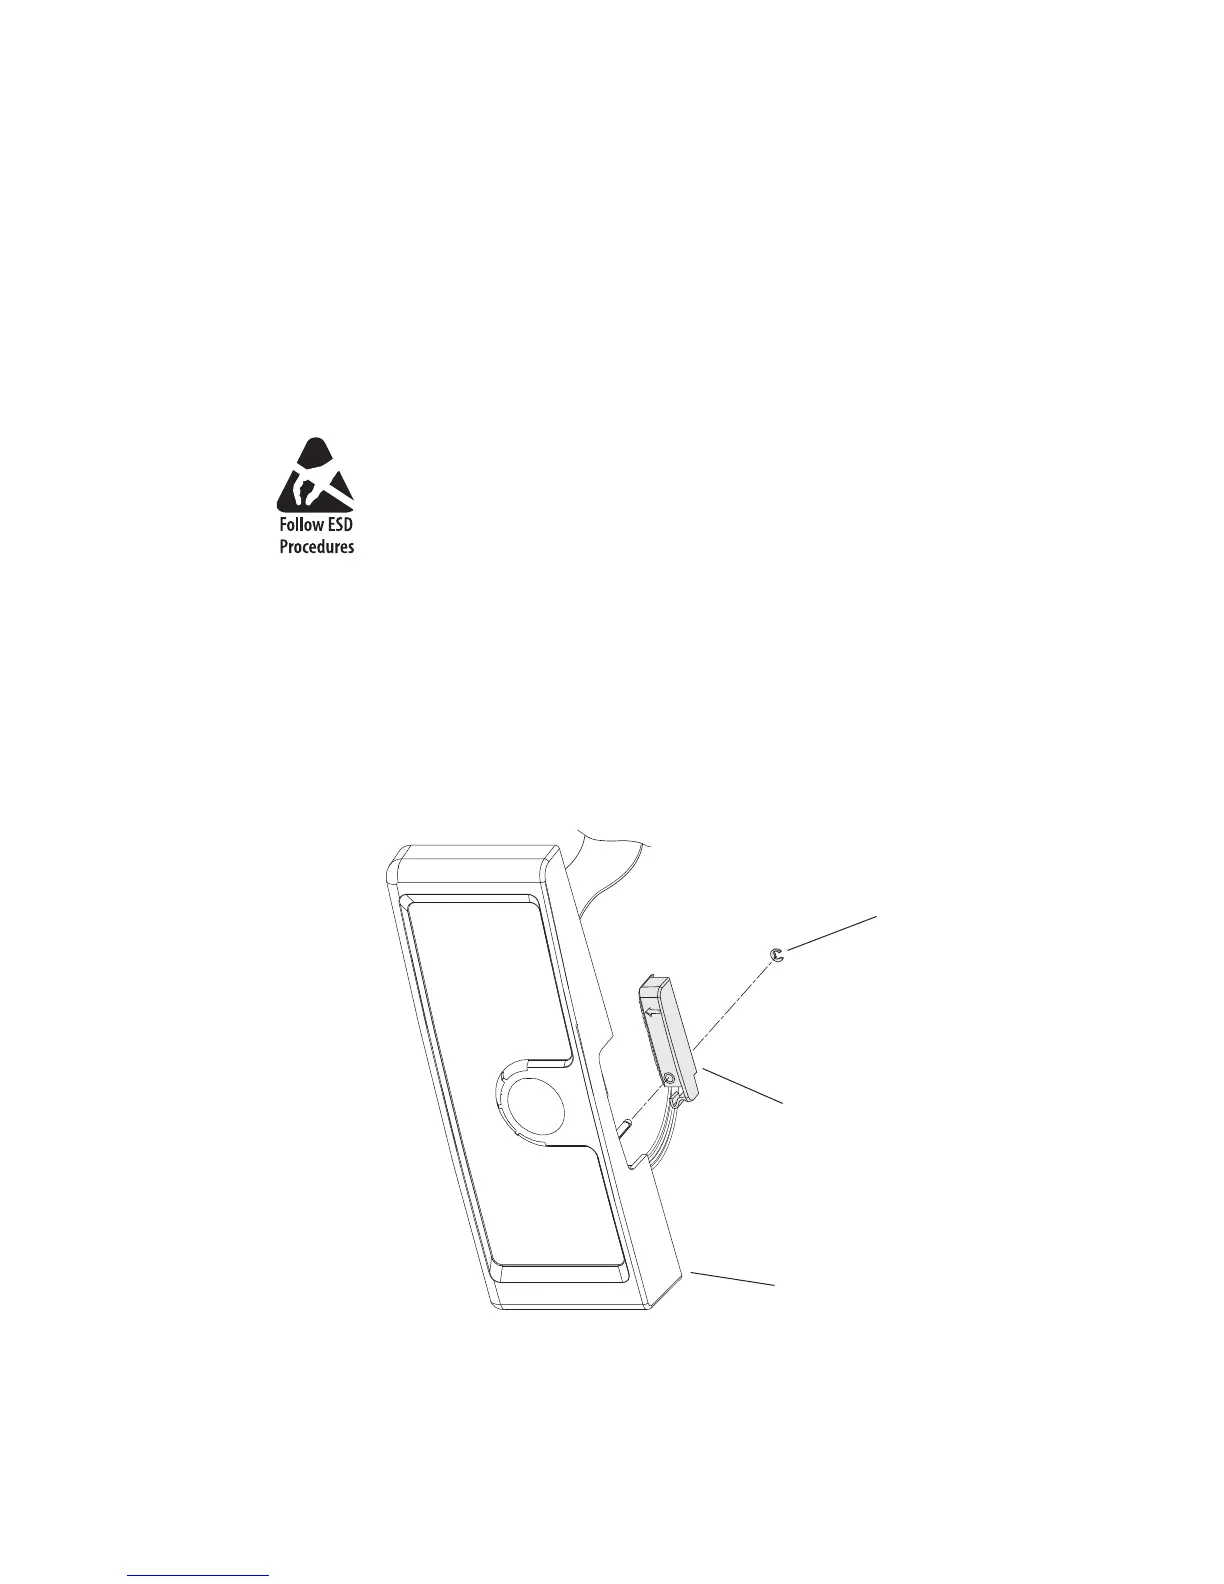
3 Remove the E-ring that holds the LTS and pull it away. The LTS is only
available as a complete unit.
4 Assemble in reverse order.
Label Taken Sensor
Take standard precautions against ESD (Electrostatic Discharges)
before touching any electronics components.
PUSH
E-ring
Label Taken Sensor
Front Panel (PD41)