Chapter 3 — Replacing Parts
38 EasyCoder PD41/PD42 Printer Service Manual
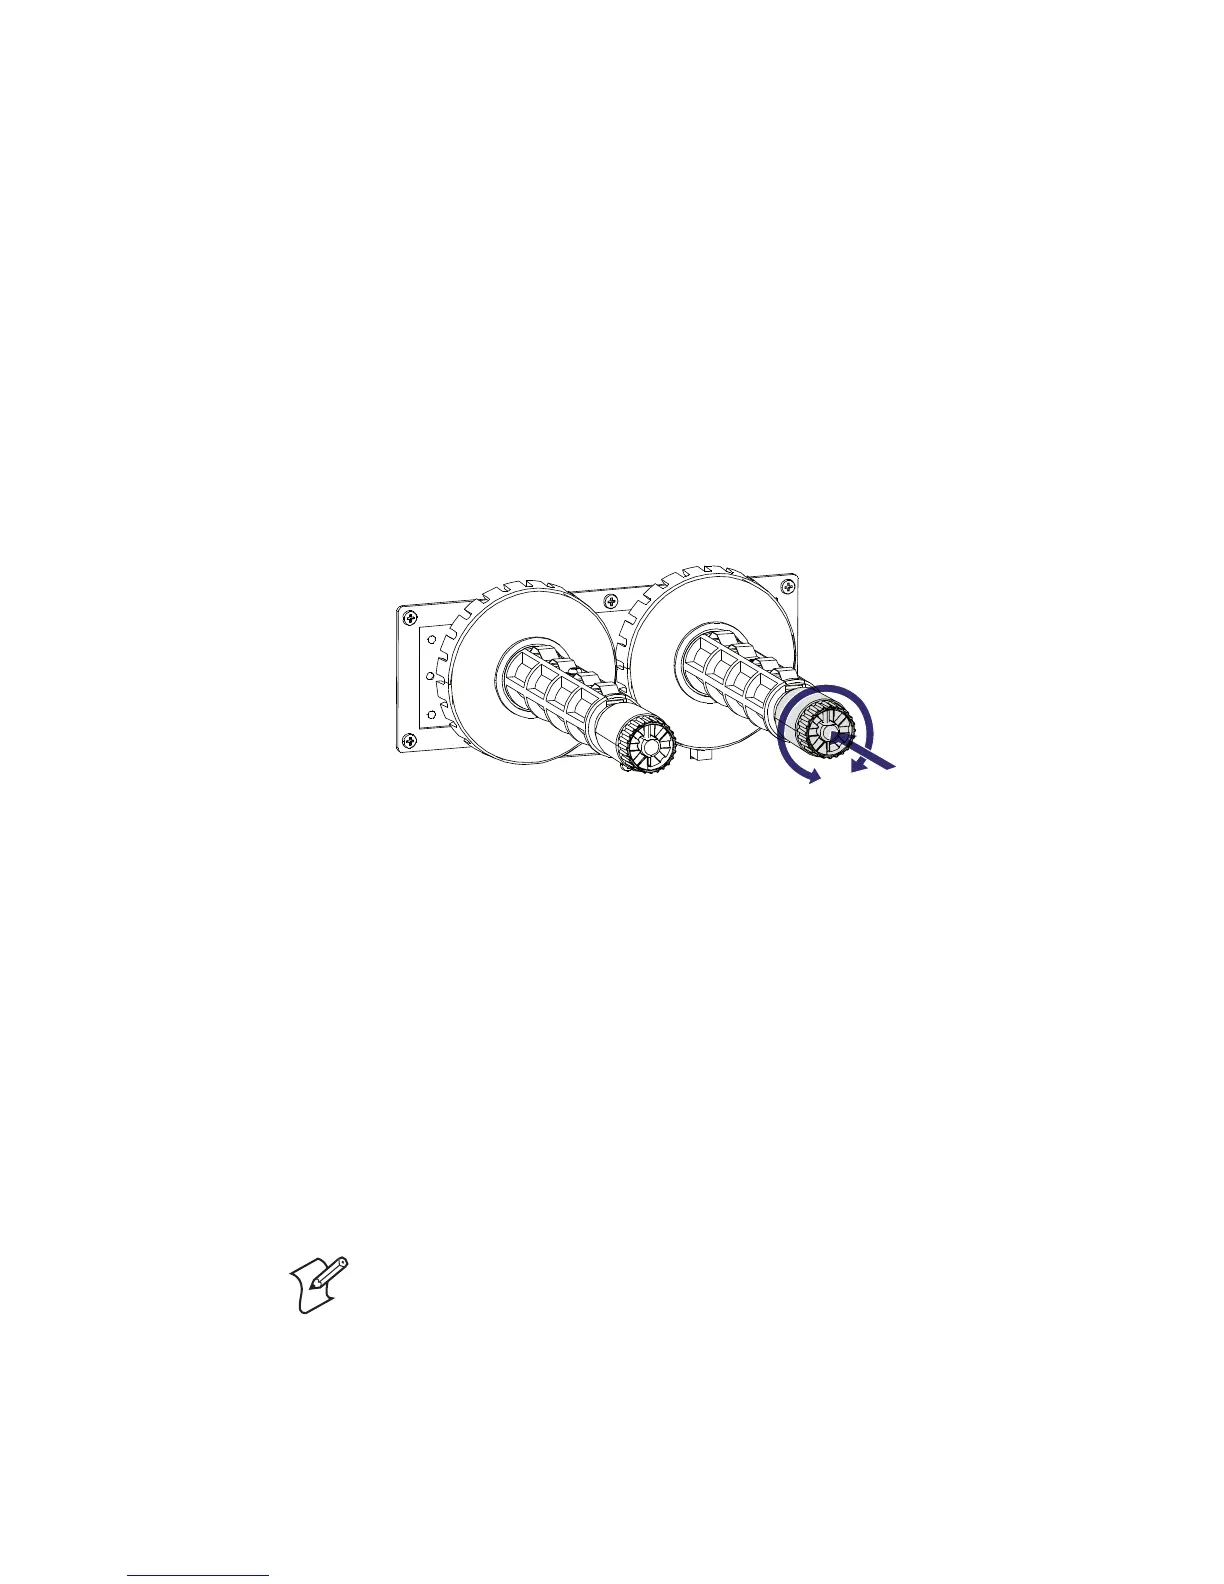
Adjusting Ribbon Tension
The knob at the outer end of each unit is engraved with numbers from 1 to
4, where 1 is maximum friction and 4 is minimum friction. Factory default
is #1 on the supply unit and #2 on rewind unit. If the friction settings
prevent the ribbon from running with the same speed as the media,
smudging may occur.
If ribbon wrinkling occurs during printing, push the knob on the ribbon
supply hub inwards (1) and rotate it clockwise to increase the breaking
force (2).
If the printer has problems pulling the labels (especially when using a
ribbon less than 50 mm/2 inches wide), push the knob on the ribbon
supply hub inwards (1) and rotate it counterclockwise to decrease the
breaking force (2).
Adjusting Ribbon Tension
Ribbon Out Sensor
The ribbon out sensor is attached to the center section from the electronics
compartment using a single screw. The sensor is connected to connector
P39 (RIBBON) on the main board.
The sensor assembly consists of a LED and a sensor mounted on a circuit
board. The LED emits a beam of light that is detected by the sensor. The
ribbon supply unit has a flange with slots situated, so the light is
intermittently let through or interrupted as the flange rotates. If no rotation
is detected during printing, an out-of-ribbon condition is assumed. This
causes error “Out of transfer ribbon” (Error 1027), and the red LED emits a
solid glow if the printer is set up for thermal transfer printing. If the printer
is set up for direct thermal printing, the ribbon out sensor is not used.
To replace the ribbon out sensor
1 Disconnect the power cord and remove the left-hand panel (For help,
see “To remove the left-hand panel” on page 27).
1
2
Note: Before replacing the sensor, check that the malfunction is not caused
by dust or foreign objects. Also disconnect and connect the cable to the
main board a few times to remove any oxide.