Wireless Access Point
User Guide
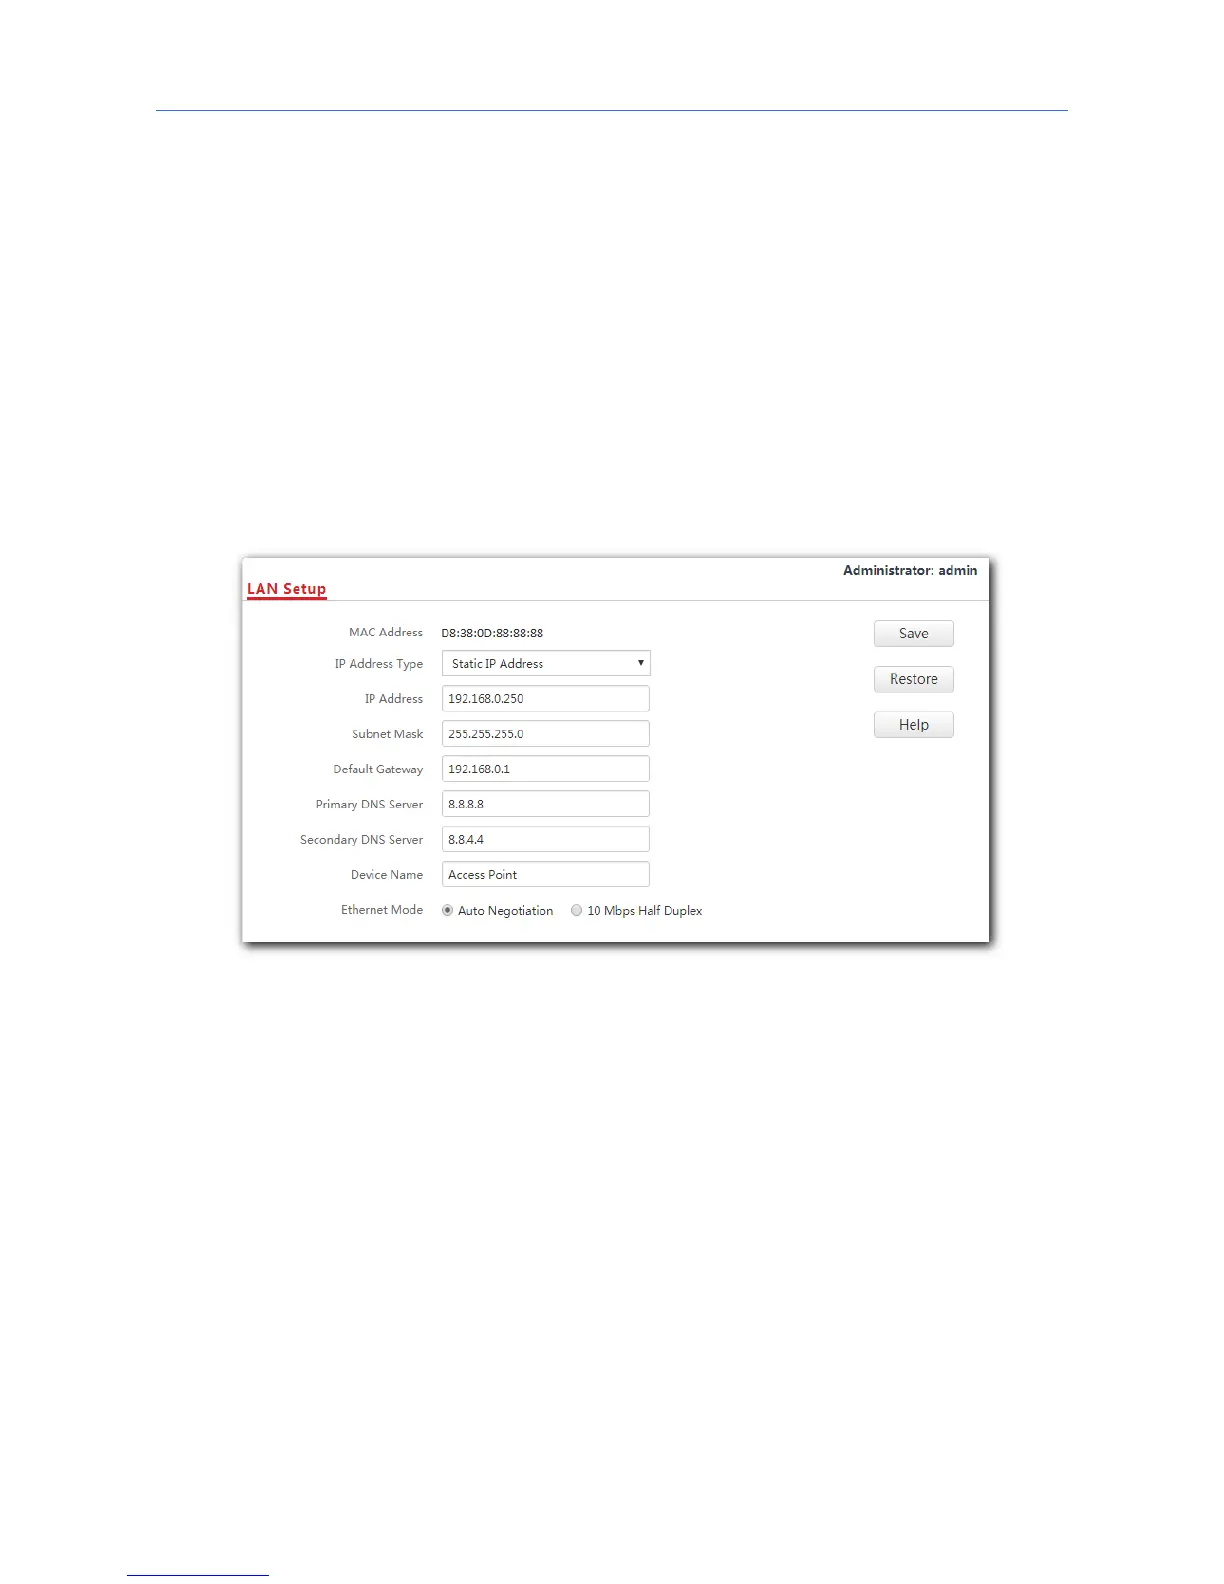
Procedure:
1. To access the configuration page, click Network Settings > LAN Setup.
2. Set IP Address Type to Static IP Address.
3. IP Address: Enter the static IP address for your AP, which is 192.168.0.250 in this
example.
4. Subnet Mask: Enter the subnet mask for your AP, which is 255.255.255.0 in this example.
5. Gateway: Enter the gateway for your AP, which is 192.168.0.1 in this example.
6. Primary DNS Server: Enter the primary DNS server for your AP, which is 8.8.8.8 in this
example.
7. Secondary DNS Server: If this parameter is available, enter the secondary DNS server for
your AP, which is 8.8.4.4 in this example. Otherwise, leave this box blank.
8. Click Save.
---End
After the configuration, if the new IP address of the AP belongs to the same network
segment as the IP address of your management computer, you can log in to the web UI of
the AP directly using the new IP address. Otherwise, before logging in to the AP’s web UI
using the new IP address, assign your computer an IP address that belongs to the same
network segment as the new IP address.
30