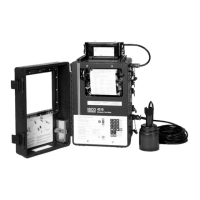
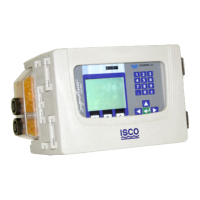
4210 Flow Meter
Section 4 Optional Equipment
4-19
tends to drive the solids further into the membrane
pores. You must usually replace both the electrolyte and
the membrane to get an accurate reading. In severe
cases of fouling it may be necessary to change the
membrane very frequently, even as often as every other
day.
4.11.1 How the D.O. Probe
Works
A thin permeable membrane stretched over the sensor isolates
the electrodes from the environment, but allows gases to enter.
When a polarizing voltage is applied across the sensor, oxygen
that has passed through the membrane reacts at the cathode,
causing a current to flow. The membrane passes oxygen at a rate
proportional to the pressure difference across it. Since oxygen is
rapidly consumed at the cathode, it can be assumed that the
oxygen pressure inside the membrane is zero. Hence, the force
causing the oxygen to diffuse through the membrane is propor-
tional to the absolute pressure of oxygen outside the membrane.
As the oxygen partial pressure varies, both the oxygen diffusion
through the membrane and the probe current change propor-
tionally.
4.11.2 D.O. Probe Preparation First, unscrew the sensor guard; remove the O-ring and mem-
brane, then thoroughly rinse the sensor with distilled water.
Prepare the KCl electrolyte according to the directions on the
bottle. Use distilled water only. You install the membranes by
hand. The probe is shipped with a small folder containing several
replacement membranes. To install a new membrane, follow
these steps:
1. Secure the probe body so it is in an upright position. You
can use a vise, adjustable wrench, or locking pliers, etc.,
whatever is satisfactory. Do not apply too much force to the
probe body, or you will crack it.
2. Fill the cavity around the silver anode with electrolyte.
The liquid should be free of bubbles and should completely
cover the tip of the sensor. Fill the cavity to the point
where any more electrolyte would spill over.
3. Lightly lay the membrane across the top of the probe. If
you do this carefully, there will be no bubbles under the
membrane.
Note
Handle the membrane material with care, touching it at the
ends only.
4. Place the O-ring on top of the membrane, generally con-
forming to the circumference edge of the probe.
5. Place the thumb and index finger from both hands opposite
each other on the O-ring at equal distances.
6. Roll the O-ring down over the end of the probe, being care-
ful not to touch the membrane where it covers the probe.