44
Replacing the Dynamic Cutter Blade
Setscrew B
Drive shaft ring
Setscrew C
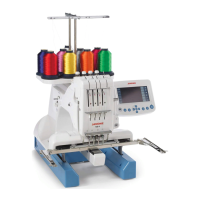
Drive shaft unit
Lever unit
Link shaft
1. Remove the setscrews A (2 pcs.) and needle plate.
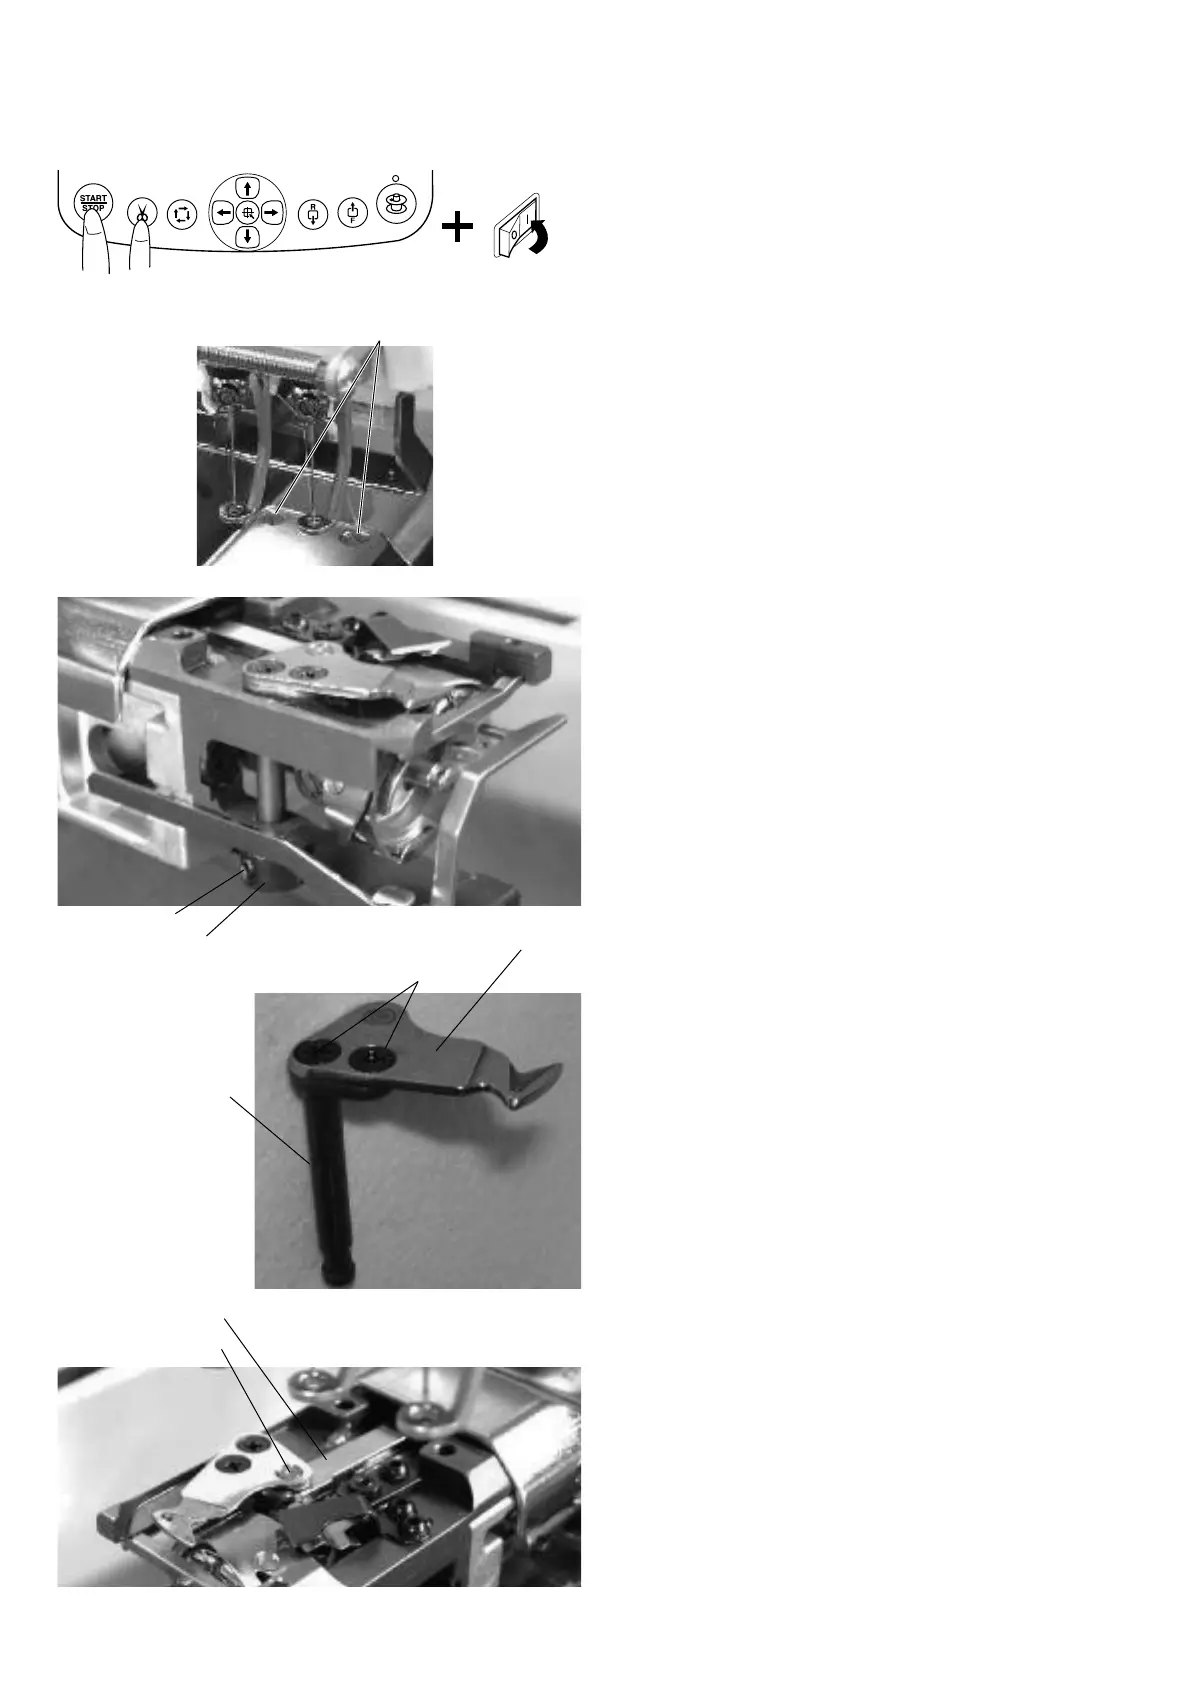
2. Turn the power switch on while pressing the Start/
Stop button and Thread cutter button at the same time
to open the
Factory Adjusting
window.
Press the
Phase
key to open the
Phase Sensor
adjusting window and press the
All Int
key.
Press the
Cancel
key to return to the previous
window.
Press the
Cut Adjust
key to open the
Cut Motor
adjusting window. Press
Divide
key to move the
dynamic cutter blade forward.
3. Loosen the setscrew B and remove the drive shaft ring.
4. Remove the cutter drive shaft unit from the frame.
Remove the setscrews C (2 pcs.) and replace the
dynamic cutter blade.
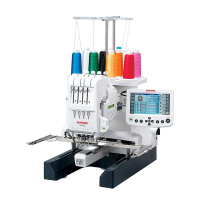
5. Insert the drive shaft into the frame and link pin of the
cutter drive shaft unit into the hole in the lever unit.
6. Attach the drive shaft ring and tighten the setscrew
while pressing the ring and shaft unit each other with
yourngers.
NOTE:
Be sure that there is no thrust play in the shaft unit.
7. Adjust the cutter blades position (see following pages)
and test auto thread cutting.
8. Attach the needle plate with the setscrews A.
Setscrew A
Dynamic cutter blade