63
1. Remove the spool stand, right cover, left cover, base
cover and X-carriage cover (see pages 4 to 7).
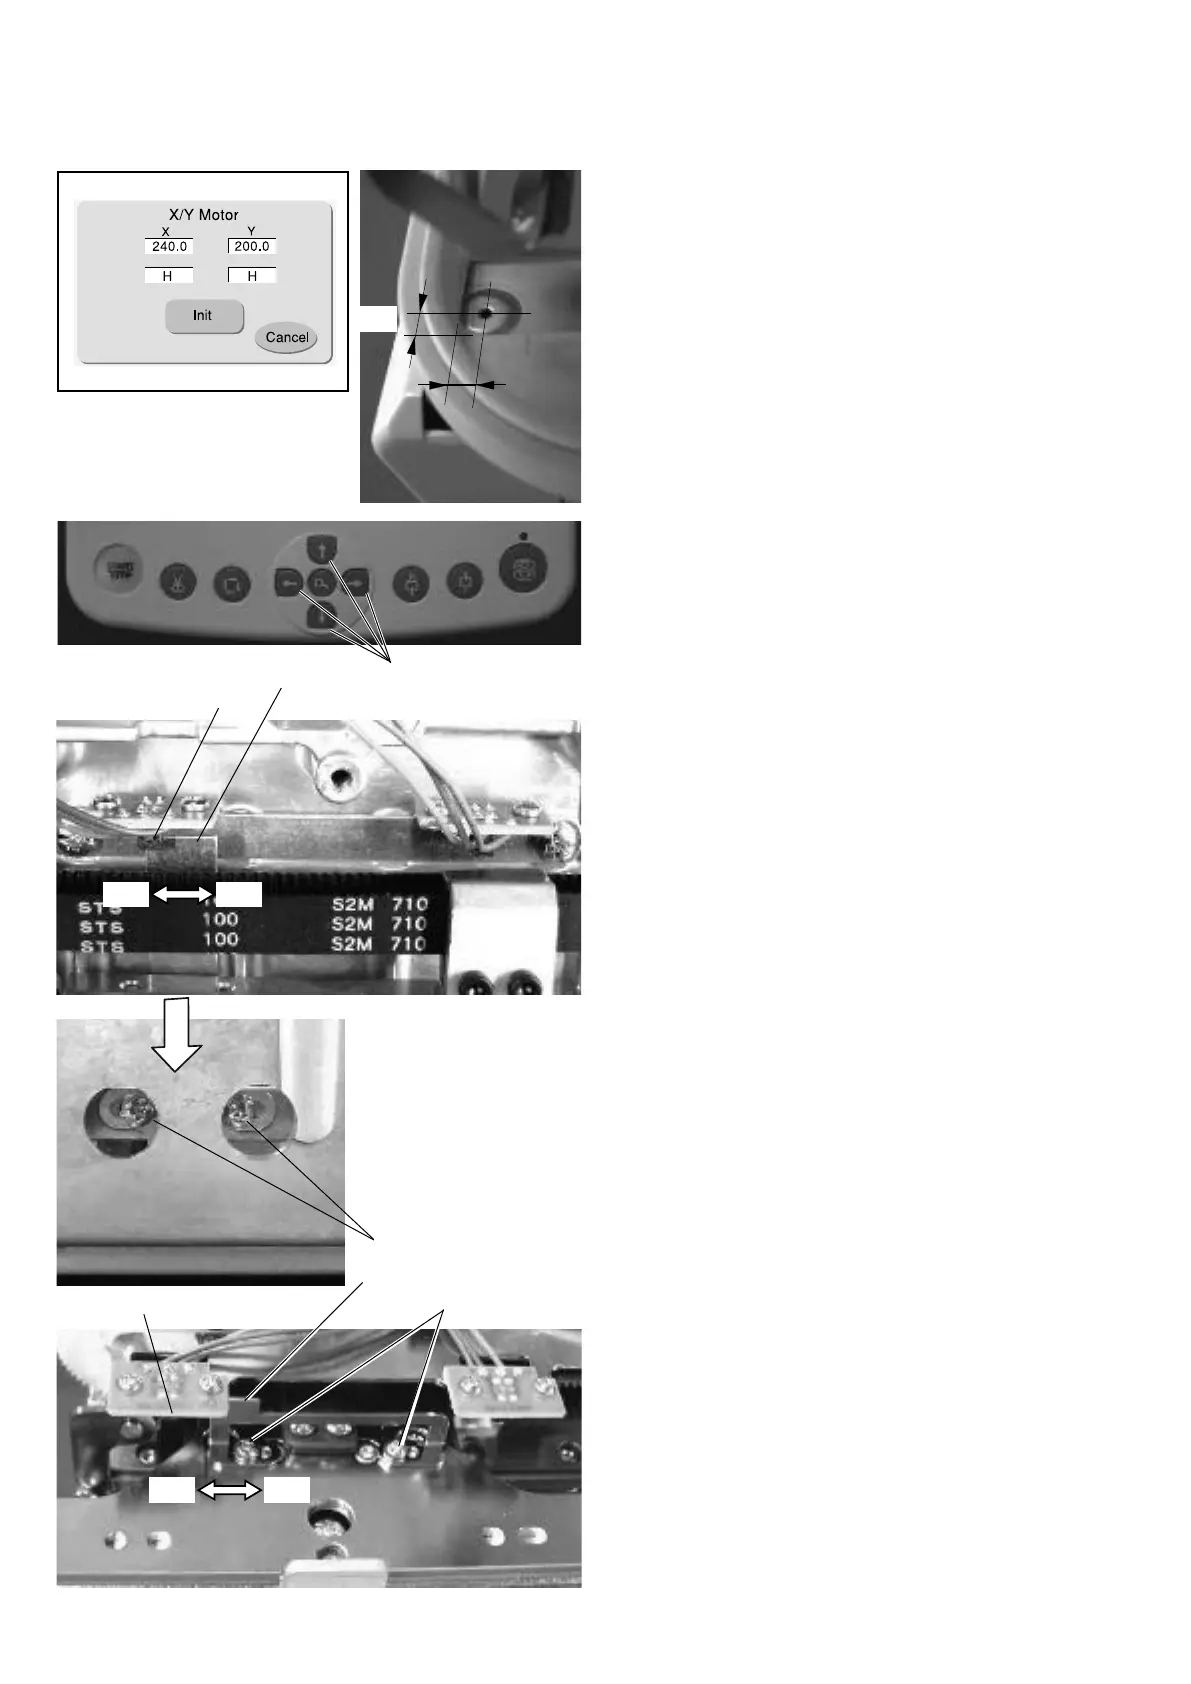
2. Attach the Hoop M1 (MB Hoop 240 X 200) to the hoop
supporter.
3. Open the factory adjusting menu window and press
the
X/Y Motor
key to open the
X/Y Motor
adjusting
window.
4. Press the jog buttons to move the carriage to where
the center of the hole in the needle plate is positioned
7 mm by 5 mm from the bottom left corner of the inner
sides of the hoop.
5. Loosen the setscrews A (2 pcs.) slightly.
Move the Y-carriage sensor plate slowly to the front
until the indication under
Y
changes from “
H
” to “
L
”.
Tighten the setscrews A (2 pcs.).
6. Loosen the setscrews B (2 pcs.) slightly.
Move the X-carriage sensor plate slowly to the left
until the indication under
X
changes from “
H
” to “
L
”.
Tighten the setscrews B (2 pcs.).
NOTE:
The sensors should not interfere with the carriage.
7. Attach the parts removed in step 1.
Adjusting the Carriage Home Position
Y-carriage sensor plate
Setscrew A
Y-carriage sensor
X-carriage sensor plate
X-carriage sensor
Jog buttons
Setscrew B
Front
Front Back
Left Right
X
Y