SECTION 3 - CHASSIS & TURNTABLE
3-16 3121714
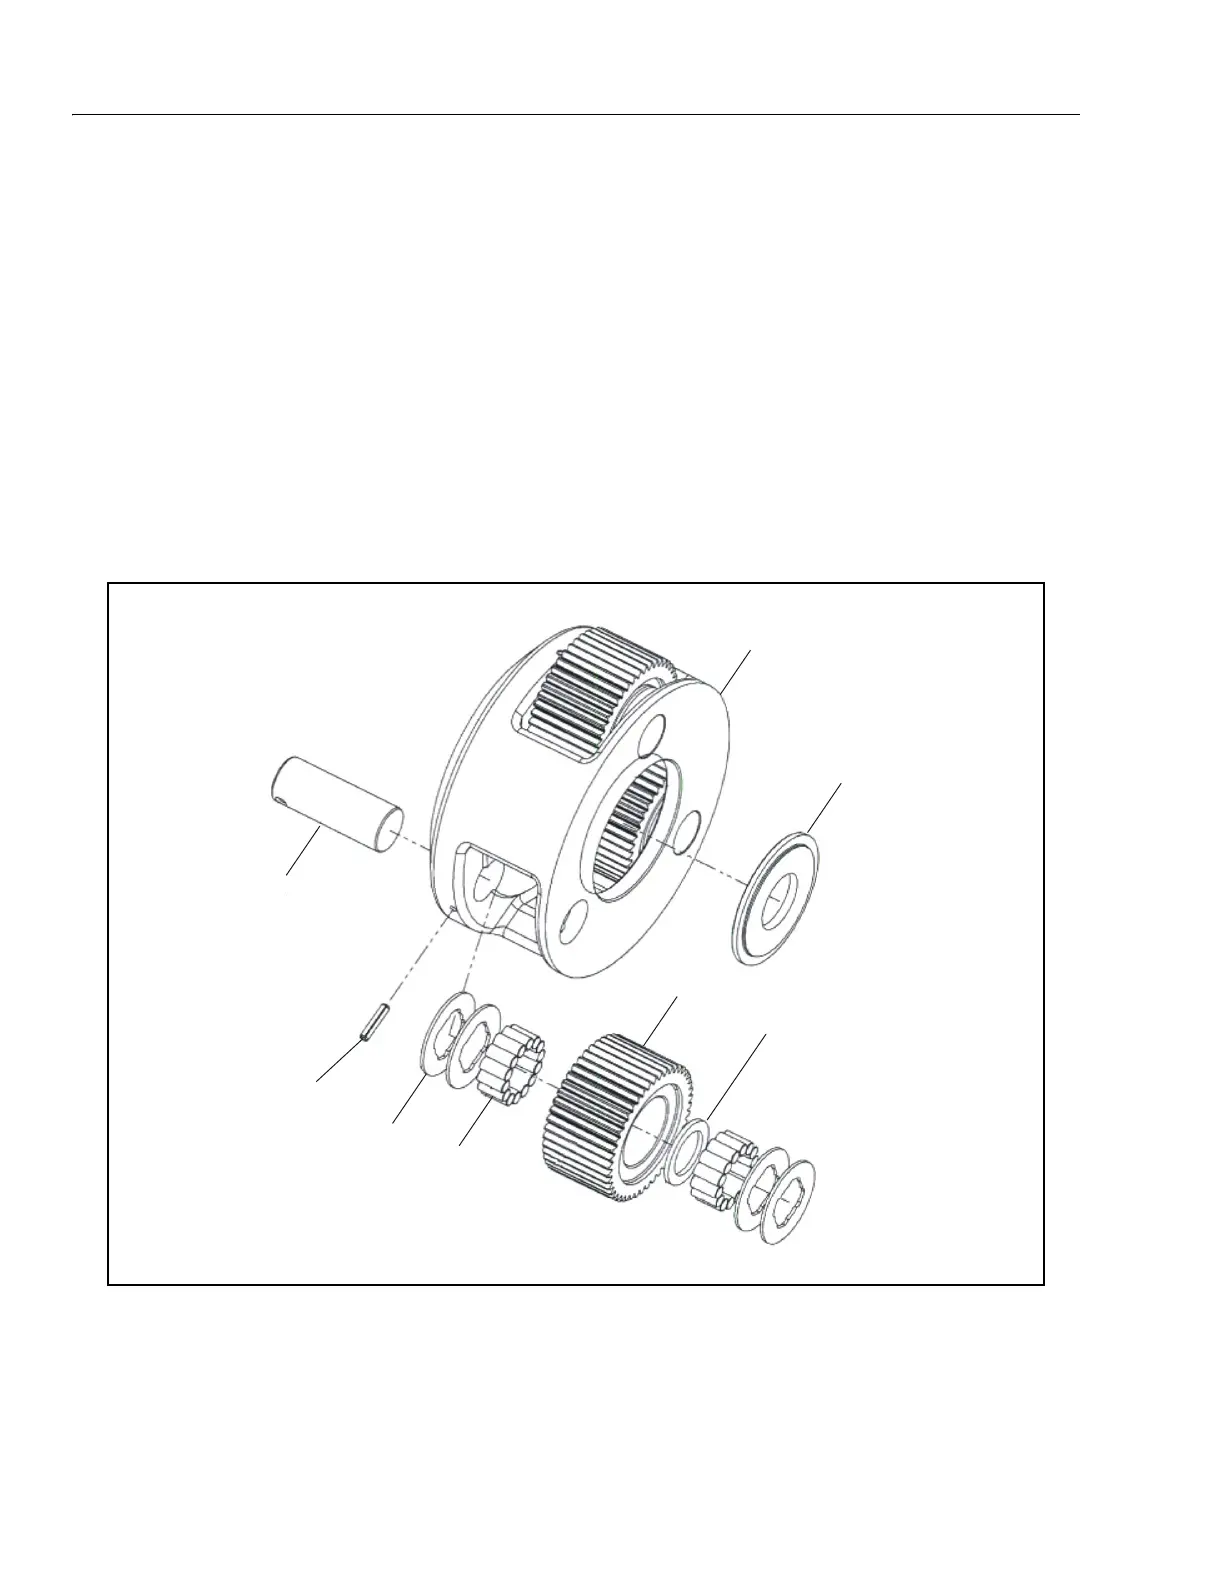
Output Carrier Disassembly
NOTE: Refer to Figure 3-13., Output Carrier and Figure 3-14.,
Planet Gear.
1. Using a 1/8” diameter punch, drive the Roll Pin (4G) into
the Planet Shaft (4E) until it bottoms against the Carrier
(3A).
2. Using a soft face hammer, tap the Planet Shaft (4E) out
of the Carrier (4A).
3. Using a 1/8” diameter punch, drive the Roll Pin (4G) out
of the Planet Shaft (4E).
NOTE: The Roll Pins (4G) should not be reused when reassembling
the unit.
4. Slide the Planet Gear Sub-assembly (4) out of the Output
Carrier (4A) being careful to not drop the Needle Bear-
ings (4C) in the process.
5. Remove 4 Thrust Washers (48), 28 Needle Rollers (4C)
and the Thrust Spacer (40) from the Second Stage Planet
Gear (4F).
6. Repeat Steps 1 though 5 for the remaining two Planet
Gears (4F).
7. Remove the Thrust Washer (4H) from the counterbore in
the Output Carrier (4A).
+
$
(
*
%
&
)
'
4A. Output Carrier
4B. Thrust Washer
4C. Needle Bearing
4D. Thrust Spacer
4E. Planet Shaft
4F. Planet Gear
4G. Roll Pin
4H. Thrust Washer
Figure 3-13. Output Carrier