26
4.7 CHECK AND REPLACEMENT OF THE POWER ENTRY MODULE 6.3A FUSES
" : Multimeter, small ! at screwdrive.
6 : 30’
i : Defective fuses may cause the following malfunctions:
Turning the machine on, the machine does not show anything.
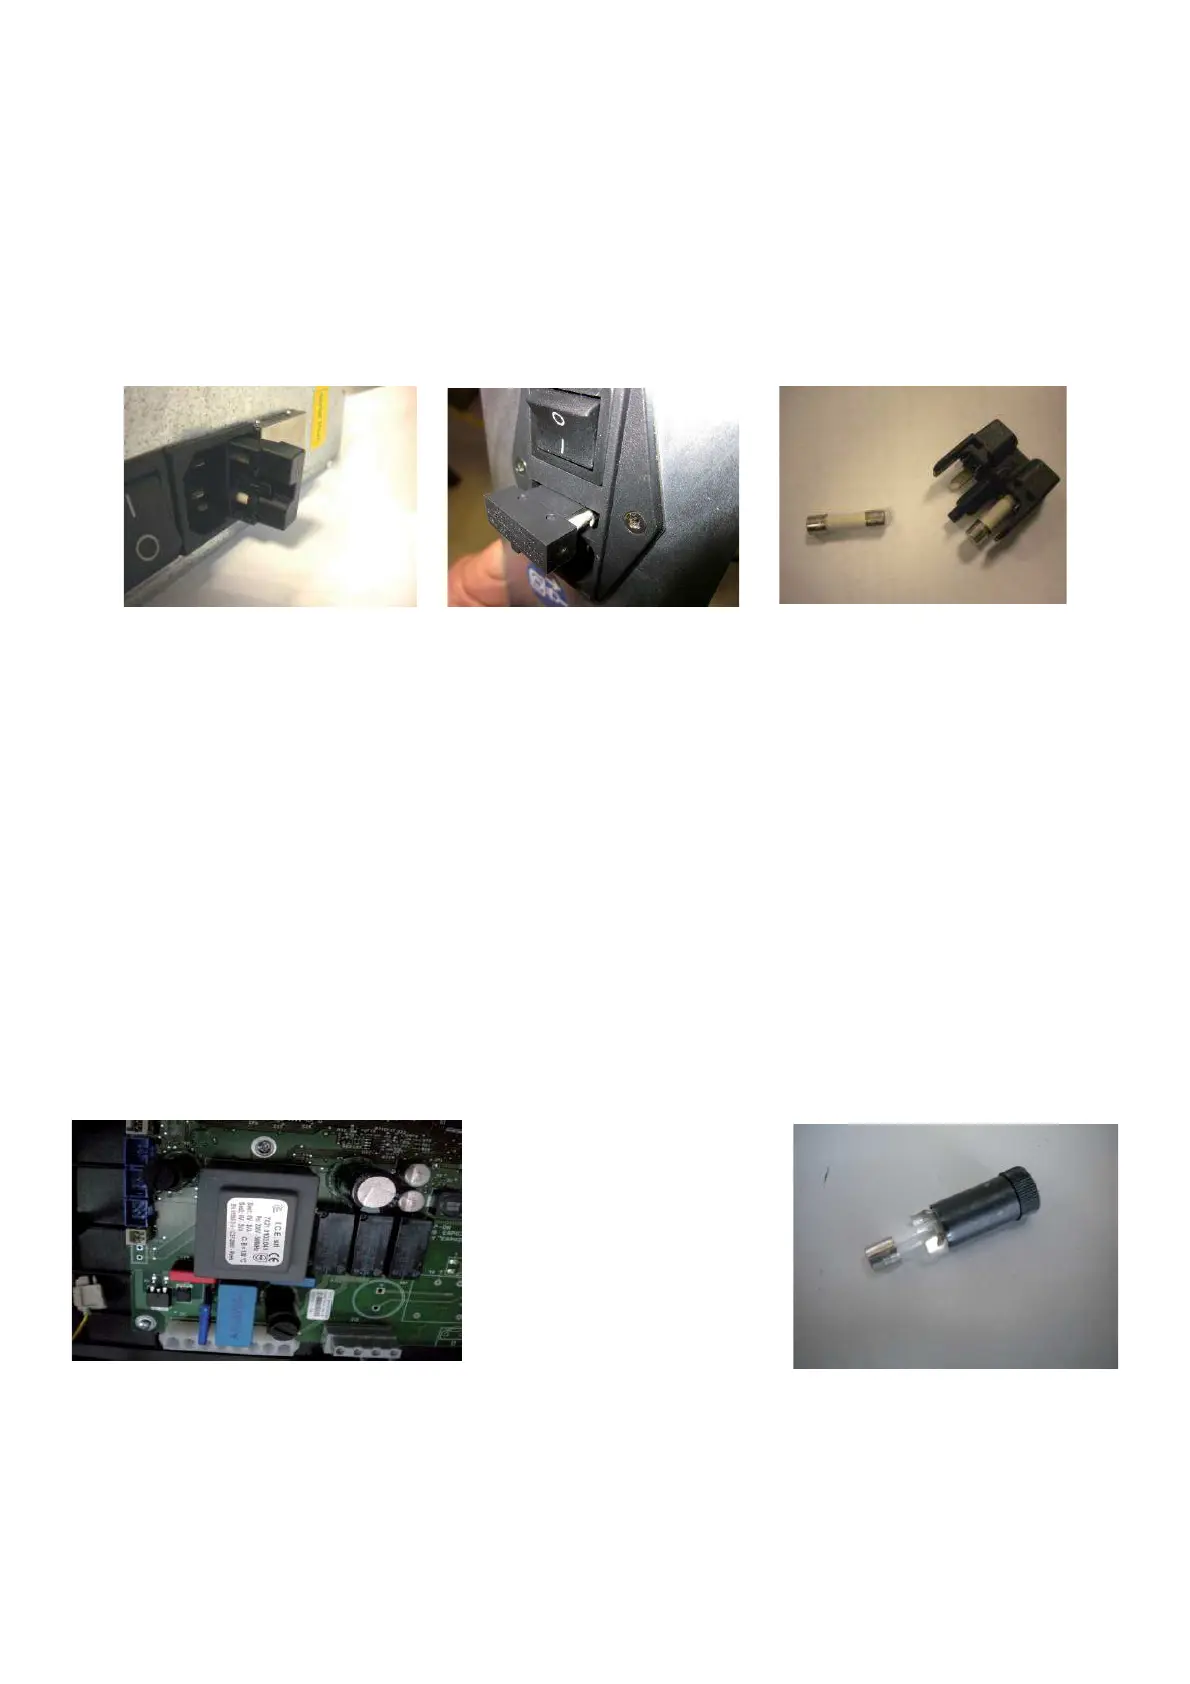
TO CHECK AND REPLACE THE FUSES
Ø Turn the balancer off.
Ø Unplug the power supply cable.
Ø Remove the fuses holder from the power entry module
Ø Remove the fuses from the holder.
Ø Take the Voltmeter and select it in Ohm.
Ø Make sure that there is continuity among the two ends.
Ø If there is not the continuity, replace the fuse or the fuses with new ones of the same Amps and same voltage.
Ø Insert the new fuses in the holder and install them on the entry power module.
4.8 CHECK AND REPLACEMENT OF THE INTEGRATED DISPLAY F1 AND F2 F FUSE
" : Multimeter, big and medium Phillips screwdriver.
6 : 30’
i : Defective fuses may cause the following malfunctions:
Turning the machine on, the machine does not show anything.
TO CHECK AND REPLACE THE FUSES
Ø Turn the balancer off.
Ø Unplug the power supply cable from the balancer.
Ø Remove the weight tray.
Ø Access to the Integrated Integrated Display board.
Ø Lift the fuse with the screwdriver to remove it easily from its holder.
Ø Take the Voltmeter and select it in Ohm.
Ø Make sure that there is continuity among the two ends.
Ø If there is no continuity, replace the fuse with new one of the same Amps and voltage.
Ø Insert the new fuse in the holder and install the plastic cover.
Ø Turn on the balancer and check if it works " ne.
Ø Turn off the balancer.
Ø Mount the weight tray.
Ø Turn on the balancer and check again if it is still working " ne.