4-21
8. Select “TIME” by using .
9. Enter a switching time by using
and press .
Starting an auto screen
1. Switching the USER MODE to use an auto screen function
2. Press and hole for 1 second or more.
Stopping an auto screen
1. Press any keys except and .
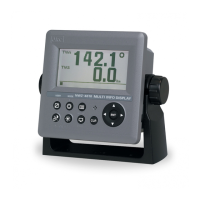
Setting a display mode
The display mode can be set only with segmentaion1 screen.
The contents of a display with an effective auto range are SOG, STW, ROT, depth, current, trip, and
total distance (ODO).
Even if it sets up an auto range by the other contents of a display, it becomes the normal display.
An auto range changes a display in the following range.
Auto range
The contents of a
display
Integer part expanded
display
Usual display Decimal part
expanded display
SOG/STW 10kn or more 1.0 - 9.9kn 0.9kn or less
ROT
More than 600°/ min 1.0-599.9° / min 0.9°/ min or less
Depth 10 m or more 9.9m or less -
Total dis tance/
Trip
10NM or more
1.00 - 9.99NM
0.99NM or less
Current 10kn or more 1.0 - 9.9kn 0.9kn or less
1. The contents of a display are set up with the above-mentioned operating procedure.
2. Select the “ DISPLAY MODE” by using and press .
3. Select the “NORMAL”, SPECIAL1“”, “SPECIAL2” or “AUTO RANGE” by using and
press .
Example) SOG display
Integer part expanded display Normal display Decimal part expanded display
4.5.5. Selecting a back light color
Select white or orange as the back light color of the screen that is normally used.
Procedure
1. Display a main menu by pressing
.
2. Select “1. DISPLAY” and “BACK LIGHT” in this order by using
.
3. Select “WHITE” or “ORANGE” by using
and press .
 Loading...