6. How to set an output function
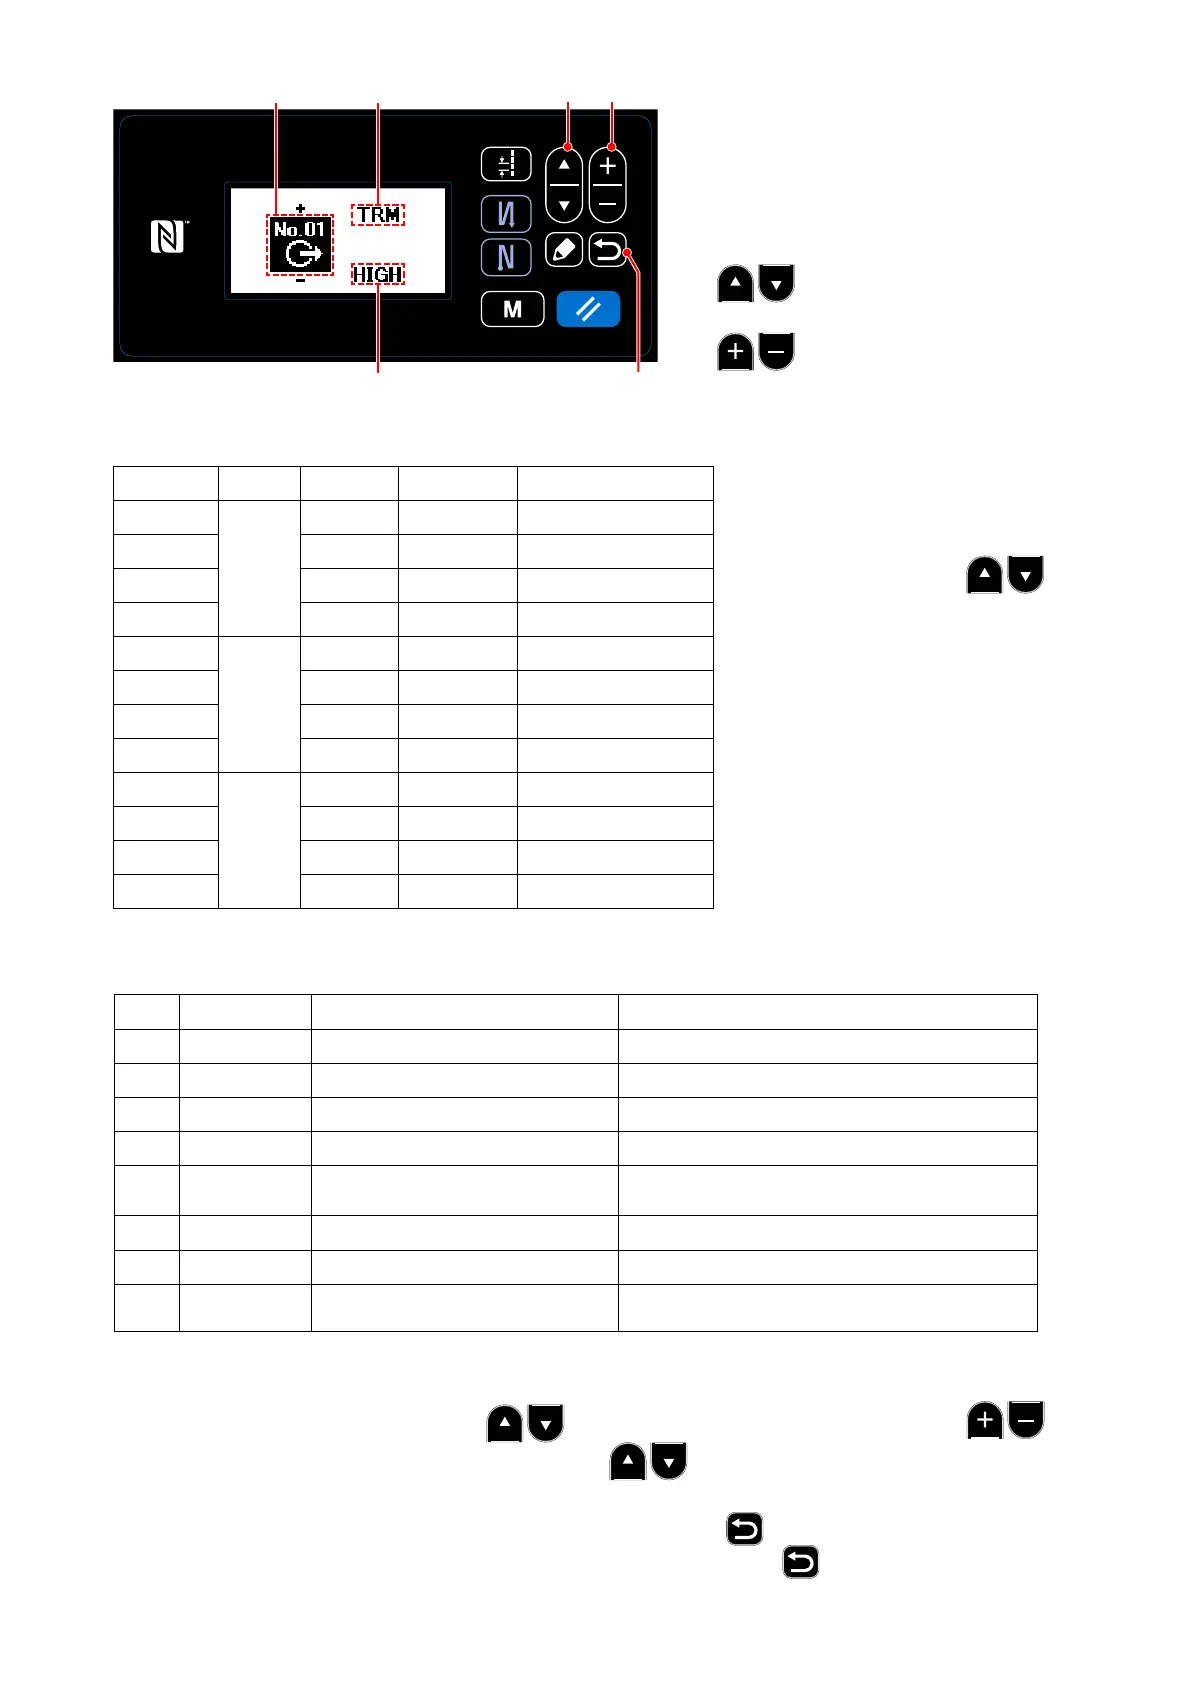
Description of a display screen and an
output switch
D: Output number
E: Name of an output function
F: Active level of output
❶:
Switch the changes (D, E, and F).
❷:
Change the set contents of D, E, and F.
OUT�No. CN No. Pin�No. Initialization
Electrical specication
1
CN51
3 NOP DC5V
2 4 FL DC5V
3 5 TRM DC5V
4 6 SSTA DC5V
5
CN56
2 NOP DC24V
6 4 NOP DC24V
7 6 NOP DC24V
8 8 NOP DC24V
9
CN61
2 COOL DC24V
10 4 NOP DC24V
11 6 NOP DC24V
12 8 NOP DC24V
(Caution) The CN56 accommodates only the SC-950.
Abbreviation Function item Remark
0 NOP No function (Standard setting)
1 TRM Thread trimmer output Output of thread trimming signal.
2 NIP Thread presser output Output of presser lifting signal
3 FL Presser lifter output Output of reverse feed stitching signal
4 BT Reverse-feed stitching output
State of one time cancel of reverse feed
stitching at end function is output.
5 SSTA Sewing machine stop-state output Sewing machine stop state is output.
6 COOL Needle cooler output Output for needle cooler
7 LSWO Rotation command output
Revolution demanding command state is
output.
List of output functions
❶ ❷
❻
ED
F
Correspondence table between an output number and a connector number
7. Settings of the destination to
output a signal
Select the input number (OUT�
No.) by pressing the
❶ and specify the destination to
input a signal.
(Check it with the correspon-
dence table between an output
number and a connector num-
ber.)
8. Setting of an output function
Select the function allocated to an output signal from an output function list.
Select a function item E by pressing the ❶, and enter the function item by pressing the ❷.
Display a selection of HIGH or LOW by pressing the ❶, and move to active level selection F of
output to switch between LOW and HIGH.
After the setting is completed, x the set contents by pressing the ❻.
(Caution) When you turn off the sewing machine without pressing the ❻, the set contents are
not reected.
– 129 –

 Loading...


