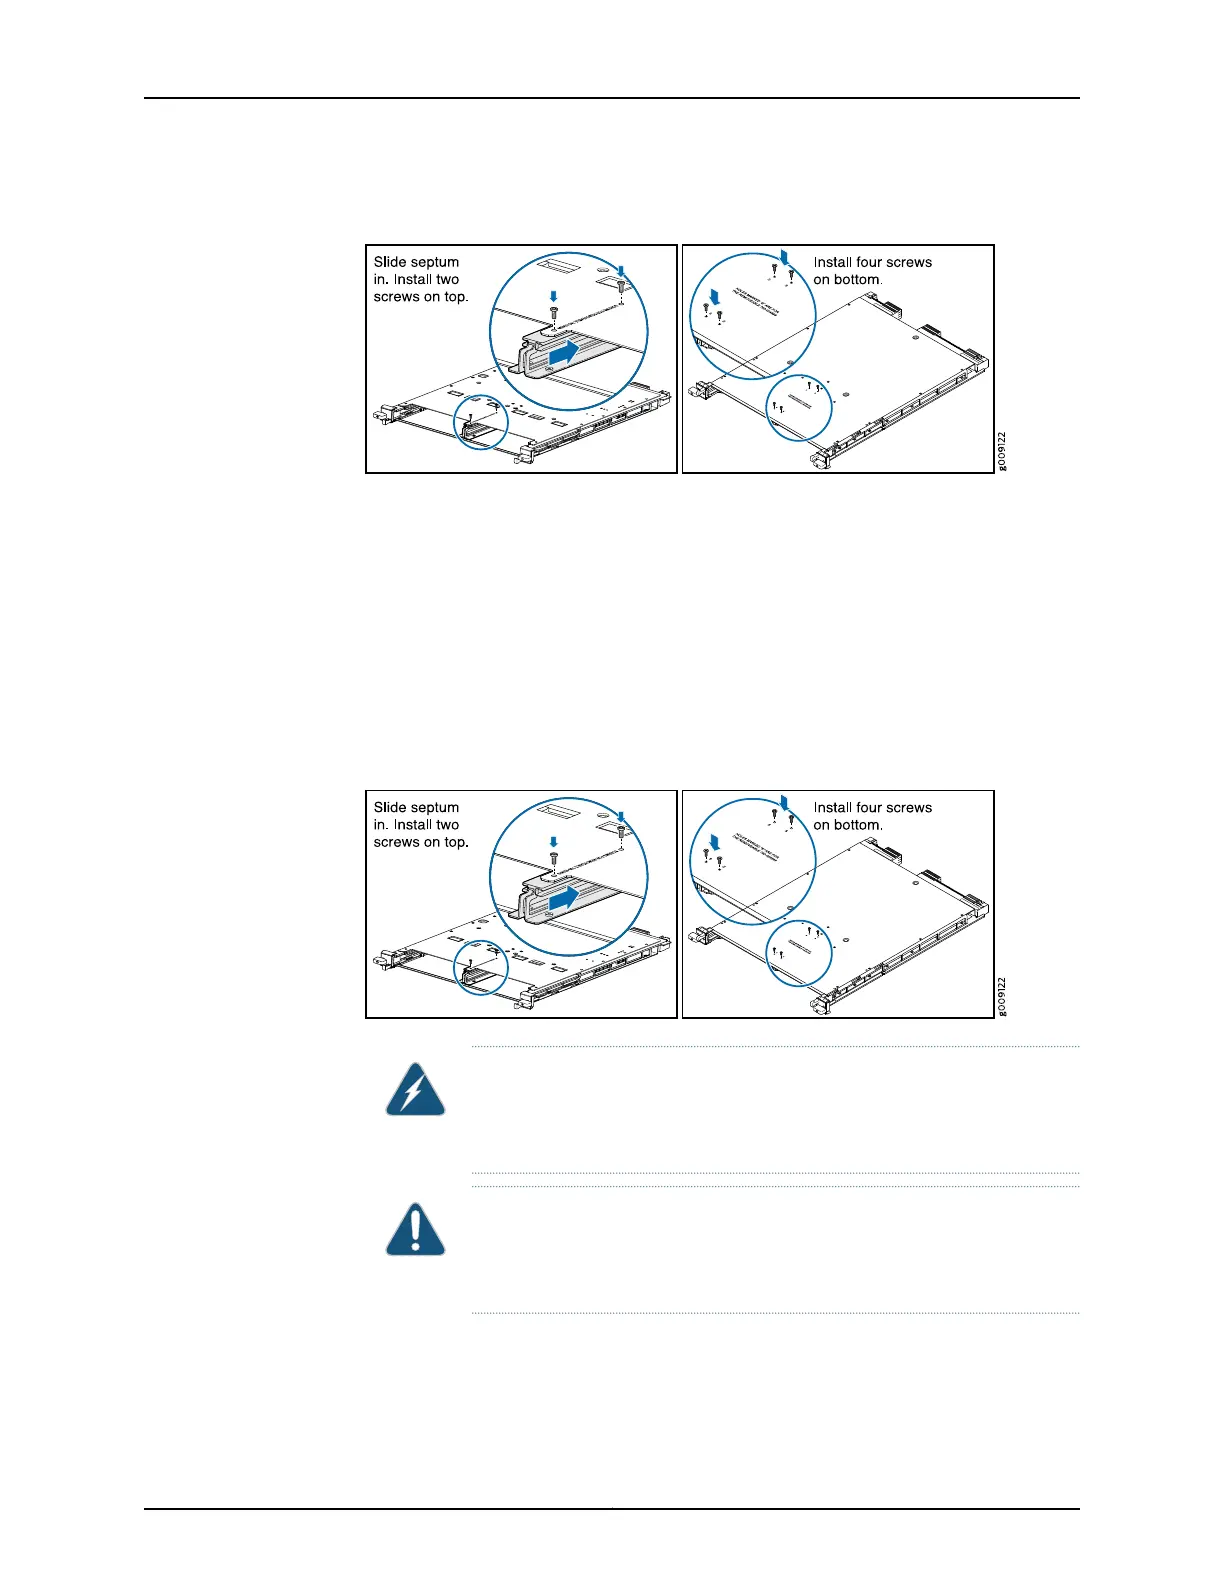
Figure 5: Installing the Septum
4. If you are installing an EX9200-40T-MIC and if there is a septum installed in the line
card, remove the septum (see Figure 6 on page 8):
a. Remove the screws labeled S on the bottom surface of the line card.
b. Remove the two screws labeled S on the top surface of the line card.
c. Slide the septum out of the line card.
d. Save the septum and screws for later use.
Figure 6: Removing the Septum
WARNING: Do not look directly into a fiber-optic transceiver or into the
ends of fiber-optic cables. Fiber-optic transceivers and fiber-optic cable
connected to a transceiver emit laser light that can damage your eyes.
CAUTION: Do not leave a fiber-optic transceiver uncovered except when
you are inserting or removing cable. The safety cap keeps the port clean
and prevents accidental exposure to laser light.
5. If any transceiver is installed in the MIC, ensure that you cover it by using a rubber
safety cap.
6. Align the rear of the MIC with the guides located along the sides of the MIC slot.
Copyright © 2016, Juniper Networks, Inc.8
Hardware Topics for Aloha Line Card