3. Align the bottom holes in the mounting brackets with holes on the side panels of the
chassis.
4. Insert mounting screws into the aligned holes. Tighten the screws.
5. Ensure that the other holes in the mounting brackets are aligned with the holes in the
side panels. Insert a screw in each hole and tighten the screws.
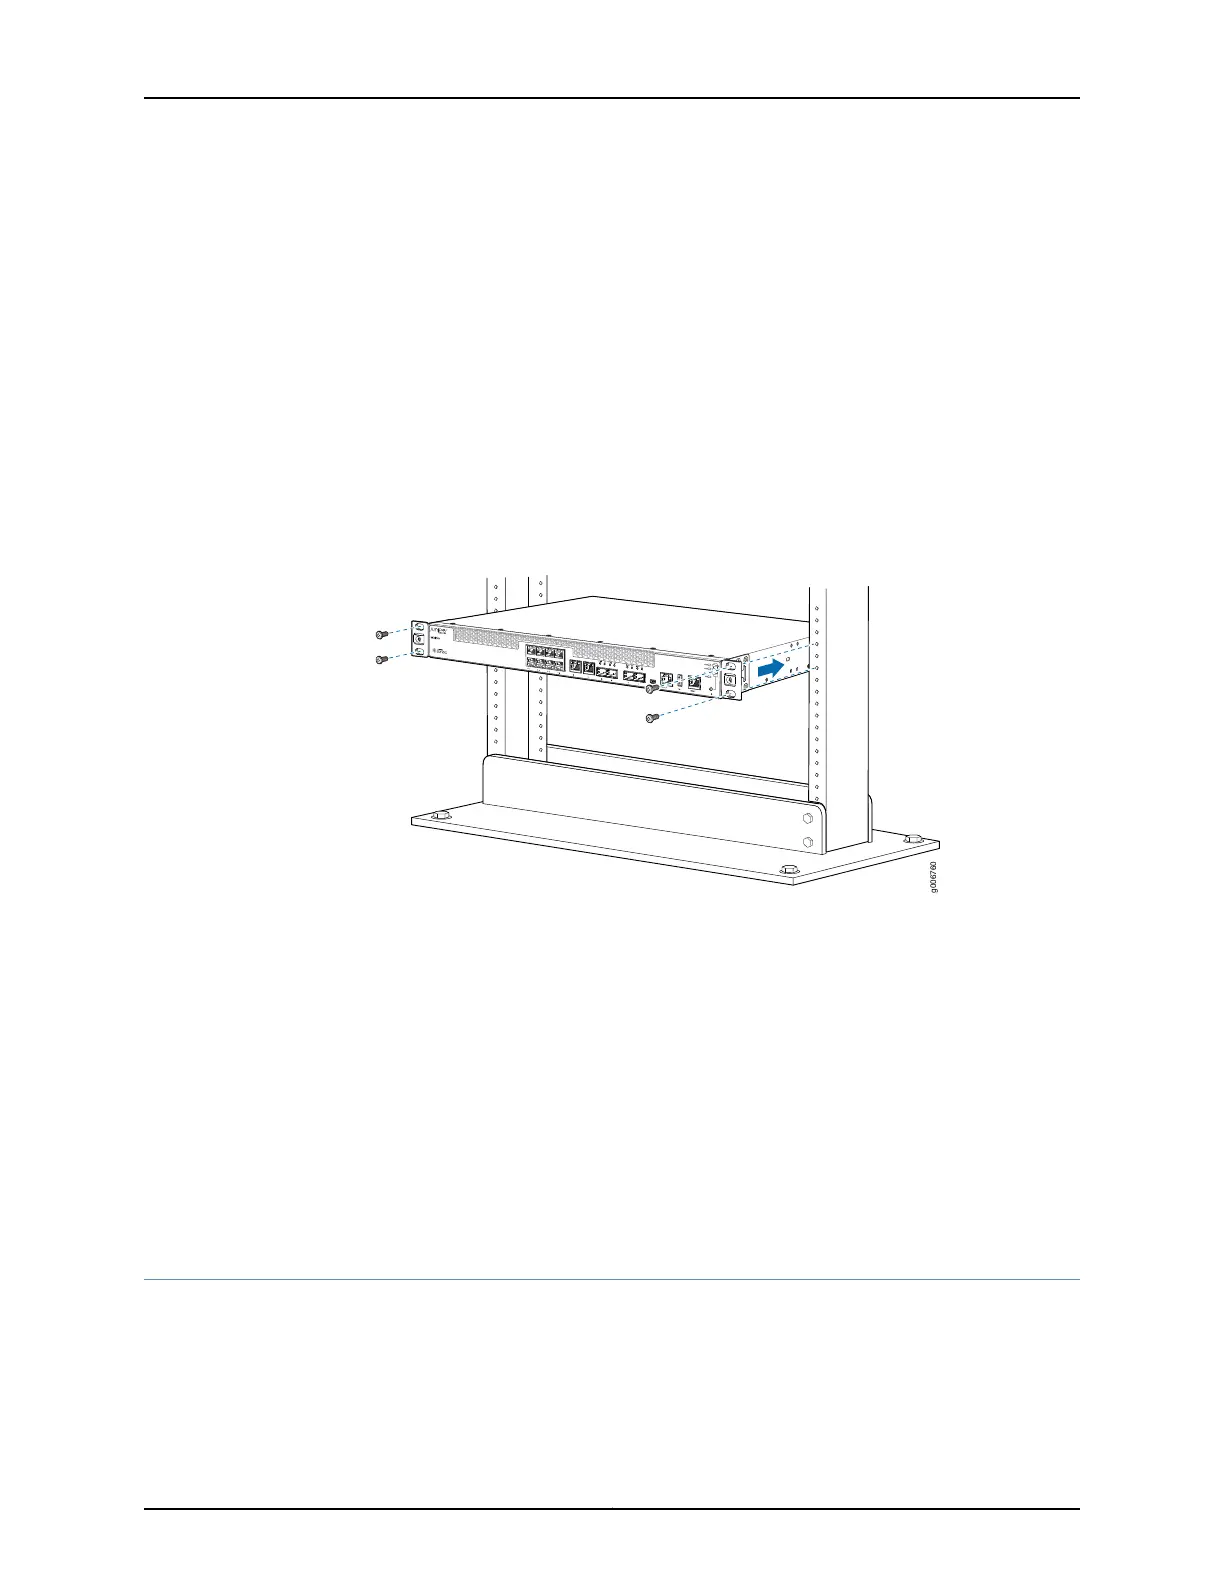
6. Have one person grasp both sides of the device, lift the device, and position it in the
rack, aligning the mounting bracket holes with the threaded holes in the rack or cabinet
rail. Align the bottom hole in both the mounting brackets with a hole in each rack rail,
making sure the chassis is level. See Figure 13 on page 81.
Figure 13: Mounting the MX150 on Two Posts in a Rack
7. Have a second person secure the device to the rack by using the appropriate screws.
Tighten the screws.
8. Ensure that the device chassis is level by verifying that all screws on one side of the
rack are aligned with the screws on the other side.
Related
Documentation
Connecting AC Power to an MX150 on page 86•
• Connecting Earth Ground to an MX150 on page 85
• Rack-Mounting and Cabinet-Mounting Warnings on page 132
Mounting an MX150 on Four Posts in a Rack or Cabinet
You can mount an MX150 on four posts of a 19-in. rack or cabinet by using the separately
orderable four-post rack-mount kit. (The remainder of this topic uses rack to mean rack
or cabinet.).
81Copyright © 2017, Juniper Networks, Inc.
Chapter 10: Installing the MX150