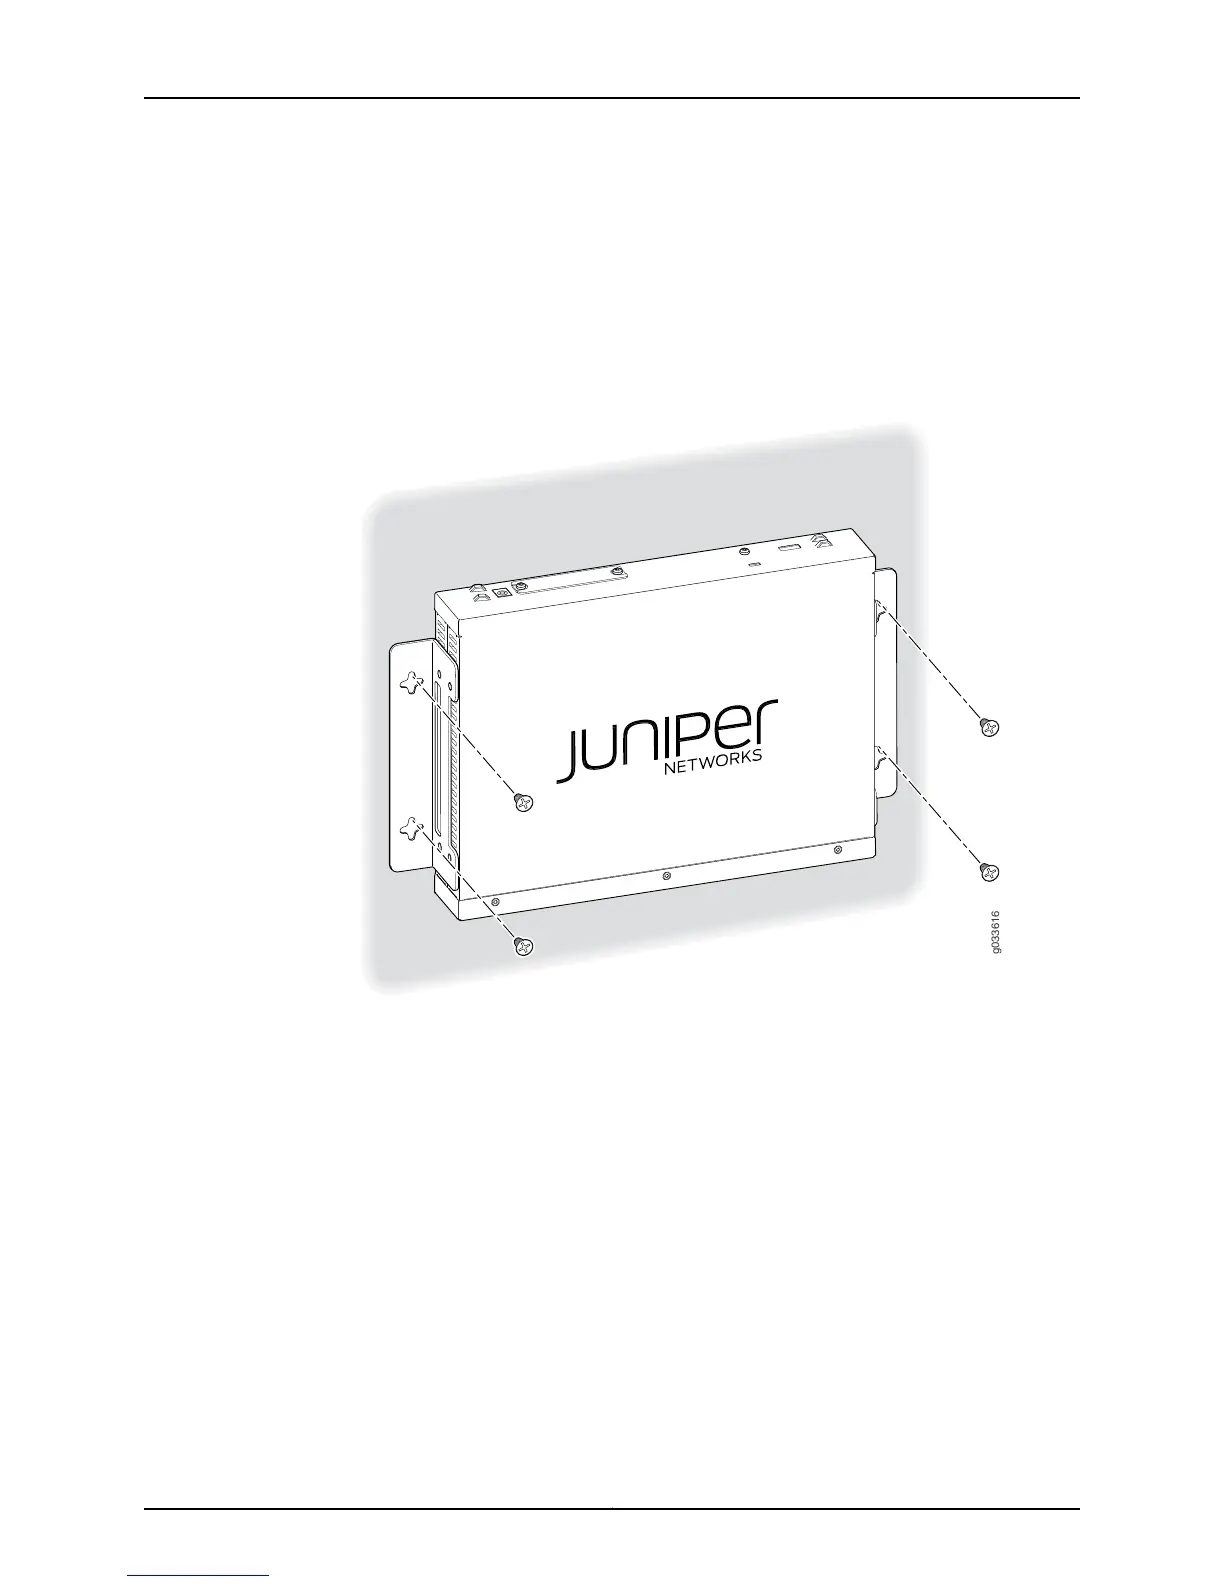
5. Have one person grasp the sides of the device, lift it, and position it on the wall.
6. Have a second person install two pairs of mounting screws through the bracket holes
on either side of the device to secure it to the wall.
7. Verify that the mounting screws on one side are aligned with the mounting screws on
the opposite side and that the device is level (Figure 20 on page 66).
Figure 20: SRX110 Services Gateway Wall Installation — Attaching the
Mounting Brackets
Related
Documentation
General Site Guidelines for Installing the SRX110 Services Gateway on page 30•
• Required Tools and Parts for Installing and Maintaining the SRX110 Services Gateway
on page 48
• Preparing the SRX110 Services Gateway for Rack-Mount, Desk-Mount, and Wall-Mount
Installation
• Adjusting the Power Supply Adapter Tray for the SRX110 Services Gateway for
Rack-Mount Installation on page 62
• Installing the SRX110 Services Gateway in a Rack on page 59
• Installing the SRX110 Services Gateway on a Desk on page 63
Copyright © 2015, Juniper Networks, Inc.66
SRX110 Services Gateway Hardware Guide for H2 Model Numbers