NOTE:
•
The 3G USB modem is not hot-swappable.
•
Ensure that the base of the 3G USB extension of the cable mount is 18
inches away from the device.
3. Power on the device. The 3G LED on the front panel of the device indicates the status
of the 3G USB modem interface.
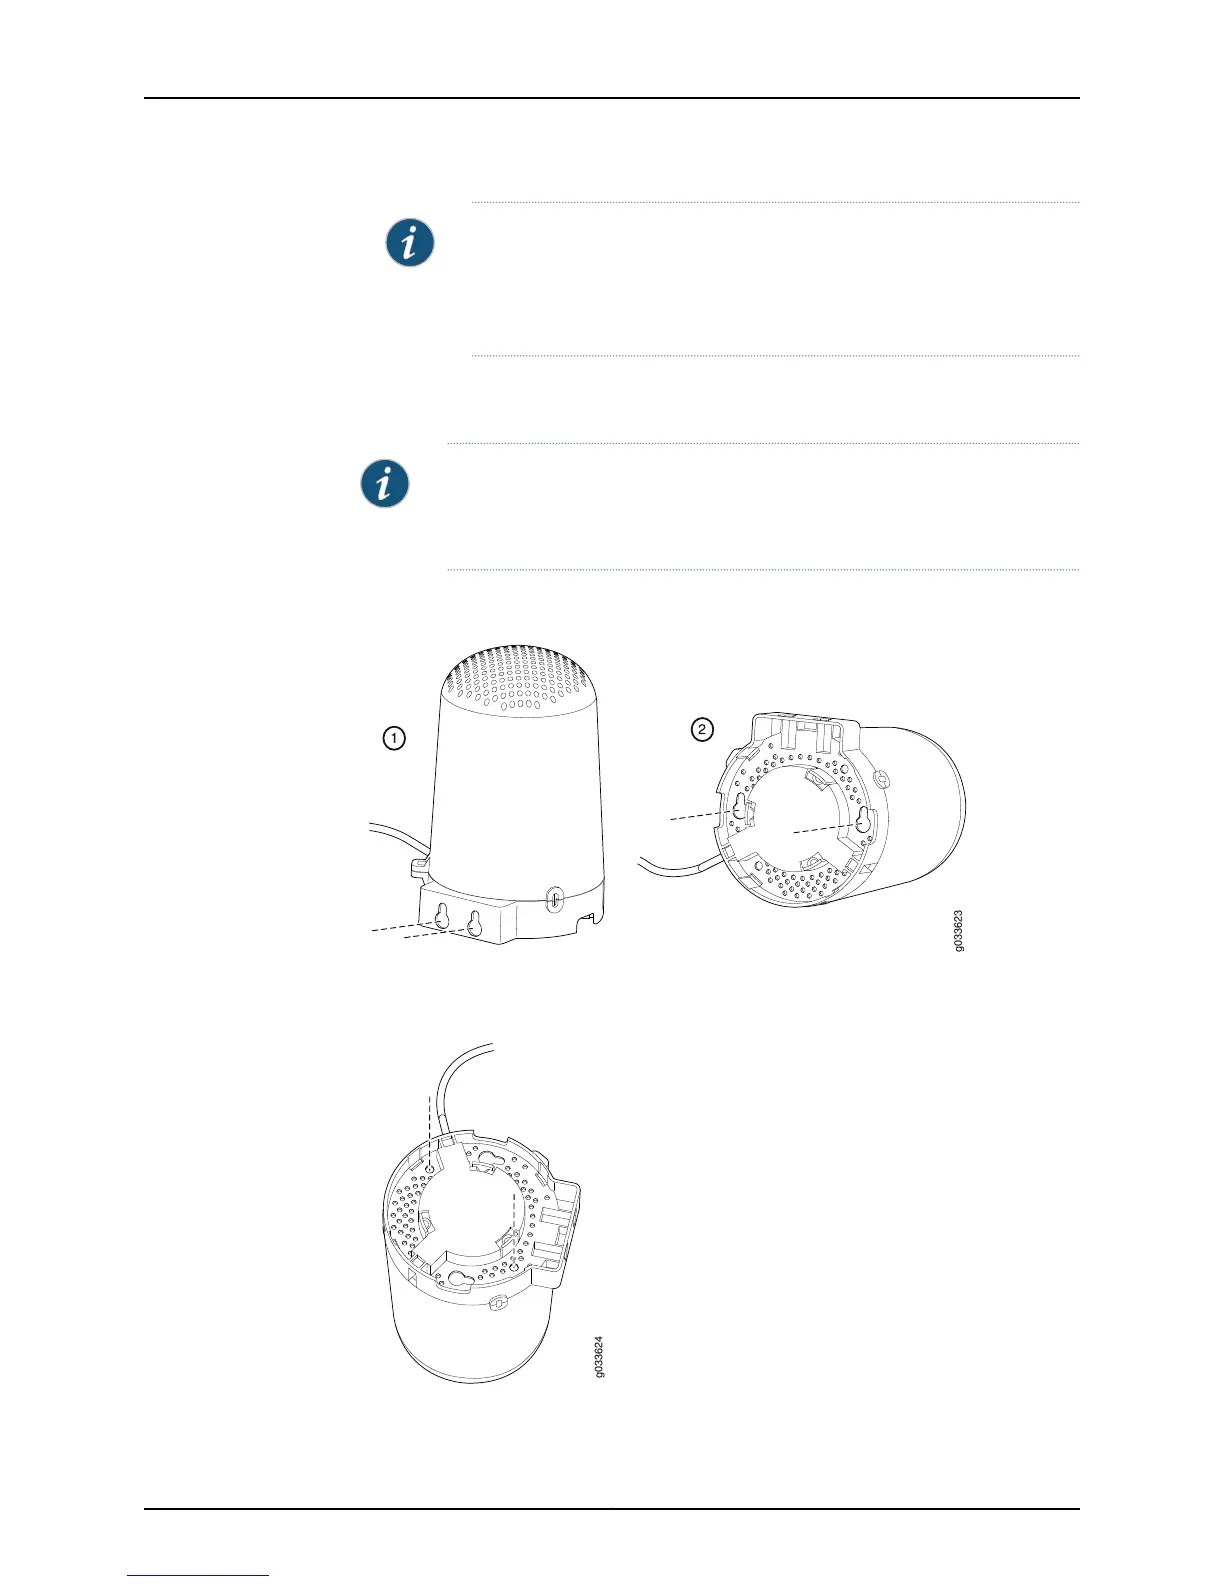
NOTE: You can wall-mount the modem using keyholes as shown in
Figure 23 on page 69 or ceiling mount the USB protection cover using screw
holes as shown in Figure 24 on page 69.
Figure 23: 3G USB Modem Wall Installation—Attaching the USB Protection
Cover
Figure 24: 3G USB Modem Ceiling Installation—Attaching the USB
Protection Cover
69Copyright © 2015, Juniper Networks, Inc.
Chapter 10: Installing the Services Gateway