3. Select an installation location under a recessed 9/16-inch or 15/16-inch T ceiling-tile
rail in the ceiling.
4. Cut a hole as follows in the ceiling tile for running the Category 5e cable:
a. Place the mounting template over the area where you will install the access point.
b. Use a box cutter or a similar tool to cut along the line marking the opening for the
port connectors.
c. Remove the mounting template and the material you cut from the ceiling tile.
5. Run the Category 5e cable from the ceiling through the hole in the ceiling tile.
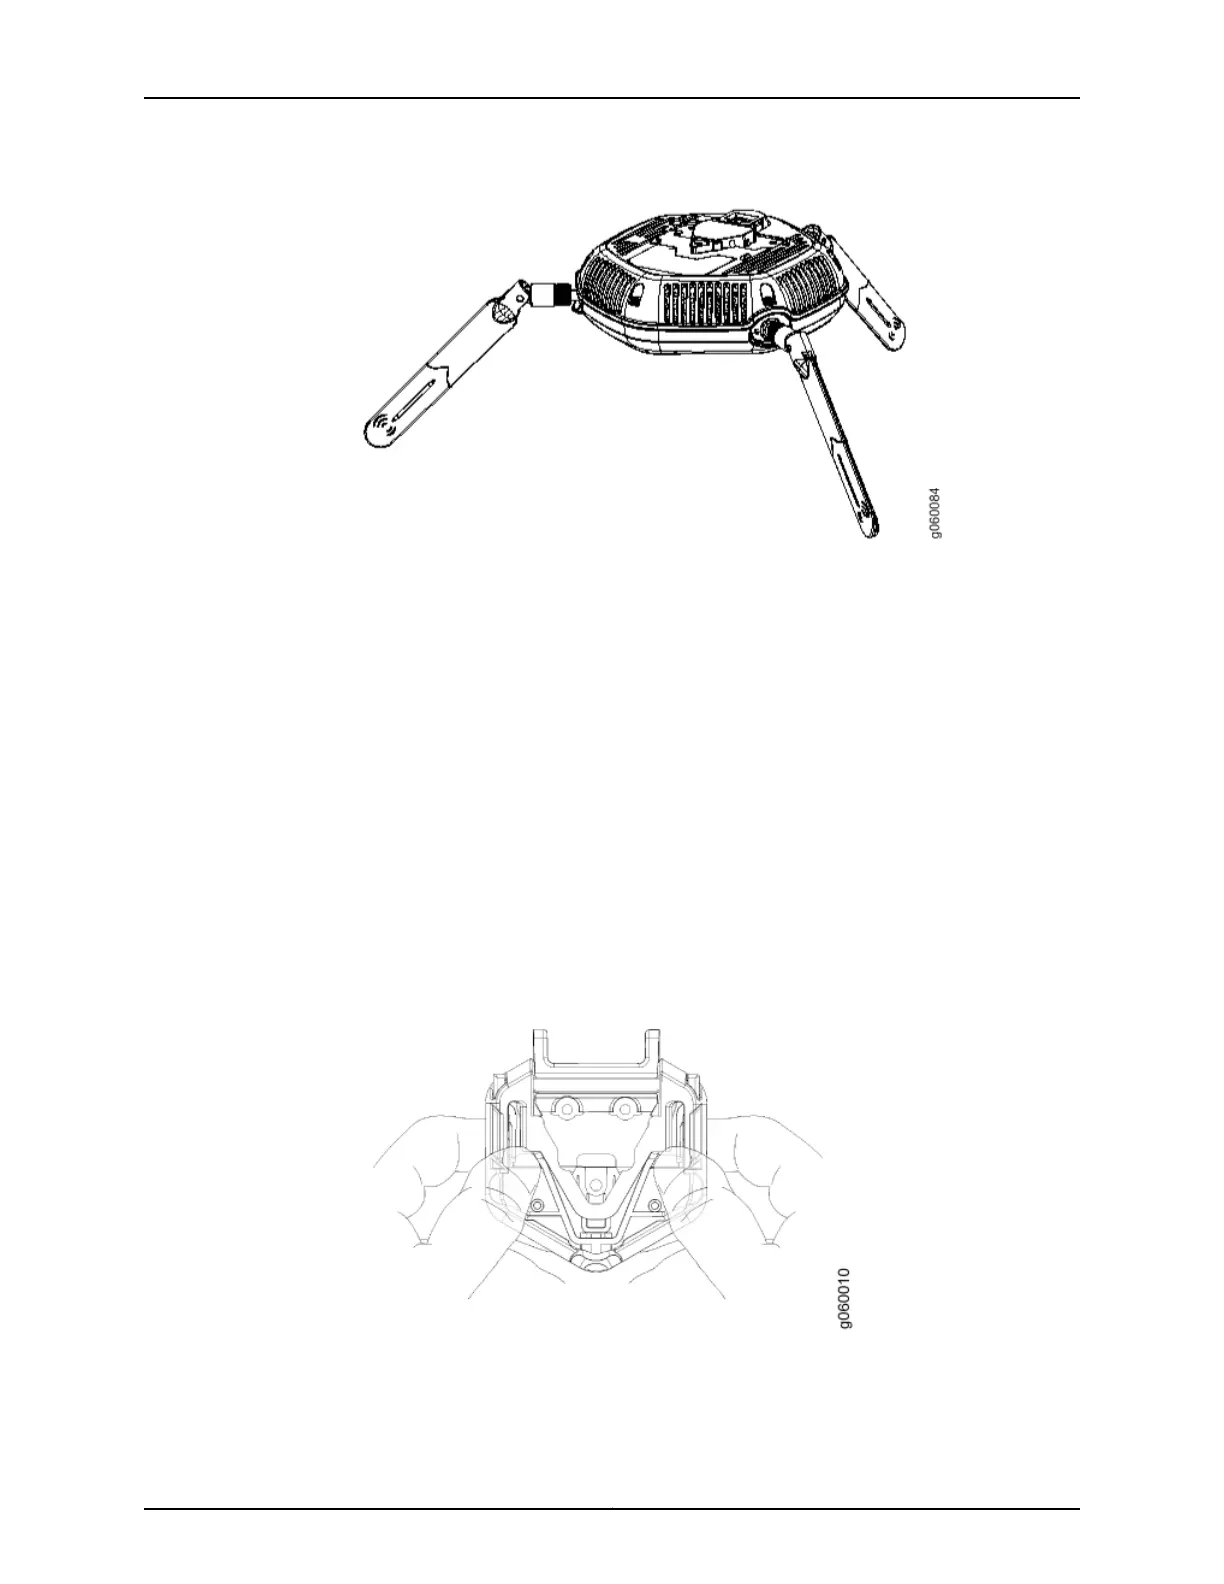
6. Ensure that the snaps on the top of the ceiling-mount bracket are open so that the
clips can fully extend to fit around the ceiling rail. The bracket is shipped with the
snaps open so that it is ready to be clipped over a ceiling rail (see Figure 5 on page 48).
Figure 5: Opening the Ceiling Bracket Clips
Copyright © 2012, Juniper Networks, Inc.48
WLA532E Access Point Hardware Documentation