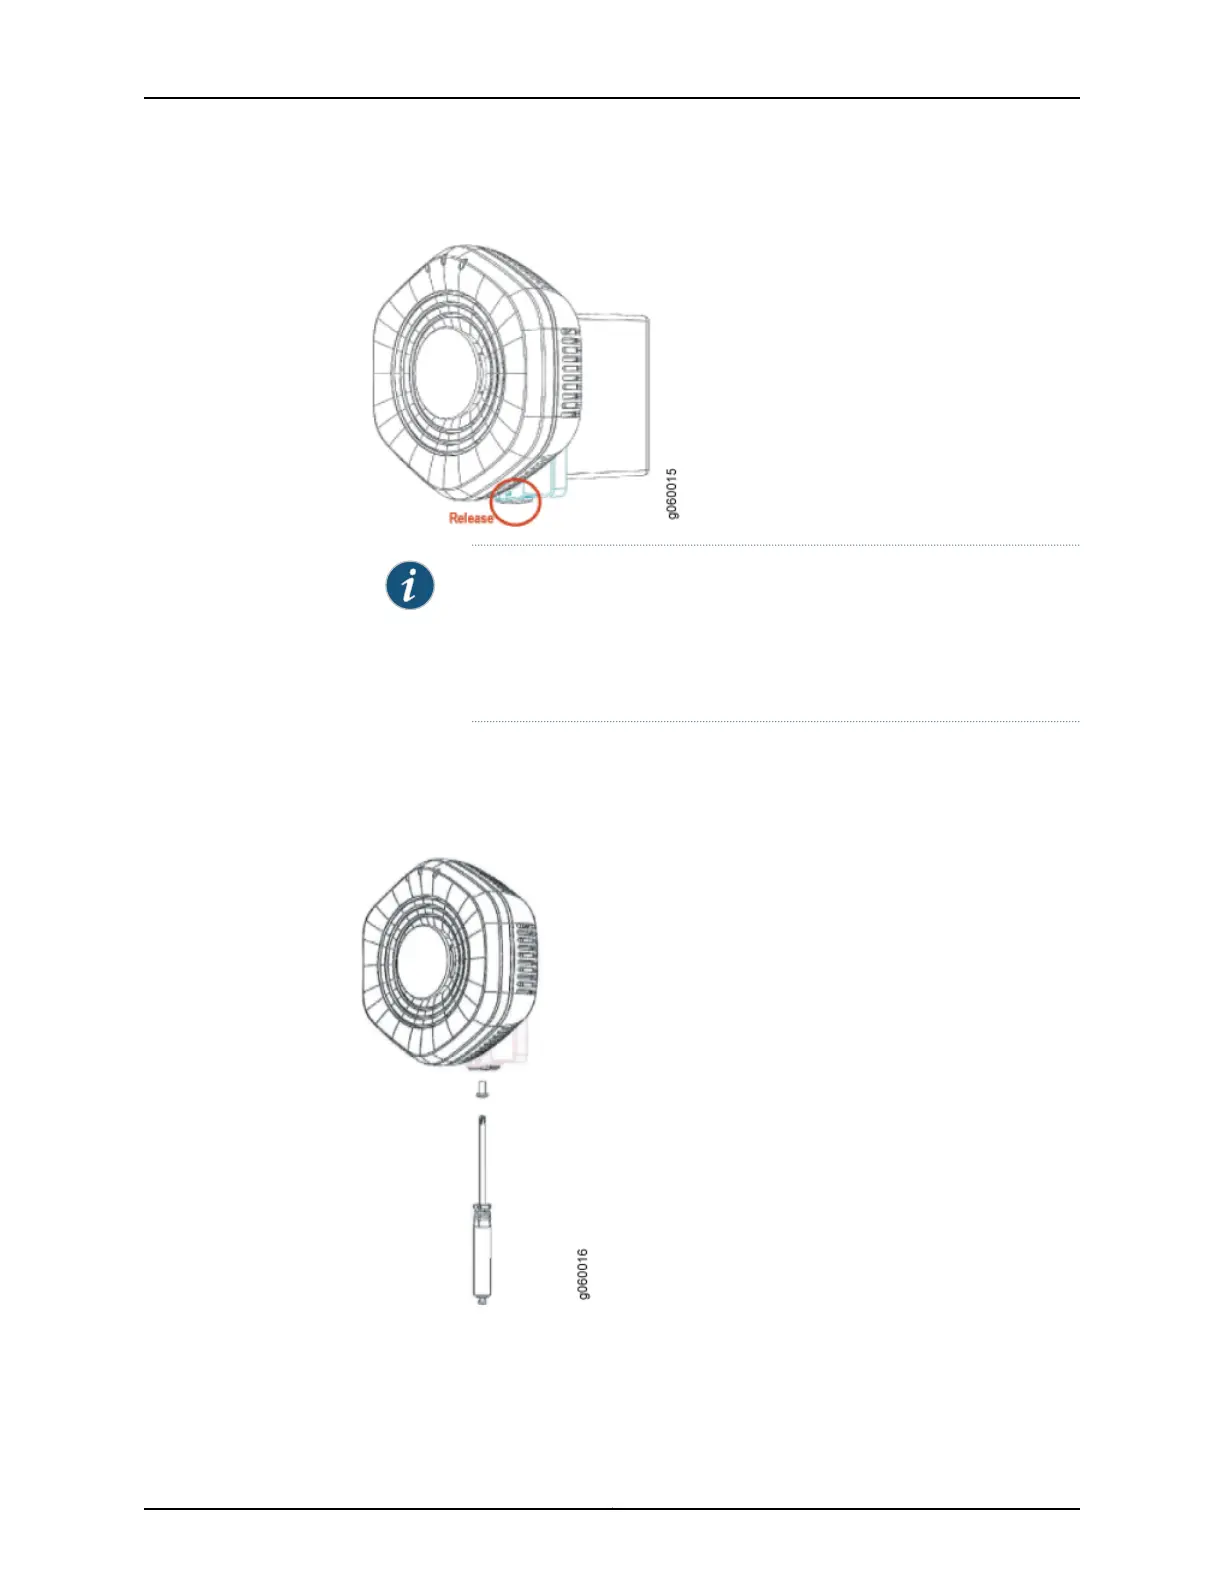
Figure 37: Release the Access Point
NOTE: We recommend that you use the optional security kit (separately
orderable) to secure the access point. The kit includes a special tool and
a security screw. Be sure that you retain the tool so that you can unlock
and move the access point. Never use a power tool to insert or remove
the security screw.
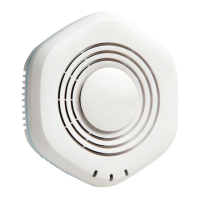
8. To lock the access point into place, secure the security screw in through the release
button by using the tool provided with the security kit (see Figure 38 on page 69). Do
not overtighten the screw.
Figure 38: Secure the Access Point with the Security Screw and Tool
Related
Documentation
Installing the WLA532E Access Point on a Ceiling Rail on page 46•
• Installing the WLA532E Access Point Using the Plenum Bracket Kit on page 51
69Copyright © 2012, Juniper Networks, Inc.
Chapter 7: Installing and Connecting the Access Point