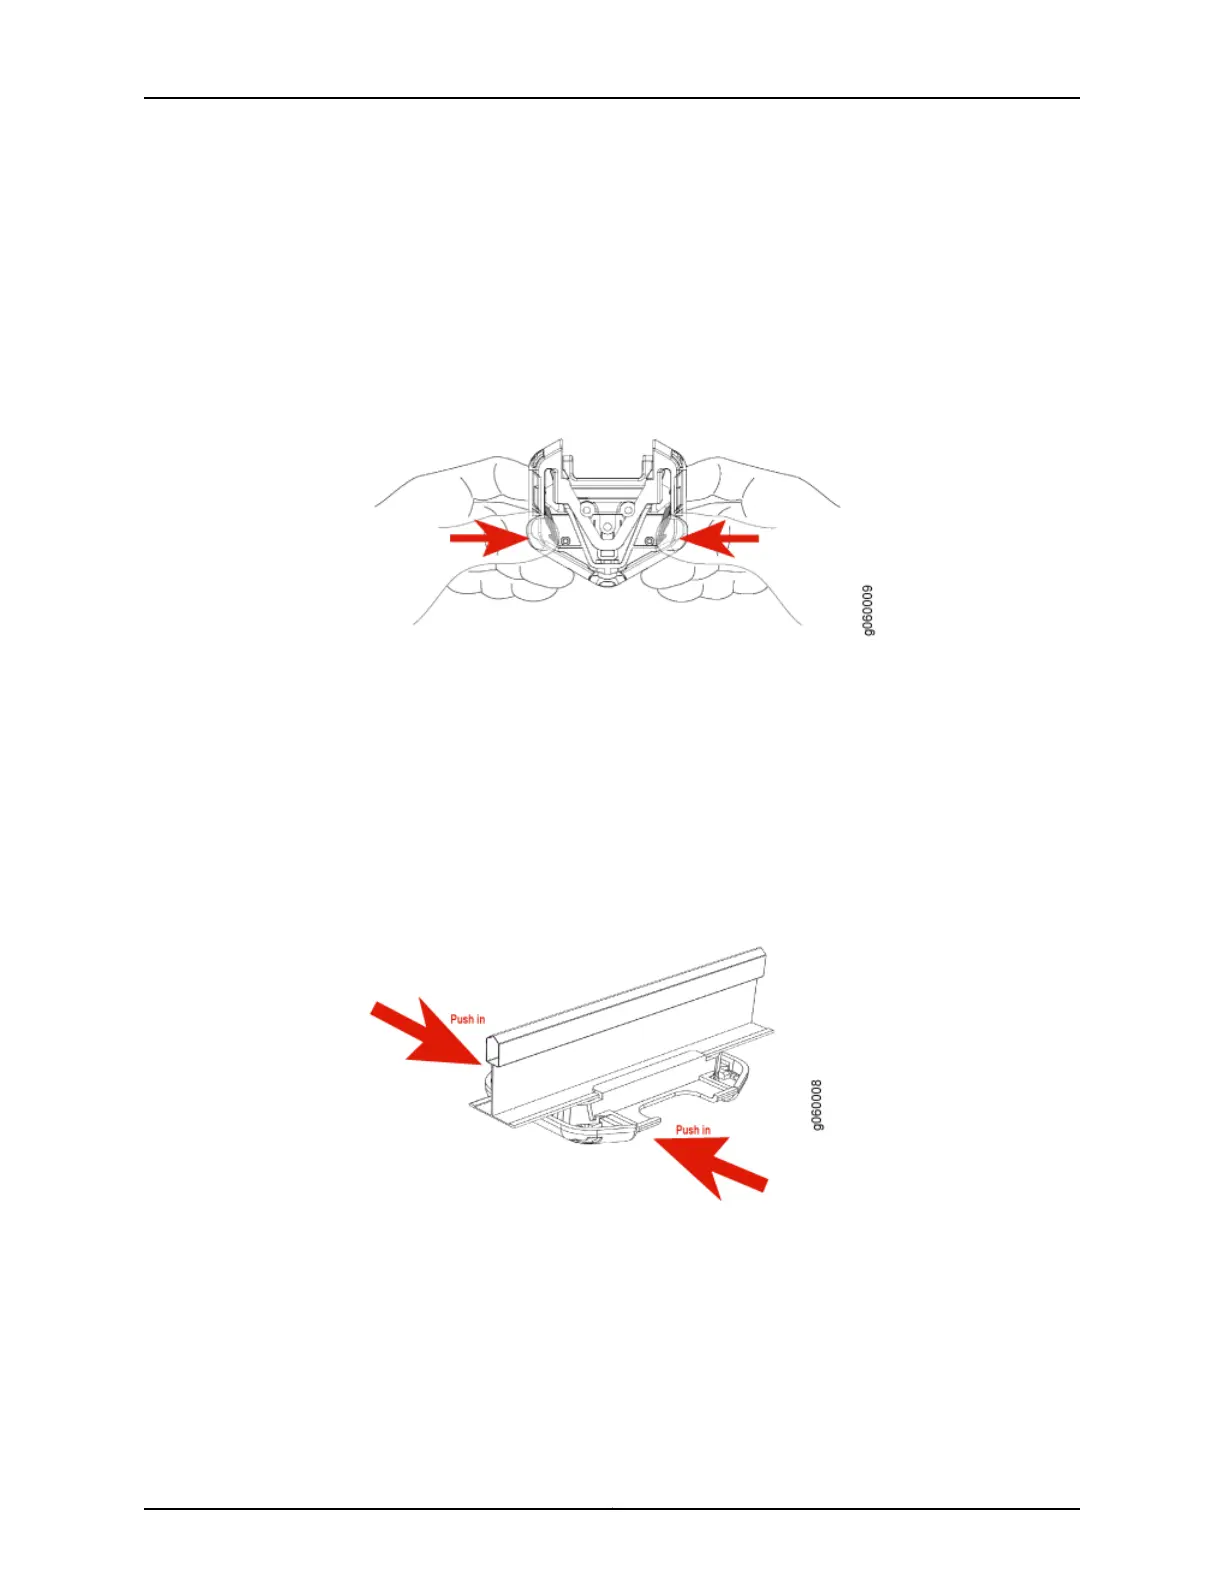
7. If the snaps are closed, open the snaps by pressing in and up with your thumbs on
both sides of the snaps on the bottom of the bracket until the snaps are fully open
(see Figure 6 on page 49) until it is fully open.
Figure 6: Opening the Ceiling Bracket Snaps
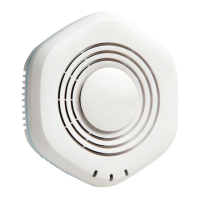
8. With the bracket clips fully extended, align the clips with the rail and hook the clips
around the top sides of the rail. Push in on the sides of the bracket until the clips lock
over the rail (see Figure 7 on page 49). Listen for a click that indicates that the clips
have locked. Ensure that the bracket has locked over the rail by gently pulling down
on the bracket before installing the access point
Figure 7: Locking the Bracket Clips over the Rail
9. Grasp the Category 5e cable that extends from the ceiling and plug it into the access
point.
10. Align the access point with the bracket.
49Copyright © 2012, Juniper Networks, Inc.
Chapter 7: Installing and Connecting the Access Point