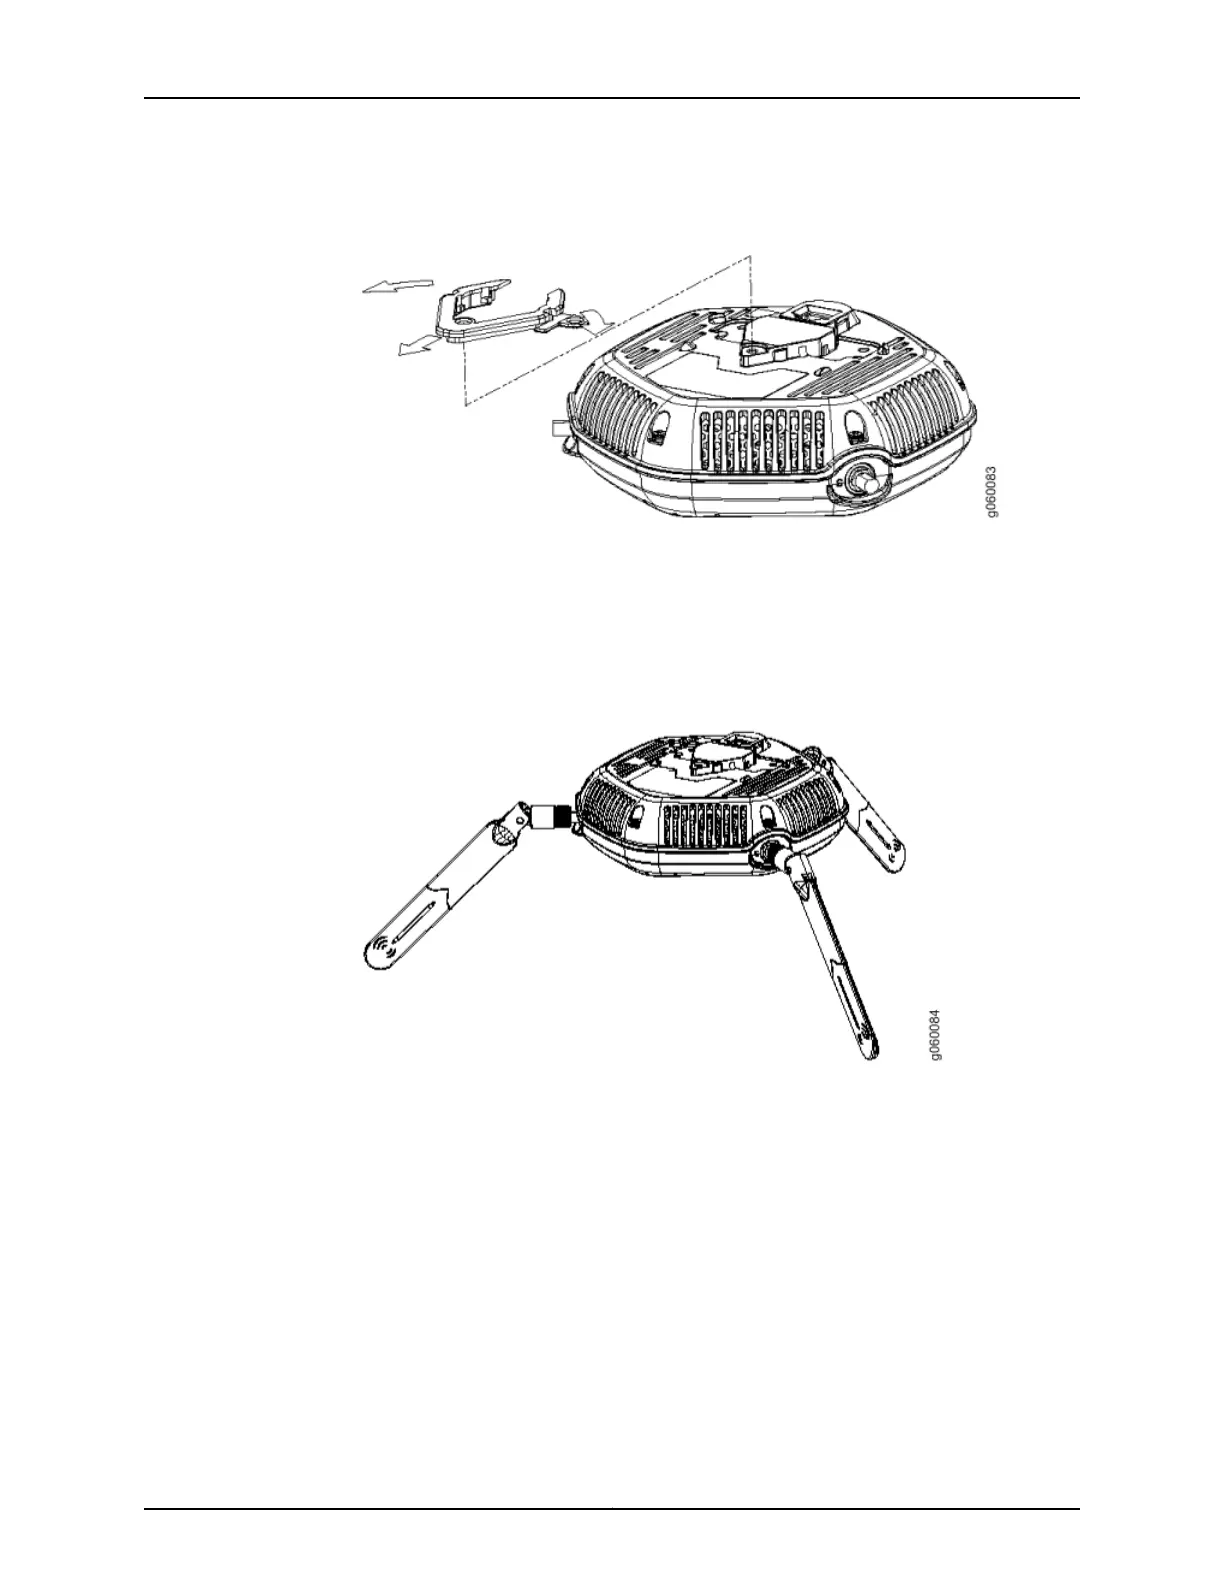
Figure 11: Removing the Diamond Bracket
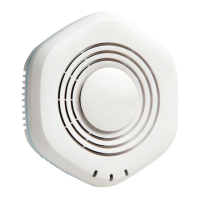
3. Attach three supported external omnidirectional and paddle antennas to the external
antenna ports of the access point. For antenna specifications and ordering information
see the WLA Series Wireless LAN Access Points product information at
http://www.juniper.net/us/en/products-services/wireless/wla-series.
4. Orient the antennas for the best antenna reception. See Figure 12 on page 53.
Figure 12: Orienting the Installed WLA532E Antennas
5. Mount the WLA532E to the top bar of the plenum bracket with the three screws that
were removed from the diamond bracket. See Figure 13 on page 54.
53Copyright © 2012, Juniper Networks, Inc.
Chapter 7: Installing and Connecting the Access Point