Page
82
9
Appendix
CA71 stand assembly instructions
Thank you for purchasing a KAWAI Concert Artist digital piano.
First, read this instruction manual and make sure that all the parts are included, and assemble the unit while being careful not to scratch or damage the
fl oor, piano or stand. (Follow the procedures in reverse order when disassembling the unit.)
Parts (included items)
Assembly sequence
1. Attaching the pedal board.
(1) From the bottom of the pedal board, insert the pedal support (F) about 1 cm.
(2) Untie and pull out the connection cord from the bottom of the pedal board.
(3) Insert the screws loosely into the pedal board through the bottom of the
steel bracket. Line up the pedal board front to fi t into the groove of the
side panel. Press the side panel against the pedal board, and tighten
the screws.
(4) Tighten screws D (4 x 16) in the remaining threaded holes.
(5) When the left and right side panels are both fastened, slowly raise the
assembly while keeping the side panels parallel.
Assembling screws
Use a Phillips-head screwdriver (+) to assemble the unit.
2. Temporarily attach the back panel (select method A or B).
A. When placing the cords in the side panels:
(1) Place the pedal cord in the groove provided on the side panel (L), and
place the power cord in the groove provided on the side panel (R) (make
sure to pull the cords through to a length of about 12 cm outside the
side panels).
(2) Place the back panel in the groove of the side panels.
(3) Align the holes of the bracket at the top of the side panels with the
holes provided on the back panel, and temporarily fasten them by using
screws B with a fl at end (M4 x 12).
(4) Fasten the back panel to the pedal board by using screws C with a
sharp end (4 x 25).
The attached cord clamps will not be used.
B. When the cords will not be placed in the side panels:
(1) Place the back panel in the groove of the side panels.
(2) Align the holes of the bracket at the top of the side panels with the
holes provided on the back panel, and temporarily fasten them by using
screws B with a fl at end (M4 x 12).
(3) Fasten the back panel to the pedal board by using screws C with a
sharp end (4 x 25).
3. Attaching the piano
(1) Place the piano on the front half of the stand (so that the metal bracket
holes are seen when viewed from the top) (the piano hooks will be
placed between the two side panel brackets).
(2) While supporting the piano, slide the piano towards the back to engage
the hooks on the piano with the metal brackets on the side panels.
(3) Press both the side panels against the piano, and tighten the
temporarily-tightened screws B (M4 x 12) on the back panel.
(4) Fasten the piano part with screws A with a fl at end (M6 x 25).
Important point:
When using screws B with a fl at end (M4 x 12), loosely tighten them so that
the side panels are loosely fastened.
Important point:
· Loosely attach the side panels so that the piano can be placed between
them.
· When attaching the piano to the side panels, press the side panels
inward for a tight fi t against the piano.
Important point:
Attach the side panels fi rmly to the pedal board.
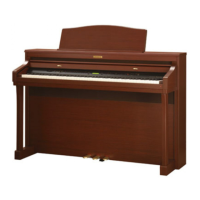
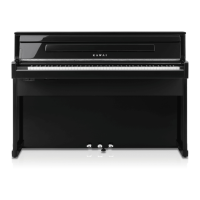
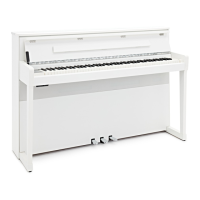
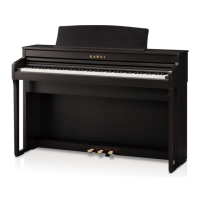
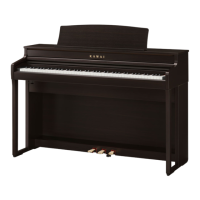
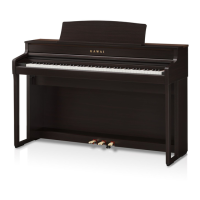
Piano
Pedal board
Speaker box
Back panel
Side panel (L) Side panel (R)
Score stand
Relay cord Power cord
Headphone hook
Headphone hook fi xing screw
4 x 14 (x 2)
(with a fl at end)
A. M6 x 25 (x 8)
B. M4 x 12 (x 4)
(with a sharp end)
C. 4 x 25 (x 4)
D. 4 x 16 (x 10)
E. Cord clamp (x 2)
F. Adjuster (x 1)
Not used if the cords
are placed in the side
panels.
Screw with a sharp end
D. 4 x16
Assemble the right side in
the same manner.
Screws with a fl at end
B. M4 x 12
Screw with a sharp end
C. 4 x 25
Pedal cord
Power cord
Approximately 12 cm
Approximately 12 cm
Screws with a
fl at end
A. M6 x 25
Hook provided on
the piano
(Side view)
Caution
x
Make sure that more than
two people work on unit
assembly.
Caution
x
Make sure that more than two people work on unit
assembly.
x
Make sure that your hands are not caught between
the piano and the stand.
x
Use the screws provided in order to securely fasten
the piano to the stand. Failure to do so may result
in the piano falling off from the stand, causing great
danger.
x
When the cords are placed in the side panel, make
sure that the cords are not pinched between parts.
x
Do not force the screws in. Insert them straight into
the hole without excessive force and tighten them
securely.
x
Lightly tighten the screws by hand fi rst to make sure
that they are threaded correctly.