204 Keysight E5092A ENA Series Configurable Multiport Test Set
Replacement Procedure
Replacement Procedure for E5092A-020
5-
Switch Indicator LED PCA Removal
Tools Required
• Box wrench 5.5mm
• TORX screwdriver, T10, T15 and T20.
Procedure
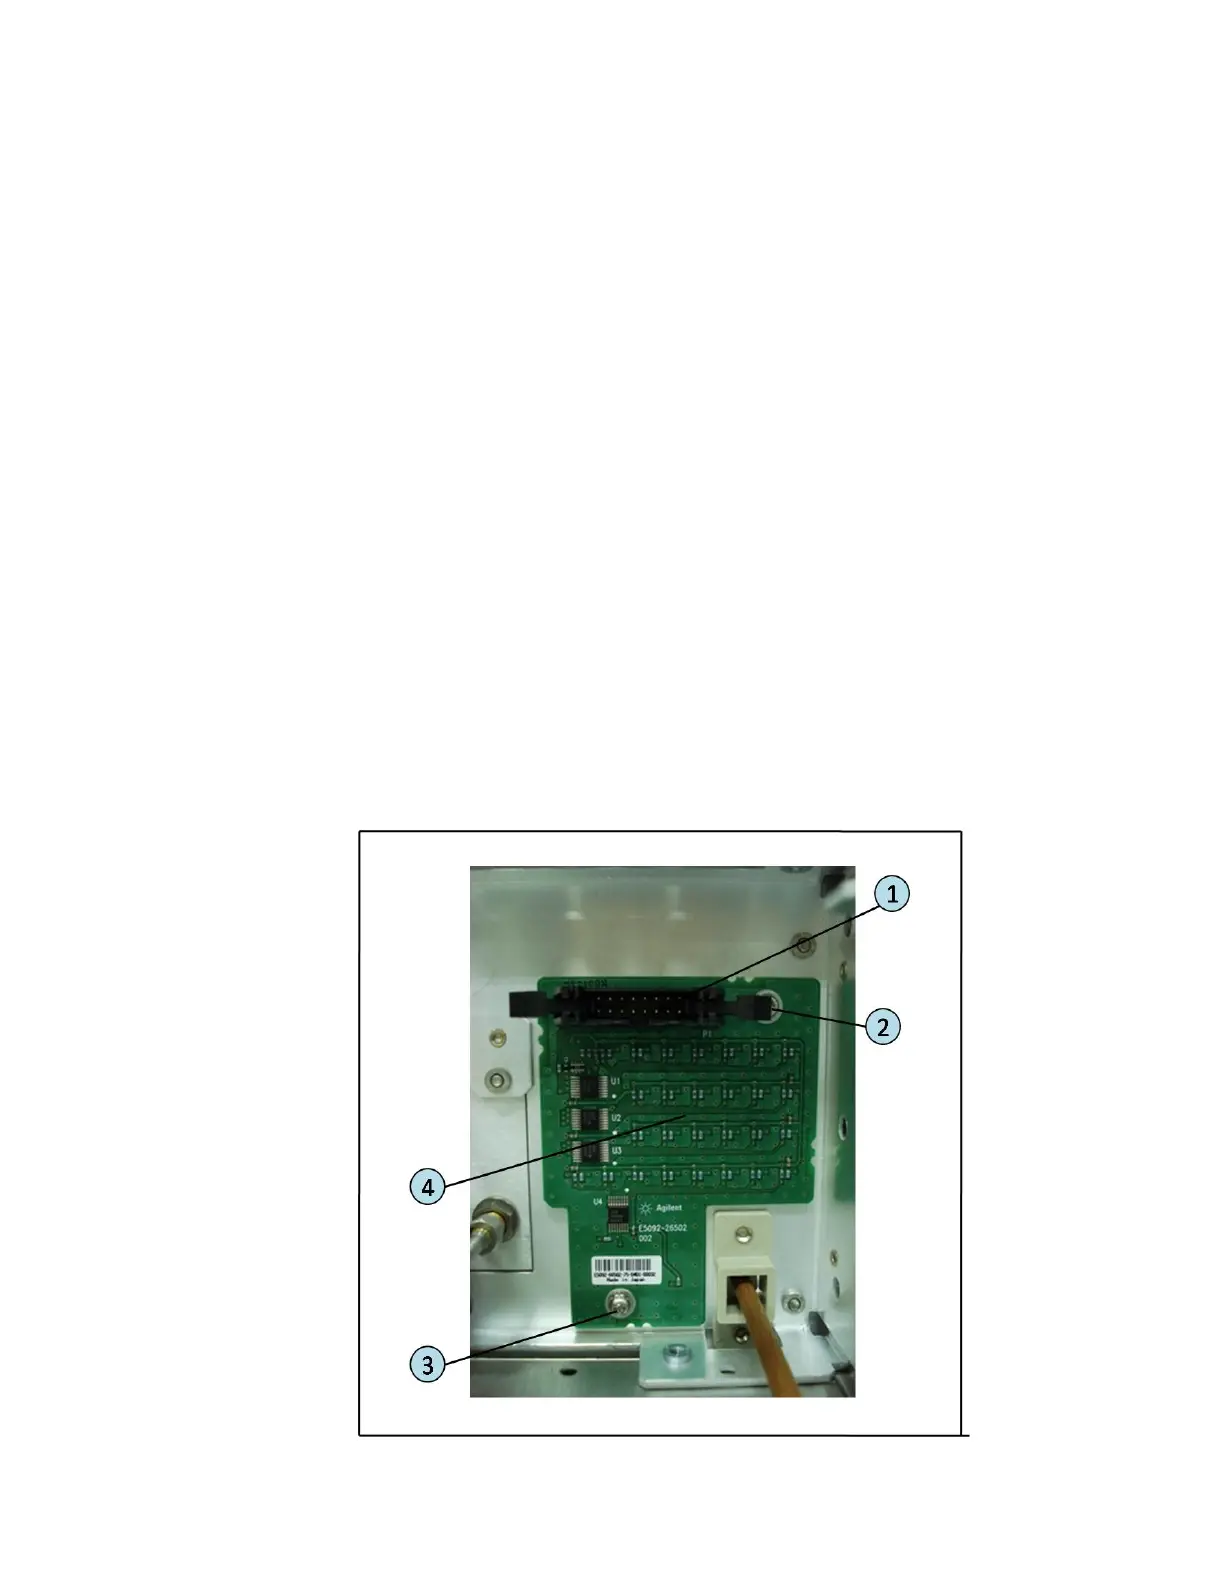
Refer to Figure 5-12 for this procedure.
Step 1. Remove the outer cover as described in “Outer Cover Removal” on page 189.
Step 2. Detach the front chassis as described in “Front Chassis Detachment” on
page 190.
Step 3. Remove the front frame as described in “Front Frame Removal” on page 191.
Step 4. Remove the main board as described in “Main Board Removal” on page 195.
Step 5. Disconnect the flat cable assembly (item 1) connected to the switch indicator
LED PCA.
Step 6. Remove the two TORX T10 screws (item 2 and item 3) securing the switch
indicator LED PCA to the front panel..
Step 7. Remove the switch indicator LED PCA from the assembly (item 4).
Figure 5-12 Switch Indicator LED PCA Removal
 Loading...


