SECTION 3 - PARTS, ASSEMBLIES & HARDWARE
1-3-1
3-1 © 2018 Konami Gaming Inc. P/N 810440
KX43
(Original Instructions)
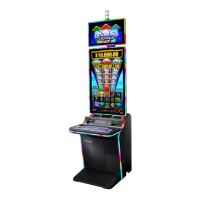
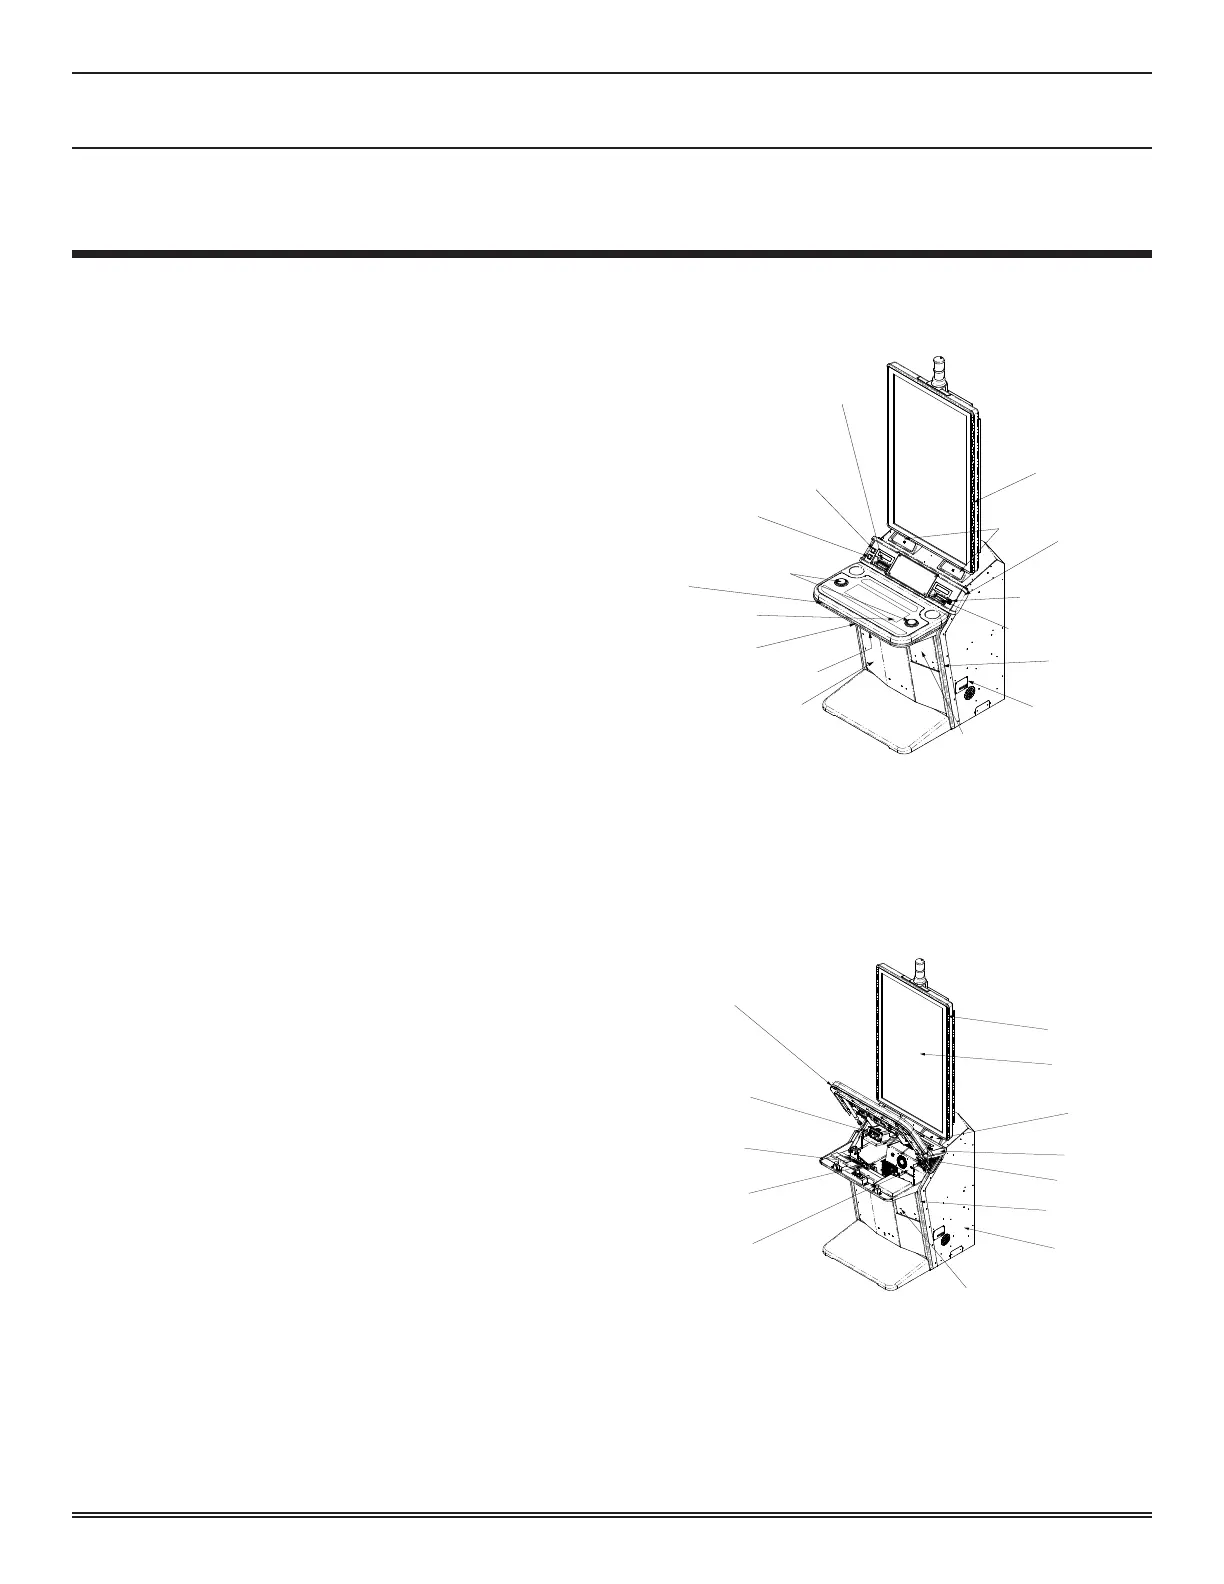
SPEAKERS
CASHOUT
BUTTON
SERVICE
BUTTON
LCD BUTTON PANEL
(TOUCHDASH PANEL)
LED EDGE LIGHT
PANELS (LCD)
LED EDGE LIGHT
(CABINET SIDES)
LED EDGE LIGHT
(DECK CORNERS)
ED EDGE LIGHT
(DECK)
HARD METERS
SUB PANEL
CASHBOX DOOR
SERIAL PLATE
BILL ENTRY
USB CHARGER
TICKET CHUTE
MAIN DOOR LOCK
SPIN BUTTONS
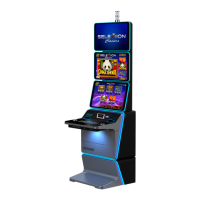
LCD LED LIGHT
PANEL
LCD
SPEAKERS (LOCATED
IN CABINET)
LED LIGHT PANEL
(DECK CORNERS)
BILL VALIDATOR
LED LIGHT PANEL
(CABINET SIDE)
SUBWOOFER (LOCATED
BEHIND PANEL)
CASHBOX DOOR (TO ACCESS
BILL VALIDATOR)
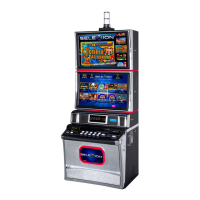
LOGIC UNIT
HOUSING
MAIN POWER SWITCH
(LOCATED ON POWER SUPPLY)
POWER SUPPLY
PRINTER
LED LIGHT
PANEL DECK
MAINTENANCE OVERVIEW
This chapter describes part removal, installation, assembly,
and disasembly� It also includes a parts list� This manual is
intended for experienced maintenance personnel working on
gaming machines�
• Removal: Describes how to remove components from the
cabinet� Note that you may need special tools depending
on the type of component removed�
• Disassembly: Describes how to disassemble the
components removed from the cabinet into parts on which
maintenance can be performed�
• Assembly: Describes how to assemble the parts� Use
caution when reconnecting harnesses to ensure proper
operation� Incorrect assembly may cause malfunctions
or failures�
• Installation: Describes how to install the components
in the cabinet�
required toolS
• Phillips Screwdriver (No� 1 and No� 2)
• Small Phillips Screwdrivers (No� 0 and No� 1)
• 4 to 13 mm Nut Driver or Ratchet Wrench
• 4 to 13 mm Wrench Set
• 22 to 24 mm Double-end Wrench
• Hand Riveter
• Needle Nose Pliers
• Pliers
• Voltage and Amperage Tester
• Crimping Tool for Connectors
• Plastic Ties
• Wire Stripper
• Pin Extractor
• IC Extractor
• Wire Cutters
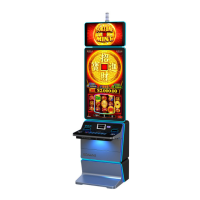
FunCtional overvieW
The following illustrations identify major components of the
machine�
SECTION 3
Parts, Assemblies & Hardware