SECTION 3 - PARTS, ASSEMBLIES & HARDWARE
1-3-7
3-7 © 2018 Konami Gaming Inc. P/N 810440
KX43
(Original Instructions)
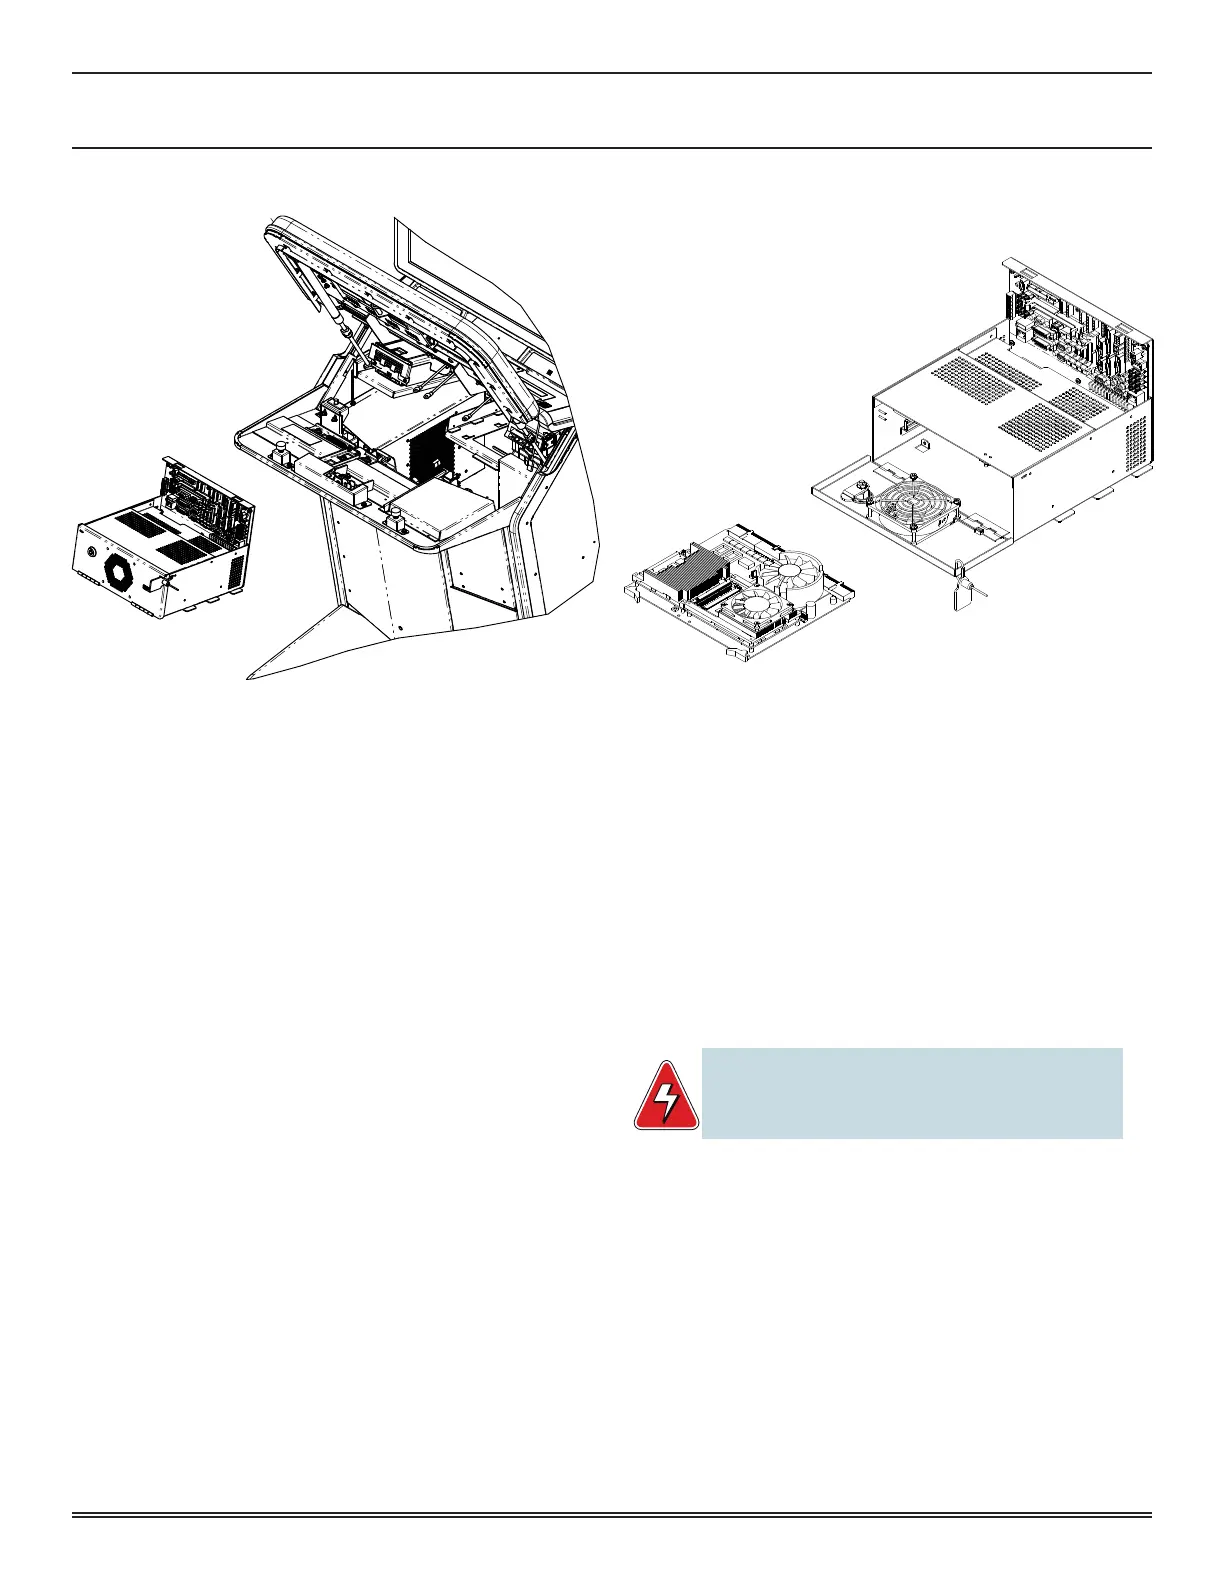
LOGIC UNIT
reMoval
1� Unlock and open the Main Deck Door�
2� Turn off machine power�
3� Unlock and open the Logic Unit Door�
4� Note locations of wires and unplug all connectors from
the Logic Unit�
5� Remove the two 8-32 nuts using a long nut driver�
6� Remove the Logic Unit by sliding it forward until it clears
the mounting rails�
inStallation
1� Slide the Logic Unit into the mounting rails and secure
with the two 8-32 nuts using a long nut driver�
2� Connect all wires�
3� Close and lock the Logic Unit Door�
4� Turn on machine power�
5� Close and lock the Main Deck Door�
MAIN PROCESSING UNIT
reMoval
1� Place the Logic Unit on a clean, stable surface�
2� Gently pull the PCB Latches toward you and pull the Main
Processing Unit (MPU) Board forward�
inStallation
1� Align the MPU Board onto the Guides�
2� Slide back until the connectors are rmly seated.
3� Snap the PCB Latches forward until they contact the edge
of the MPU Board�
CAUTION: PCBs are electrostatic sensitive!
Discharge body static prior to handling any PCB to prevent
damage or destruction of static sensitive components.