Introduction–Driver installation and settings
8
7
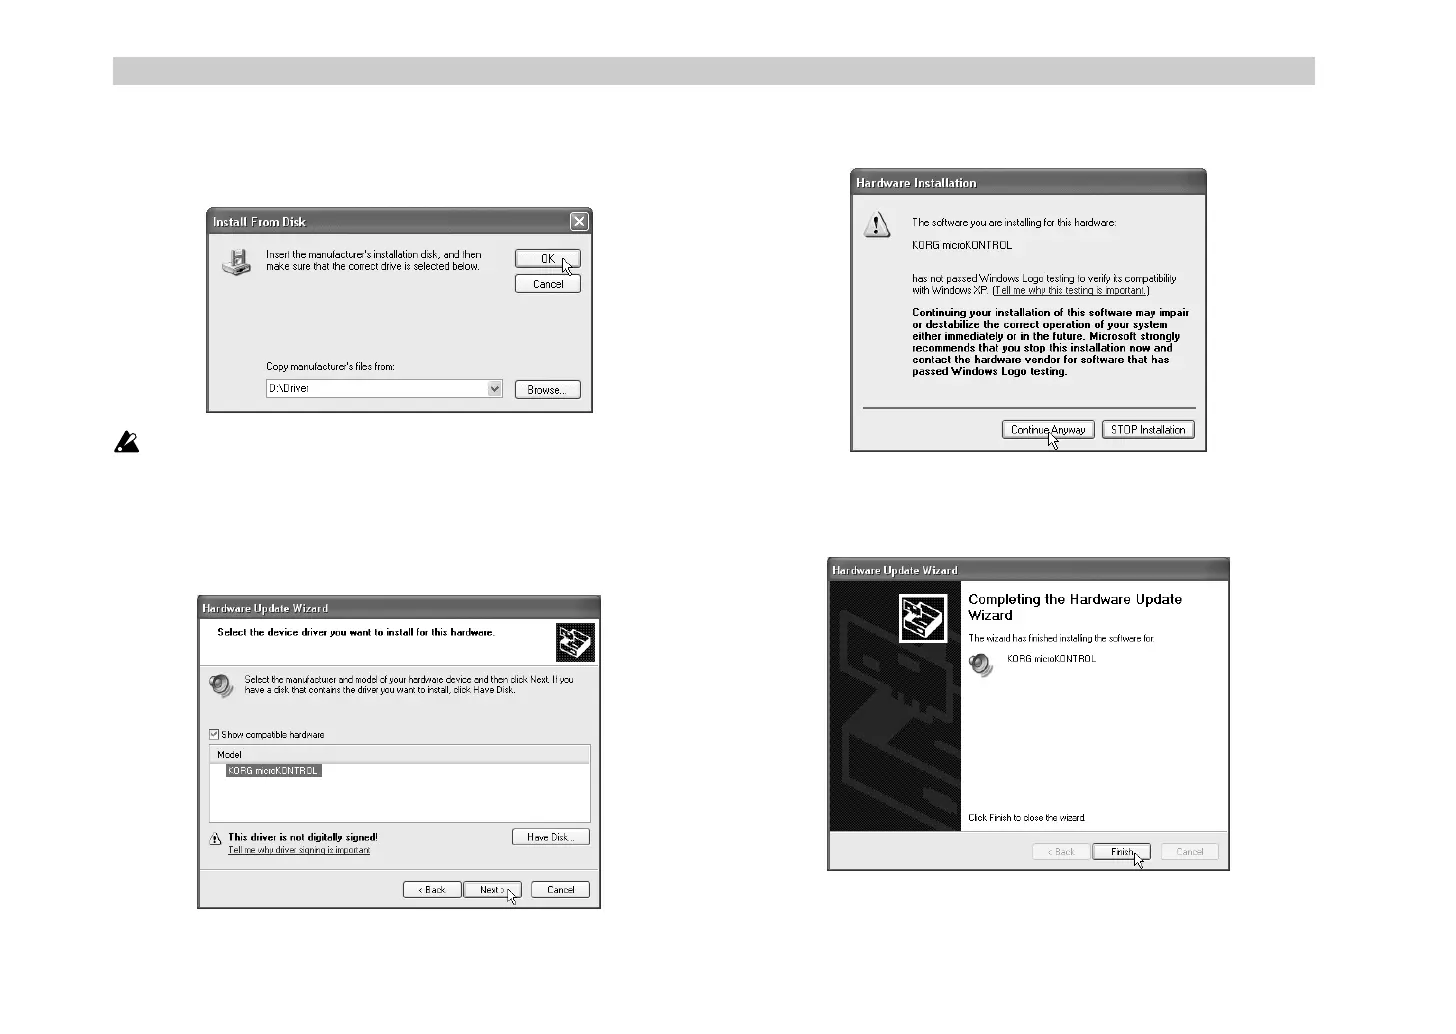
You will be asked for the name of the folder. Insert the CD-ROM
included with the microKONTROL into your CD-ROM drive. Then
type the name of the folder “D:\Driver” that contains the KORG USB-
MIDI driver, and click the
[OK] button
.
The above example is for when your CD-ROM drive is drive “D”. You
will need to change this as appropriate for your computer system; for
example, if your CD-ROM drive is drive “E”, then replace “D:” with
“E:” in the folder name you type.
8
Make sure that
KORG microKONTROL
is displayed as the Model,
and click
[Next>]
to begin installing the driver.
9
If a dialog box appears, warning you that the driver is not digitally
signed, click
[Continue Anyway]
.
10
When the dialog box indicating that installation is completed appears,
click
[Finish]
. If a dialog box recommends that you restart Windows,
click
[Yes]
to restart.
+ !"