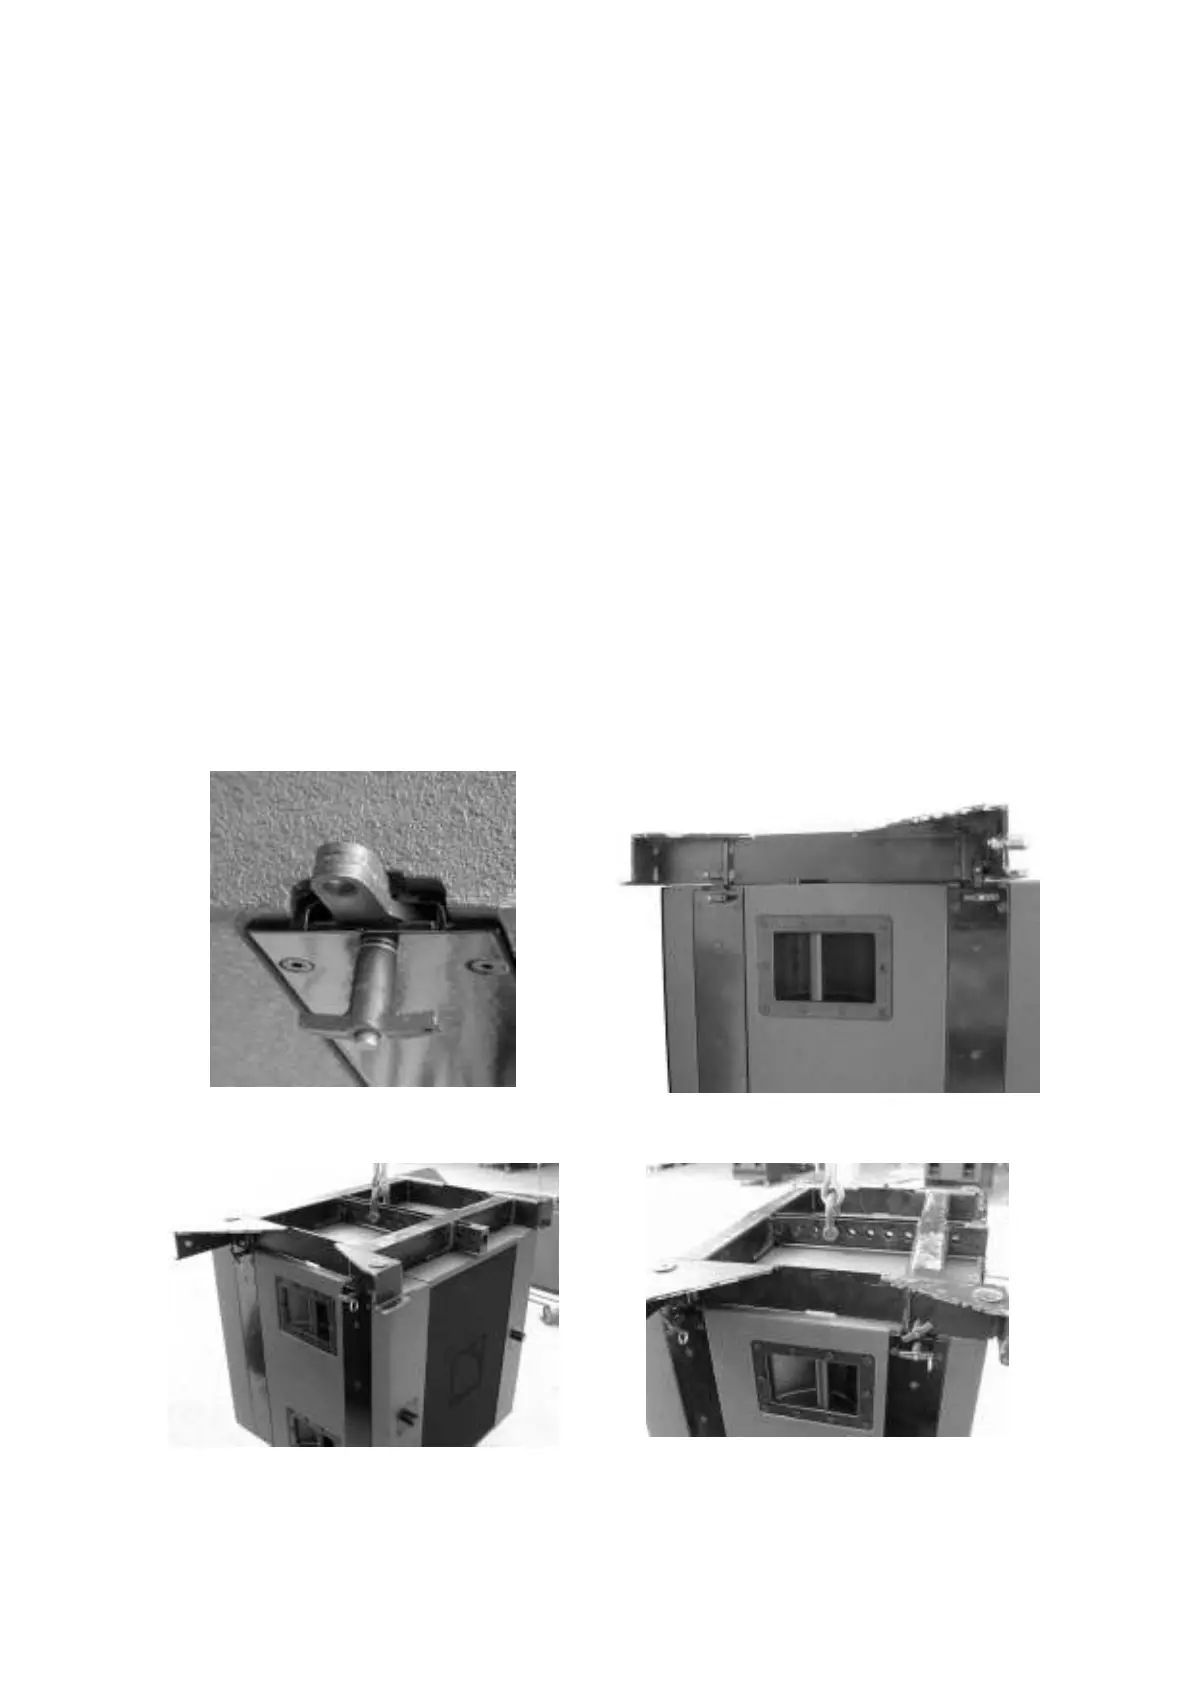
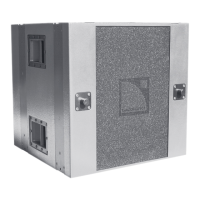
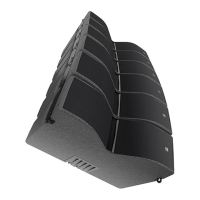
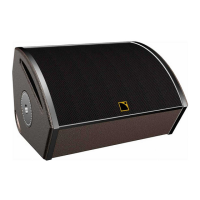
Rigging dV-SUB Standalone
When rigging dV-SUB standalone, up to 6 enclosures deep can be flown from dV-BUMP or dV-
BUMP2 (single or two point hang). Please refer to the photo sequence below in addition to the
following description of dV-SUB rigging procedures.
To fly the system, the first dV-SUB enclosure is located at the rigging location and flipped onto it's
stacking runners in the normal orientation. Four dV-ANGLESD are pre-attached to the dV-SUB using
4 x dV-PIN25, in preparation for attaching dV-BUMP. The ''fat'' part of the dV-ANGLESD is oriented
towards the center of dV-SUB on both sides.
Note: Since there are no stacking runners on the top of dV-SUB, it is possible to select the stacked
hole position on the dV-SUB end of dV-ANGLESD.
The next step is to place dV-BUMP or dV-BUMP2 into position and secure using 4 x dV-PIN25.
Attach the motor to dV-BUMP using an 18 mm shackle.
Note: Hole number 5 (from the front) on the central spreader bar will produce a ''dead hung'' array (i.e.,
approximately zero degree tilt angle). Hole numbers 6, 7 or 8 can be used for downwards tilt.
Raise the first dV-SUB enclosure off the ground with sufficient clearance to position the next dV-SUB
enclosure underneath.
Pre-attach 4 x dV-ANGLESS to the second dV-SUB enclosure using 4 x dV-PIN25.
Slowly lower the first dV-SUB into position by mating the pre-attached dV-ANGLESS to the
corresponding rigging slots on the first enclosure. Secure the two dV-SUBs using 4 x dV-PIN25.
Repeat this procedure as the dV-SUB array is progressively flown.
(i) dV-ANGLESD pre-attached - note that the stacked hole
position has been selected and the ''fat'' part of the angle bar
is oriented towards the center
(ii) dV-BUMP placed into position and secured using 4 x dV-
ANGLESD and 8 x dV-PIN25
(iii) Fly the first enclosure, pre-attach 4 x dV-ANGLESS, land
on the second enclosure, secure using dV-PIN25 then repeat
this procedure
(iv) Pick point hole #5 (from the front) on the central
spreader bar section of dV-BUMP produces a dead hang
(approx zero degree tilt)