0022442_001
3
4
5
360°
Ø 2.5 mm / 1.5 m
3 mm/1.5 m
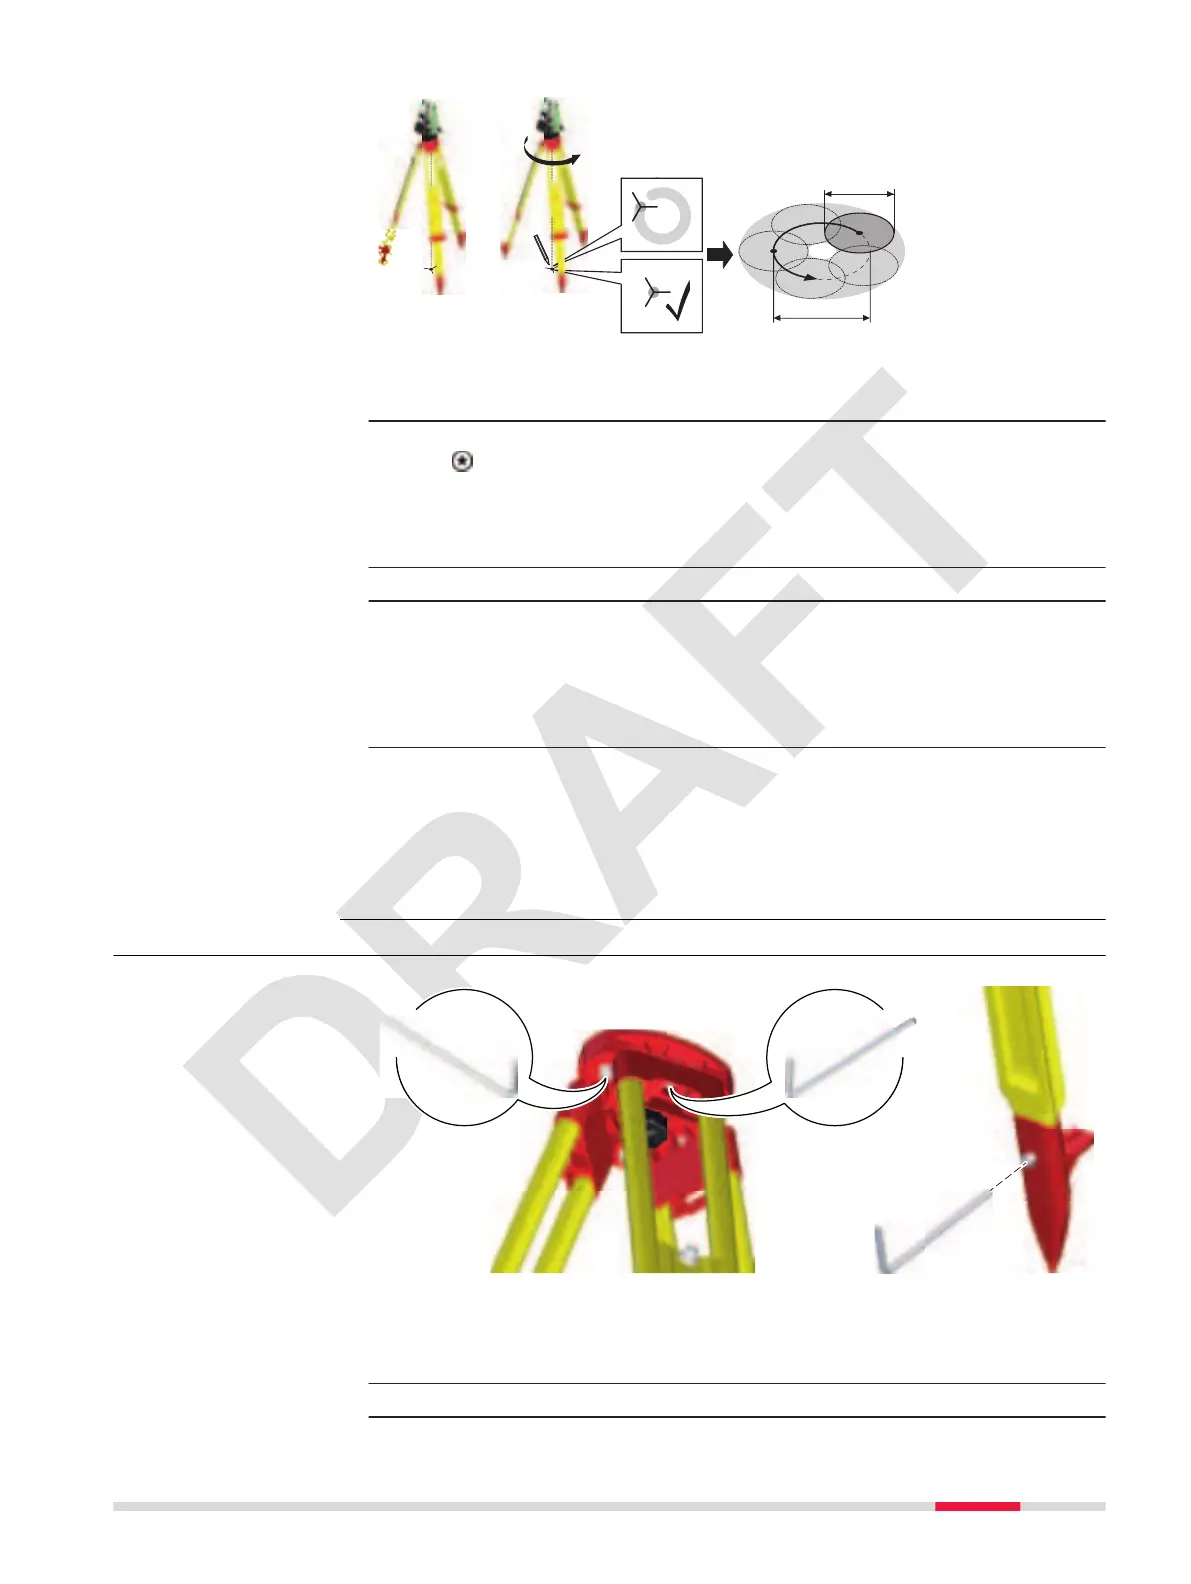
1
1. Set up the instrument on the tripod approximately 1.5 m above the
ground and level up.
2. To activate the laser plummet, turn on the instrument, and press the
key from within any app and access the level panel.
☞
Inspection of the laser plummet should be carried out on
a bright, smooth and horizontal surface, such as a sheet
of paper.
3. Mark the centre of the red laser dot on the ground.
4. Turn the instrument slowly through 360°, carefully observing the
movement of the red laser dot.
☞
The maximum diameter of the circular movement
described by the centre of the laser dot should not
exceed 3 mm at a height of 1.5 m.
5. If the centre of the laser dot describes a perceptible circular move-
ment or moves more than 3 mm away from the point which was rst
marked, an adjustment may be required. Inform your nearest Leica
Geosystems authorised service centre. Depending on brightness and
surface, the diameter of the laser dot can vary. At 1.5 m, it is about
2.5 mm.
11.1.7 Servicing the Tripod
The following table explains the most common settings.
☞
The connections between metal and timber components must
always be rm and tight.
1. Tighten the leg cap screws moderately, with the supplied Allen key.
Inspect the laser
plummet step-by-step
Servicing the tripod
step-by-step
Tools 89
 Loading...