Step 2. Locate the drive you want to remove.
Step 3. Remove the hot-swap drive.
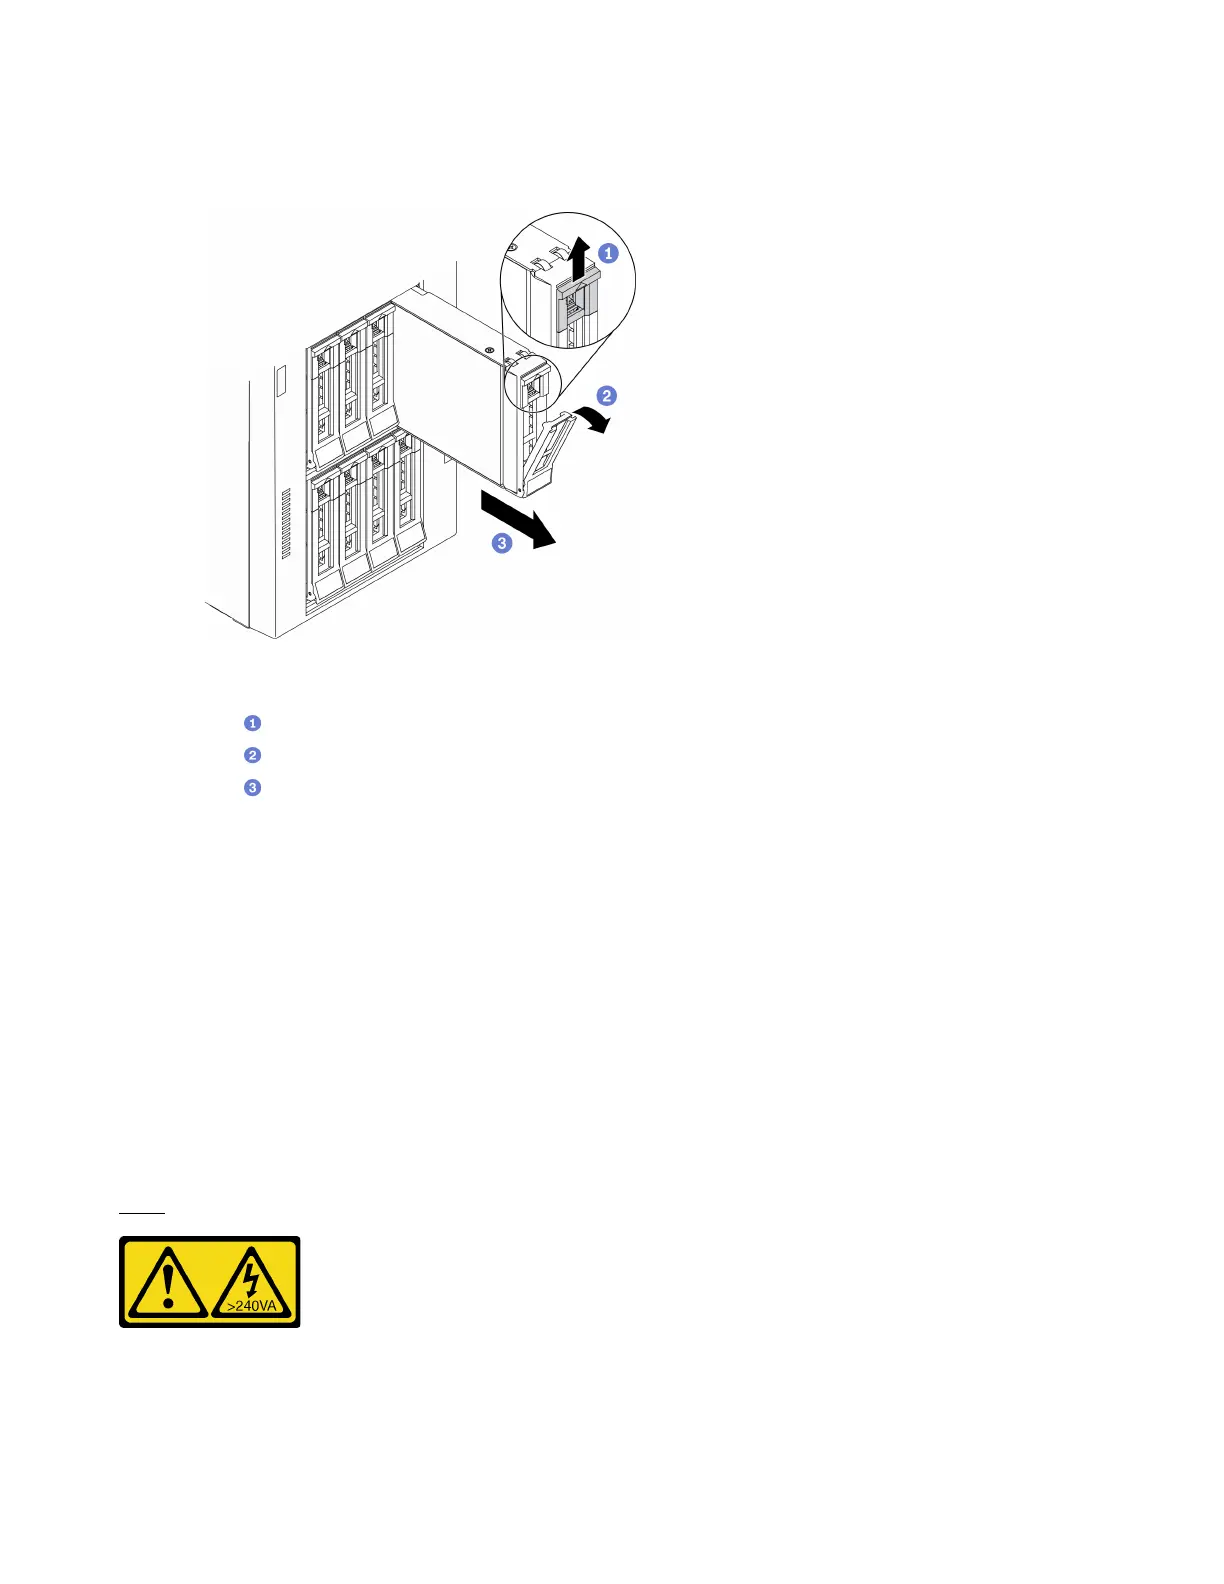
Figure 51. Opening the tray handle
a.
Slide the release latch to open the tray handle.
b.
The tray handle opens automatically.
c.
Pull the tray handle and carefully slide the drive out of the drive bay.
After you finish
1. Install a new drive or install the drive filler to cover the drive bay. See “Install a hot-swap drive” on page
84.
Attention: To ensure that there is adequate system cooling, do not operate the server for more than two
minutes without either a drive or a drive filler installed in each bay.
2. If you are instructed to return the component or optional device, follow all packaging instructions, and
use any packaging materials for shipping that are supplied to you.
Install a hot-swap drive
Use this information to install a hot-swap drive.
About this task
S033
CAUTION:
Hazardous energy present. Voltages with hazardous energy might cause heating when shorted with
metal, which might result in spattered metal, burns, or both.
84
ThinkSystem ST650 V2 Maintenance Manual

 Loading...


