Repair information 4-33
5025-2xx, 4xx
7. Remove the exit deflector and bin-full/narrow media sensor flag. See “Exit deflector and bin-full/narrow
media sensor flag removal” on page 4-30.
8. Remove the bin-full/narrow media sensor. See “Bin-full/narrow media sensor removal” on page 4-18.
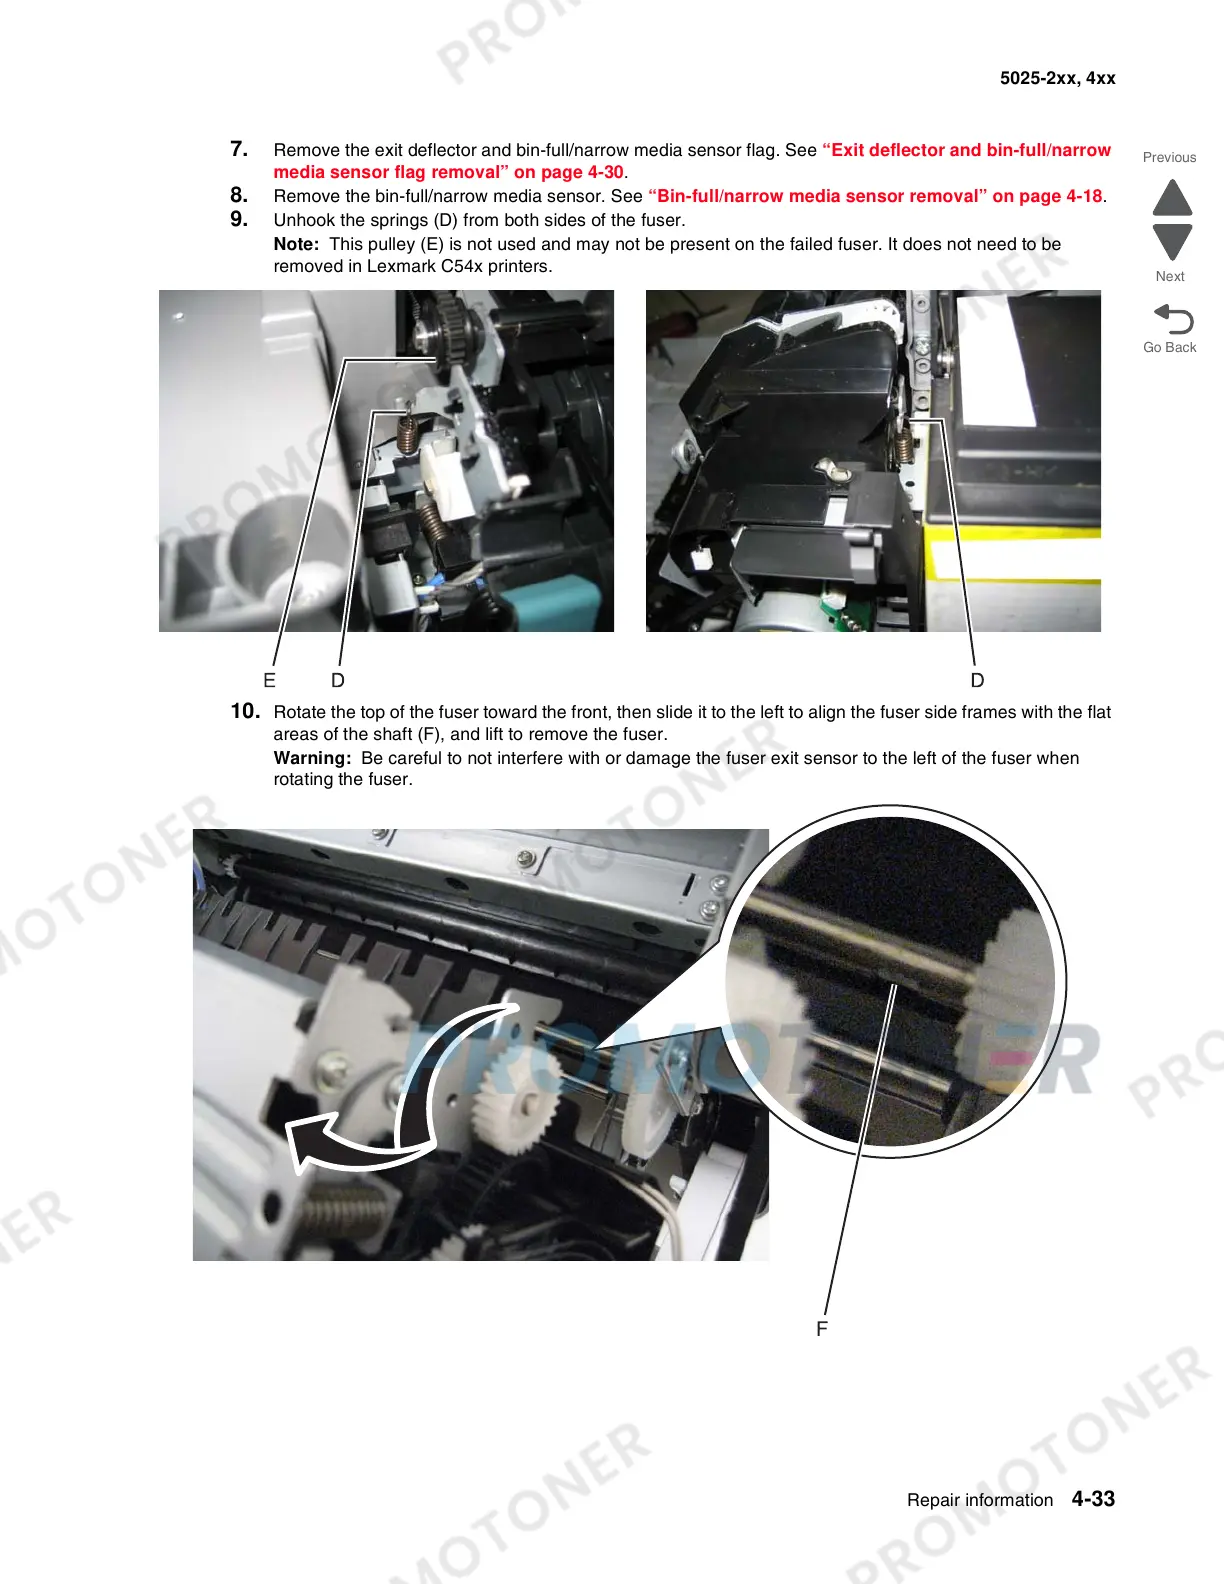
9. Unhook the springs (D) from both sides of the fuser.
Note: This pulley (E) is not used and may not be present on the failed fuser. It does not need to be
removed in Lexmark C54x printers.
10. Rotate the top of the fuser toward the front, then slide it to the left to align the fuser side frames with the flat
areas of the shaft (F), and lift to remove the fuser.
Warning: Be careful to not interfere with or damage the fuser exit sensor to the left of the fuser when
rotating the fuser.