Repair information 4-77
5025-2xx, 4xx
Tray present sensor removal
See “photo sensors” on page 7-7 for the part number.
1. Remove the media tray.
2. Remove the imaging unit. See “Imaging unit (IU) removal” on page 4-49.
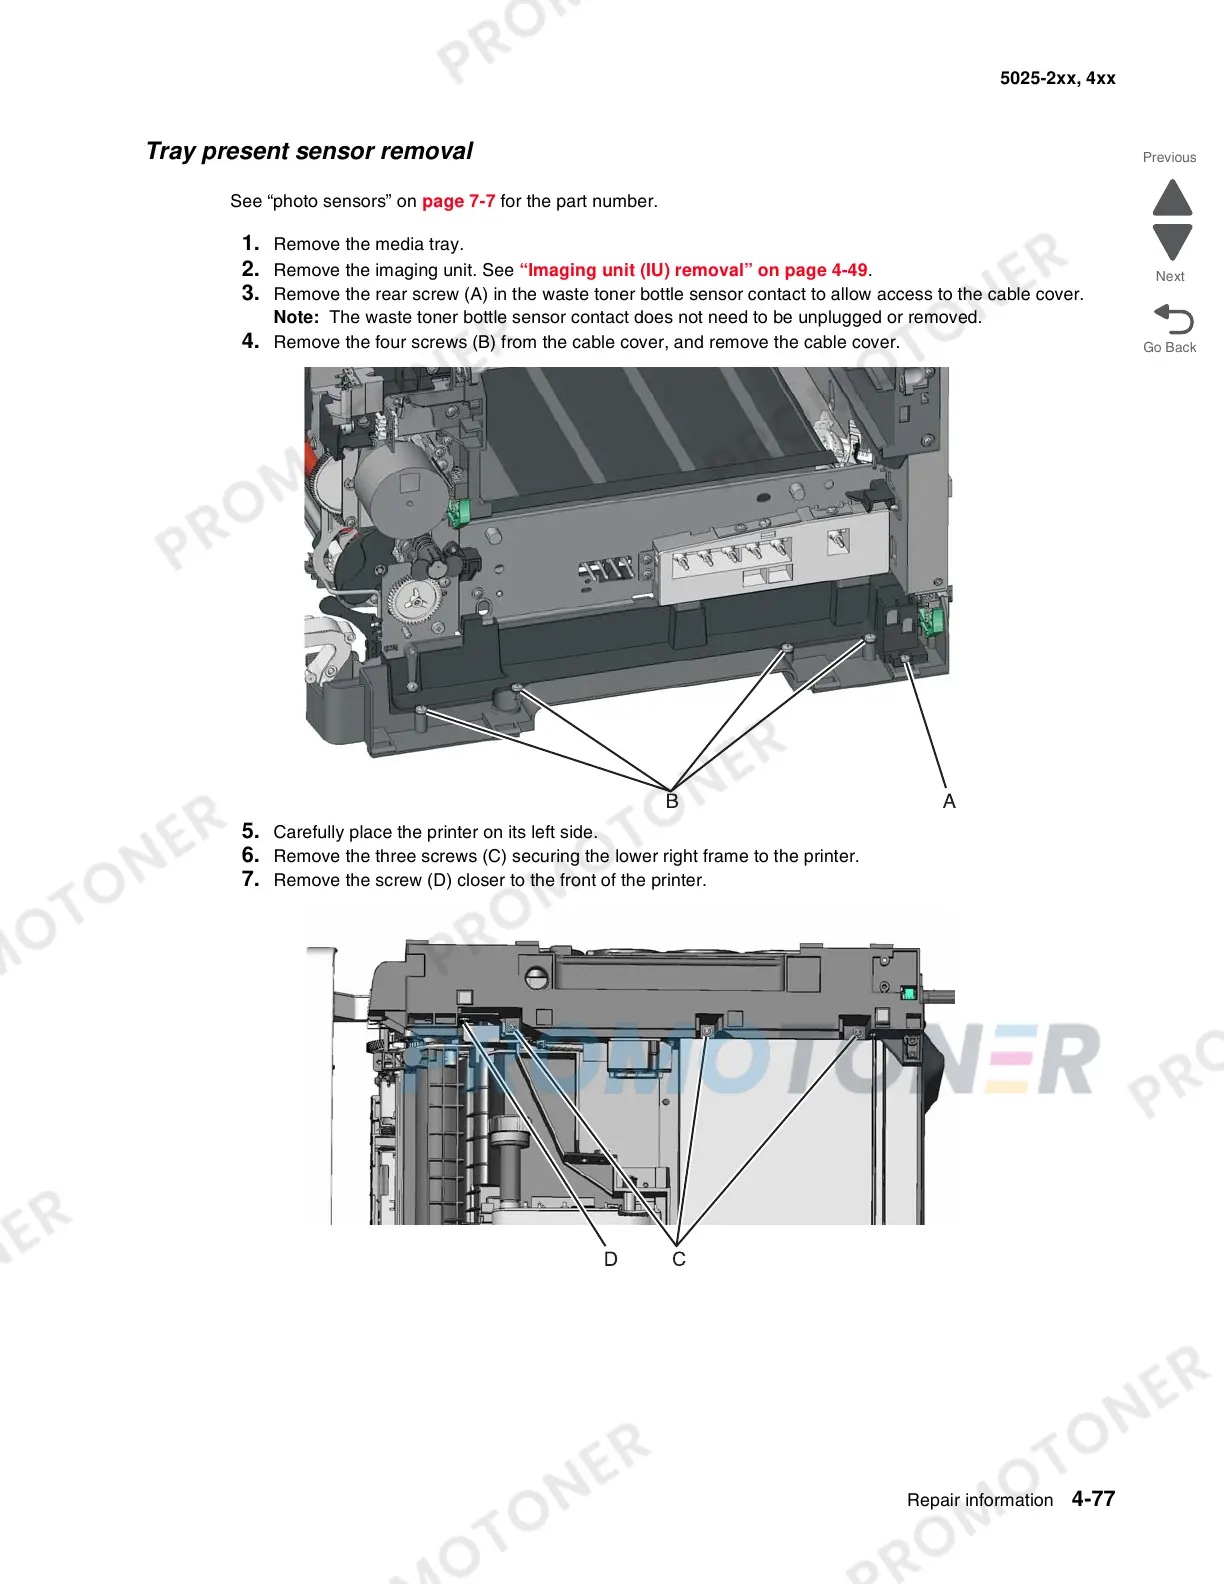
3. Remove the rear screw (A) in the waste toner bottle sensor contact to allow access to the cable cover.
Note: The waste toner bottle sensor contact does not need to be unplugged or removed.
4. Remove the four screws (B) from the cable cover, and remove the cable cover.
5. Carefully place the printer on its left side.
6. Remove the three screws (C) securing the lower right frame to the printer.
7. Remove the screw (D) closer to the front of the printer.