4-80 Service Manual
5025-2xx, 4xx
USB port connector removal
See “USB port and cable (for portable flash drive)” on page 7-9 for the part number.
The FRU includes the USB port connector and cable.
1. Remove the operator panel. See “Operator panel logo plate” on page 4-9.
2. Remove the right cover assembly. See “Right cover assembly removal” on page 4-12.
3. Remove the waste toner bottle. See “Waste toner bottle removal” on page 4-81.
4. Remove the rear shield. See “Top cover assembly removal” on page 4-13.
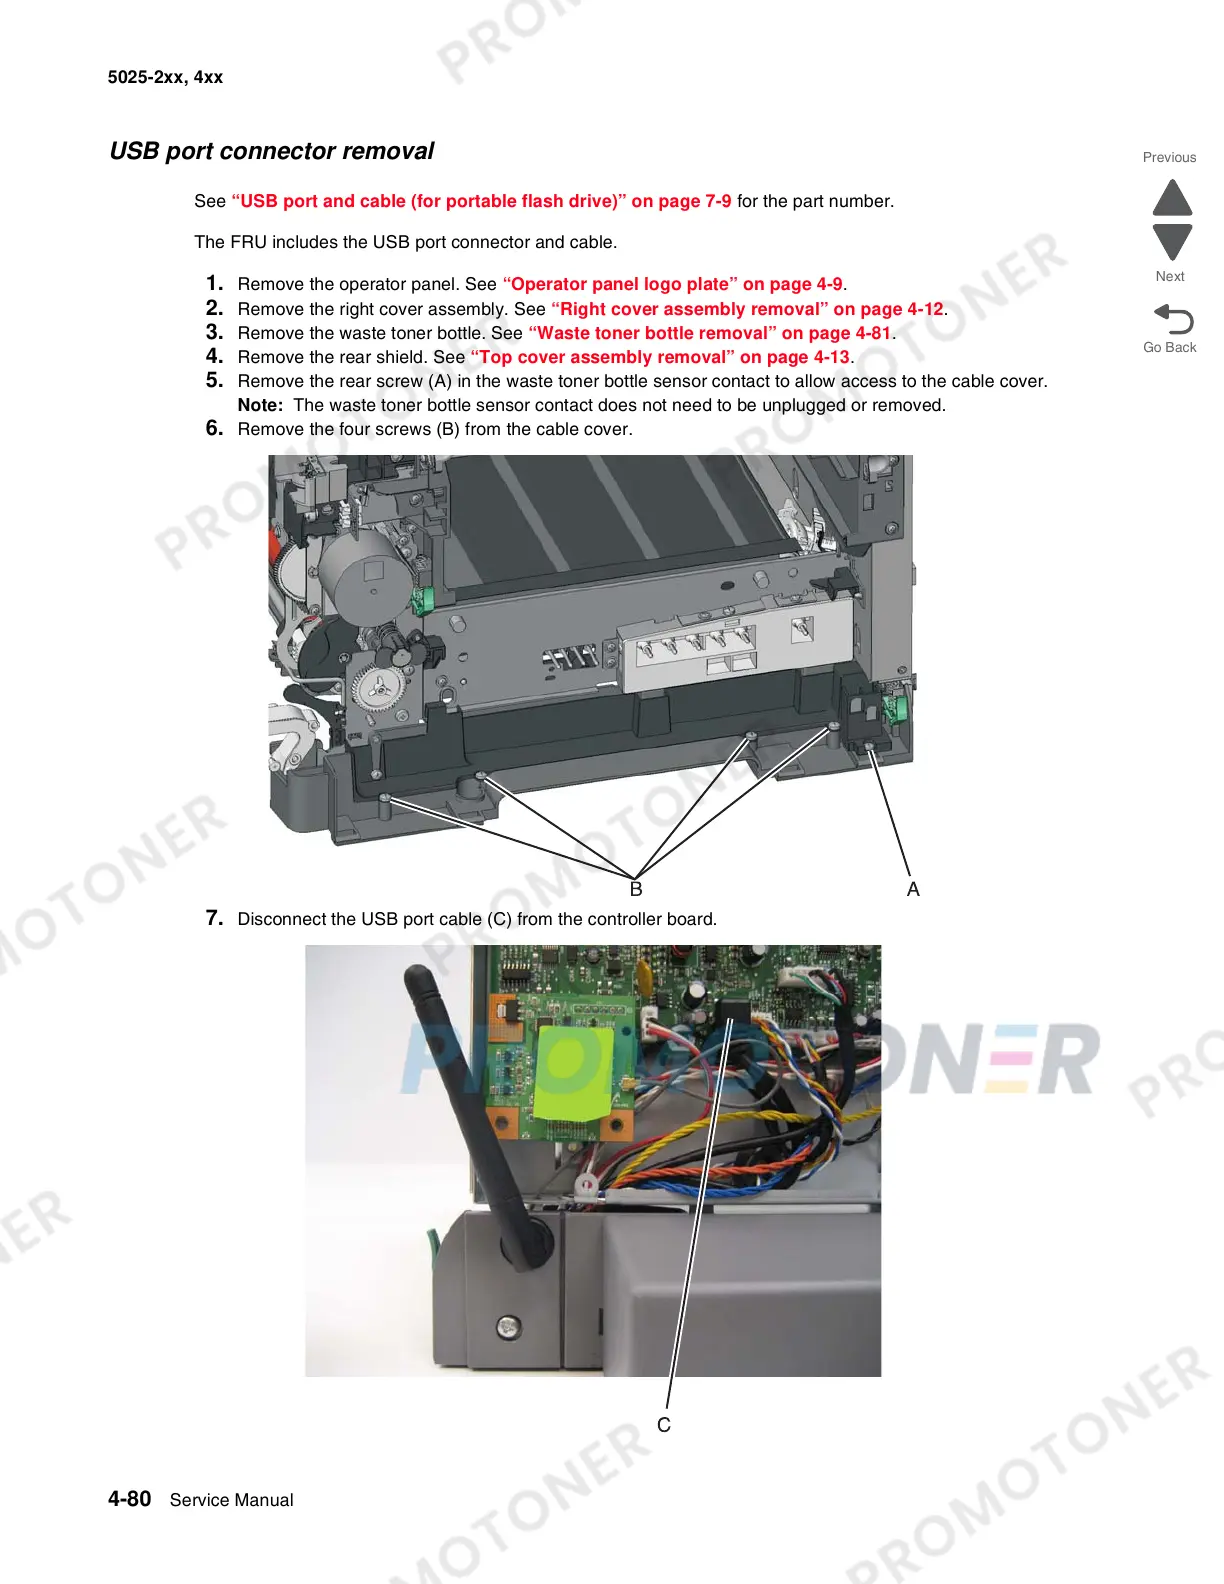
5. Remove the rear screw (A) in the waste toner bottle sensor contact to allow access to the cable cover.
Note: The waste toner bottle sensor contact does not need to be unplugged or removed.
6. Remove the four screws (B) from the cable cover.
7. Disconnect the USB port cable (C) from the controller board.